32
C
onnecting
to a Computer
You can connect your RISO Printer to a computer in two ways, i.e. with direct cable
connection (Local connection mode) and over the public telecommunication lines
(Remote transmission mode).
For direct cable connection, the standard parallel port (IEEE 1284A) is provided on
your RISO Printer.
For data transmission over the public telecommunication lines, on the other hand, the
standard serial port (DB-9) is mounted there.
NOTE
An extra network port can be added to enable the connection of standard
Ethernet cables (10Base-T and 100Base-TX) by building the optional network
interface card into your RISO Printer.
☞
p.198
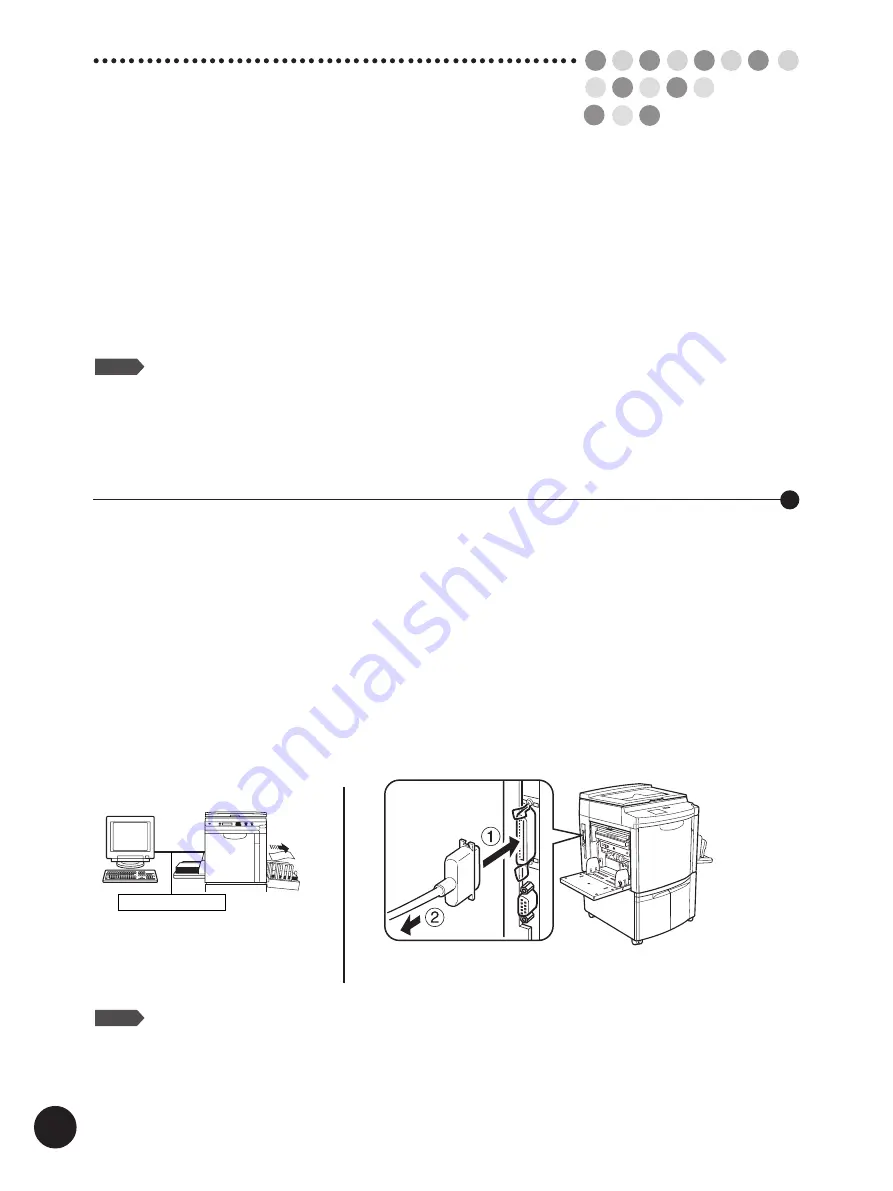
To print out the document file created on your Windows PC which is placed beside
your RISO Printer, connect the standard parallel printer cable, IEEE 1284-compliant
one, between the printer port of your computer and the parallel port of your RISO
Printer.
With this connection, you will be able to send the document data created on your
Windows PC directly to your RISO Printer.
In this case, you are required to select "Local connection" as communication mode.
Important!
• Always use a commercially available IEEE 1284-compliant printer cable.
• Be sure to turn off the personal computer and the RISO Printer when connecting
the cable.
• The allowable maximum input / output voltage of the parallel port is 5 V.
NOTE
If you want to connect your RISO Printer to a Macintosh or use your RISO
Printer in the LAN (Local area network) environment, you are required to
install the optional network interface card into the RISO Printer and add the
Ethernet network port (RJ45) to allow the connection of the 10Base-T or
100Base-TX Ethernet cable.
Local printer cable
q
To the parallel port of your RISO Printer
w
To the printer port of your Windows PC
Using the Standard Printer Cable
Содержание RP3100AW
Страница 6: ...6 ...
Страница 16: ...16 ...
Страница 54: ...54 ...
Страница 78: ...78 ...
Страница 162: ...162 ...
Страница 174: ...174 ...
Страница 207: ......
Страница 208: ......


