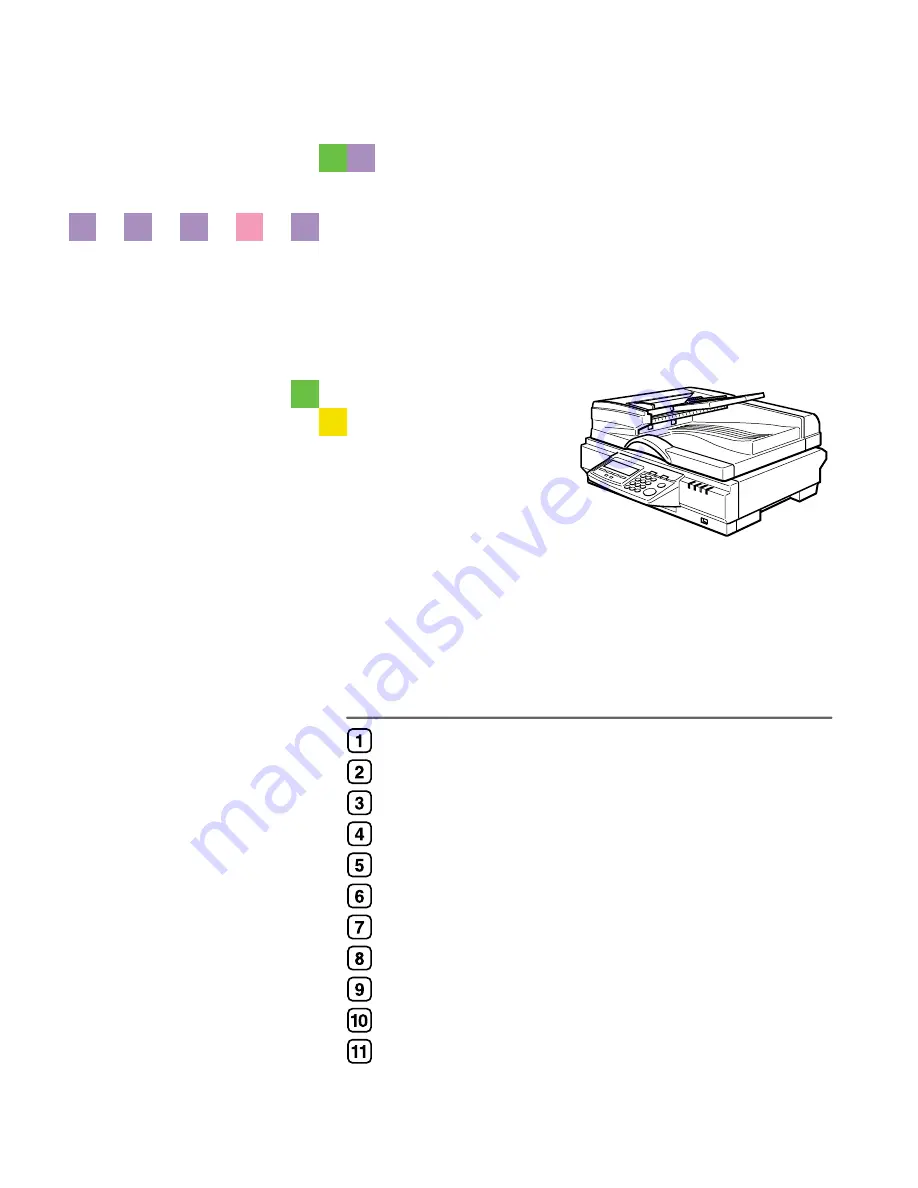
background image

Image Scanner

Operating Instructions

Read this manual carefully before you use this product and keep it handy for future reference. For safe and correct use, please be sure to read
the Safety Information in this manual before using the machine.

What You Can Do With This Machine

Setting Up the Scanner

Configuring the Scanner Settings

Setting Originals 

Using the Network TWAIN Scanner Function

Sending Scan File by E-mail

Sending Scan File by Scan to Folder

Sending Scan File by Scan to FTP

Sending Scan Files Using Delivery Server

Printing Scanned Image Files

Appendix 

Содержание 402252 - IS 300e

Страница 1: ...Safety Information in this manual before using the machine What You Can Do With This Machine Setting Up the Scanner Configuring the Scanner Settings Setting Originals Using the Network TWAIN Scanner F...

Страница 2: ...e employed in this manual With this machine refer to the metric version Important Contents of this manual are subject to change without prior notice In no event will the company be li able for direct...

Страница 3: ...on Settings and Standby Screens 17 Function Priority 18 Select Method 19 Standby screens 19 Scanner Features Menu 21 2 Setting Up the Scanner Checking the Scanner Location 23 Attaching the Control Pan...

Страница 4: ...nfiguring Scan Settings 87 Configuring E mail Address 88 Information to Register as Destination and Printer 91 Information to register in E mail Address 91 Information to register in File Send Path 92...

Страница 5: ...t 124 Sender 124 Subject 124 File name and file type of an e mail attachment 124 Related information 124 Before Sending Scan Data 126 Original Location 126 Original Orientation and Scanning Sides 126...

Страница 6: ...ut Print Scan Standby Screen 160 Printing Scan Data 162 Specifying the Number of Copies 163 Configuring Print Settings 163 Confirming the Print Settings 165 Selecting a Printer 166 Selecting Colour Bl...

Страница 7: ...n Binary or Halftone is selected 195 When Gray scale is selected 196 When 8 colors or 8 colors halftone is selected 197 When 256 colors is selected 198 When 16770K colors is selected 199 When Using th...

Страница 8: ...vi...

Страница 9: ...osoft Windows 98 The product name of Windows Me is Microsoft Windows Millennium Edition Windows Me The product names of Windows 2000 are as follows Microsoft Windows 2000 Professional Microsoft Window...

Страница 10: ...or repair Your equipment s cover has been damaged Disposal can take place at our authorized dealer or at appropriate collection sites Protect the equipment from dampness or wet weather such as rain s...

Страница 11: ...of the lithium batteries by incineration This can cause them to rupture result ing in injury Note Please return used NIC boards to our authorized dealer or service representative Your cooperation with...

Страница 12: ...nd efficient operation of this scanner all users should read and follow the instructions carefully Quick Installation Guide Describes how to install the scanner Operating Instructions this manual Prov...

Страница 13: ...to read the instructions all of which are described in the Safety Information section The statements above are notes for your safety Important If this instruction is not followed paper might be misfe...

Страница 14: ...6...

Страница 15: ...rouble of allocat ing a special computer for scanning or connecting a scanner to a computer each time you need 1 This machine Connect this machine to a network TCP IP using a 100BASE TX or 10BASE T ca...

Страница 16: ...ever it is not essen tial to have an e mail server inside the LAN where this machine belongs 3 E mail client software Use e mail client software such as Mi crosoft Outlook to receive e mail mes sages...

Страница 17: ...connect using an optional wireless LAN card 2 Computer with a shared folder To use this function it is necessary to cre ate a shared folder in advance You can specify a shared folder to save scan fil...

Страница 18: ...however that it is essen tial to have the FTP server inside the LAN WAN where this machine belongs It is not possible to access an FTP server via a proxy server 3 Client computer You can browse scann...

Страница 19: ...ble 3 Network printers Printers connected to a network TCP IP using a 100BASE TX or 10BASE T cable It is necessary to assign a fixed IP address to each of the network printers Process Flow A A A A Per...

Страница 20: ...resses shared folders groups etc and document data files sorted by each of the destinations 3 Client computer You can browse document data files on a delivery server from a client computer by using De...

Страница 21: ...key Press this key to configure various set tings such as send scan print scan net work etc 8 Clear Modes key Press this key to return to the initial screen that is displayed when you turn the power...

Страница 22: ...canning 4 Lock switch Set this switch to the Lock position when you transport this machine 5 Power connector For connection of the bundled AC power cord 6 Network interface connector For connection of...

Страница 23: ...ion keys located under the display panel to operate keys that appear on the display panel Example To execute a key operation on the display panel press the relevant function key Press A to select Scan...

Страница 24: ...rror See p 169 Error Indicators to eliminate the error On b Blinking Off Description For a short while after turning the power on Power is on No original is set to the original table No scanning opera...

Страница 25: ...to FTP Delivery Server See p 12 Delivery Server Print Scan See p 11 Scan to Print To select the functions you use you must configure the following settings in ad vance With the options in 7 Select Met...

Страница 26: ...elect this option if you hardly ever use Print Scan With this op tion one of the following screens is displayed as the initial screen de pending on the setting in 7 Select Method Delivery Server stand...

Страница 27: ...l Send File SMB and Send File FTP are not availa ble The following table shows which standby screen will be displayed as the Send Scan initial screen in accordance with the settings in 1 Select Method...

Страница 28: ...uter and configure various settings using the control panel of this machine or a Web browser on a client computer You cannot deliver scan data by using Delivery Server If you want to print scan data p...

Страница 29: ...u cannot use the fol lowing functions Print Scan De livery Server e mail Send File SMB Send File FTP sending any file by using a Web browser on a client computer Print Scan standby screen While this s...

Страница 30: ...What You Can Do With This Machine 22 1...

Страница 31: ...n measuring difference of heights between an end and the other end of this machine compared to a lev el surface Installation space Make sure that the scanner is in a location where there is enough spa...

Страница 32: ...ra dio or television set In a location subject to ex treme temperatures or hu midity Near a humidifier Set up the scanner in a location where the temperature and hu midity will fall within the ranges...

Страница 33: ...wrong direction the socket has a number of tiny prongs inside of it When you insert the plug into the socket make sure that the socket is fac ing in the correct direction In serting in the wrong direc...

Страница 34: ...f this ma chine B B B B Insert the USB interface card that comes with this machine to the PC Card slot on the rear panel of this machine Note Make sure that the card is se curely inserted until you fe...

Страница 35: ...ugh a slit and the other USB cable through the other slit This step is not necessary when you use an optional wireless LAN card instead of the USB interface card B Align the two prongs of the card slo...

Страница 36: ...the four screws at the bottom of the rear panel of this machine C C C C Pull out the scanner control unit Important The scanner control unit is very heavy Be careful not to drop it when removing D D...

Страница 37: ...the rear panel of this machine Note Only a single side of the wire less LAN card has three hori zontal lines which is located on the black end of the card When you insert the card make sure that the s...

Страница 38: ...e cable and then attach the ferrite core that comes with this machine as illustrated below Note Skip this step when you use this machine in North America B B B B Insert the network cable s end that ha...

Страница 39: ...sure to use the power cord that comes with this machine D D D D Insert the power plug into the power outlet Do not use with a power source with a voltage different from the specified volt age Do not u...

Страница 40: ...ower while the Scanner Features menu is displayed all the settings that you have config ured could be discarded and this ma chine could return to its factory default status You should also confirm tha...

Страница 41: ...lined steps are essential 1 If you use this machine as a network TWAIN scanner you need a TWAIN compliant application on the client computer you use DeskTopBinder V2 Lite that comes with this machine...

Страница 42: ...about settings this manual does not cover see the Web Status Monitor Help For information about how to view the Web Status Monitor see p 84 Accessing the Scanner Configure 1 System Settings on this ma...

Страница 43: ...to Folder 35 3 Outline to Use Scan to Folder The following overview diagram shows the preparation steps for sending scan files to shared folders of Windows using SMB protocol Note that the underlined...

Страница 44: ...older SMB operation from this machine When you perform Enter Custom Send File operation using the Web Status Monitor it is not necessary to register File Send Path in advance Create a shared folder on...

Страница 45: ...ine For details about settings this manual does not cover see the Web Status Monitor Help For information about how to view the Web Status Monitor See p 84 Accessing the Scanner Configure 1 System Set...

Страница 46: ...o Use the Network Delivery The following overview diagram shows the preparation steps to use this ma chine as a network delivery scanner which function is enabled using ScanRout er V2 Professional Lit...

Страница 47: ...ite on a computer used as a network delivery server and make necessary settings See the manuals for ScanRouter V2 Professional Lite or ScanRouter V2 Professional Lite Help Install DeskTopBinder V2 Lit...

Страница 48: ...tor Help For information about how to view the Web Status Monitor see p 84 Accessing the Scanner 1 This step is essential only when you use a network printer This step is not essential when you use a...

Страница 49: ...ure these settings as necessary No mark in a column means that the setup item to the left has no direct re lation to the function Under Method in the table on the next page there is a column for each...

Страница 50: ...url cgi b Help URL cgi bin help cgi b Sys tem Set tings or TCP IP 2 Function Pri ority Select co lon Send Print b b b b b b b LAN Type Ethernet b b b b b b b b IP Address 11 22 33 44 3 3 3 3 3 4 3 b b...

Страница 51: ...al Display only SNMP 13 Community Name public 14 b b b admin 15 null 16 Access Type read only 14 b b b read write 15 Not Acces sible 16 Protocol TCP IP b b b Manager IP Address 0 0 0 0 Pass word Curre...

Страница 52: ...i ty 4 b b b Original Size Auto De tect b b b Duplex 1 Sided Orig 1 Sided Print b b b Reduce En large Zoom 100 b b b Create Mar gin Off b b Quali ty Speed Speed b b Scan ner Function Pri ority Web Sta...

Страница 53: ...n Option Clear Set tings after Each Scan Job b b b b b b Border Erase 0mm b b b b b b Language Select English b b b b b b b b ADF Thin Paper Off b b b b b b Job Delivery Data Max Setting On 1MB b 7 Wa...

Страница 54: ...e Send Settings File Send Interval Time for Re sending Off b b b No of Times to Resend Off b b b Job Delivery Data Max Setting Off b b b File Name Time On b b b Create De vice Name Folder On b b b Fil...

Страница 55: ...ed b b FTP Server Name null b b Key Display null b b Assign Title Alphabet ABC b b Assign Title Custom Title 1 b b Assign Title Frequently Used Title s On b b Server Name Path Name null b Login User N...

Страница 56: ...entica tion Pass word null b Sender s Name De fault Adminis trator s Ad dress b b Administra tor s Name null b b Administra tor s E mail Address null b b Interval Time for Re sending E mails 30 b b No...

Страница 57: ...null b b Delivery Settings De liv ery Delivery Server IP Ad dress 0 0 0 0 6 22 Interval Time for Re delivery Off b b No of Times to Redeliver Off b b Job Delivery Data Max Setting On 1 MB b b 23 b Pri...

Страница 58: ...Communication Mode is set to Infrastructure mode or 802 11 Ad hoc mode 11 A setting when Communication Mode is set to Ad hoc mode or 802 11 Ad hoc mode 12 An essential setting when WEP Setting is set...

Страница 59: ...Initial Scanner Setup 51 3 24 Available up to 99 registrations 25 Yes is automatically selected for the first printer that is registered No is selected for all other printers...

Страница 60: ...een that is displayed when you turn the power on Select colon Send Print When you select this option Select Method screen is initial ly displayed On this screen pressing the 1 key displays the Deliver...

Страница 61: ...an access mask entry determines the range of the IP addresses Access control is the value that becomes the reference for re stricting the client that uses this product as a network TWAIN scanner Acce...

Страница 62: ...the network you use this machine specify the IP address of the secondary DNS server in the form of xxx xxx xxx xxx xxx 0 through 255 Note This setting can only be config ured using the Web Status Mon...

Страница 63: ...Send Print Send Scan and Print Scan The option that is currently se lected is displayed first mark appears along with the option currently selected Use and to display the option you want to select E E...

Страница 64: ...you have speci fied and returns to the previ ous screen E Press Next 3 Subnet Mask appears as the setup item currently select ed F Specify each value for 3 Sub net Mask 4 Default Gate way Address 5 Ac...

Страница 65: ...ou want to set no lim itation of access to this ma chine it is not necessary to specify 5 Access Control while you need to confirm that 6 Access Mask is set to 000 000 000 000 C Press OK The setting s...

Страница 66: ...ireless LAN for de tails J J J J Press Next 12 Wireless LAN Signal ap pears as the setup item currently selected Note When an optional wireless LAN card is in use under infrastruc ture mode you can ch...

Страница 67: ...N scanner or perform a Custom File Send operation from a client computer when ever no operation is performed on this machine Note When you set 7 Select Method to TWAIN this setup item is dimmed and ca...

Страница 68: ...Black and White Photo is se lected Compression Gray Scale Full Col our This item determines whether to compress scan data created under the following conditions Scan is performed for sending the scan...

Страница 69: ...nd File TWAIN is selected under 7 Select Method Select whether to update the contents of the destination lists of e mail addresses file send paths and FTP servers auto matically with the latest data r...

Страница 70: ...Press Add to continue scan ning to add scanned data to the current image file Pressing New Job finishes the current scanning job and sends the scanned data You can start a new job with the current se...

Страница 71: ...data by the shadow of paper ends of the original This machine can erase the borderline using a white line which width you can specify using Erase Border You can select a line width from 1mm 0 04 to 5m...

Страница 72: ...ct Title This item lets you select the titles that are displayed when you press the Title key You can select between Alphabet and Custom Title Note This setting can only be config ured using the Web S...

Страница 73: ...ct the option you want for 2 TWAIN Standby Time If you select On specify the time after which this machine stands by for a network TWAIN command or a Enter Custom Send File command using the number ke...

Страница 74: ...hrough 14 ADF Thin Paper as the setup item select options for each of them in the same way that you have done in the steps C C C C through E E E E After all 15 Job Delivery Data Max Setting appears as...

Страница 75: ...With this option you will have copies in colour when you use a colour printer or cop ies in black and white when you use a monochrome printer Black and White The original is scanned with black and whi...

Страница 76: ...rns to the Print Scan Settings menu Note Pressing Cancel discards the entered value and returns to the previous screen F F F F Press Next 2 Colour Black and White ap pears as the setup item currently...

Страница 77: ...s to the standby screen that is displayed when you turn the power on Important Never turn off the power of this machine before the standby screen is displayed Doing so can discard all the settings you...

Страница 78: ...s Black and White colon Text Photo Scans originals containing graphs photos and text as black and white binary images Black and White colon Photo Scans originals containing mainly black and white phot...

Страница 79: ...Size list Enter the offset from the reference start point in millimeters or inch es Note This setting is enabled only when Custom Area Setting is se lected in the Scan Size list You can select millime...

Страница 80: ...White colon Text Black and White colon Text Photo or Black and White colon Photo and Original Set tings is set to a 1 sided option 297mm 11 7 vertical and 2000mm 78 7 horizontal from the reference po...

Страница 81: ...lack and White colon Text Photo or Black and White colon Photo is selected in the Scan Type list When On is selected for this item text and graphics are scanned with their edges smoothed Filter This i...

Страница 82: ...ll Colour list under Sys tem Settings the scanned image is saved as a PDF file Other wise it is saved as a TIFF file Original Settings This item lets you select the orien tation of the original and wh...

Страница 83: ...ult Scan Settings menu Note Pressing Cancel discards the selected option and returns to the Default Scan Settings menu G G G G Press Next 2 Resolution appears as the set up item currently selected Not...

Страница 84: ...J J Press Next 3 Scan Size appears as the setup item currently selected K K K K Press OK The setting screen for 3 Scan Size appears L L L L Select the Scan size The option that is currently se lected...

Страница 85: ...tting screen for 4 Image Density appears O O O O Use the 1 1 1 1 and 0 0 0 0 keys to highlight the setting you want P P P P Press OK This saves the setting you have se lected and returns to the Defaul...

Страница 86: ...V V V Press Exit This exits the Scanner Features menu and returns to the standby screen that is displayed when you turn the power on Important Never turn off the power of this machine before the stan...

Страница 87: ...g is done by error dif fusion Text Photo Select this option for originals containing a mixture of text and photographs By selecting this option scan is performed with gray scale Photo Select this opti...

Страница 88: ...5 to 400 Note This setup item appears as Zoom on the Web Status Mon itor Create Margin Use this item to reduce the image to 93 of the original size Note This setup item is included un der Reduce Enlar...

Страница 89: ...appears E E E E Select the scan type The option that is currently se lected is displayed first mark appears along with the option currently selected Use and to display the option you want to select F...

Страница 90: ...splayed press OK This saves the setting you have selected and returns to the De fault Print Settings menu Note Pressing Cancel discards the selected option and returns to the Default Print Settings me...

Страница 91: ...revMenu This registers the print settings you have configured to the De fault memory area and returns to the Print Settings menu R R R R While the Print Settings menu is displayed press 2 3 or 4 key t...

Страница 92: ...eturn to a standby screen Accessing the Scanner System requirements of a client computer OS Microsoft Windows 95 98 98 SE Me 2000 XP Microsoft Windows Server 2003 Microsoft Windows NT4 0 Web browser M...

Страница 93: ...his machine in the web browser s address bar and then press the Enter key The top page of the Web Status Monitor is displayed on the web browser which means that you succeed in accessing to this machi...

Страница 94: ...nu Area Contains main menu items such as Sta tus Config Reference and Configuration Clicking a main menu item refreshes the sub menu area displaying sub menu items that are included under the main men...

Страница 95: ...ngs A A A A Click Configuration on the main menu The password input dialog box appears Note Once you set the password the password input dialog box will not appear from the second time When the dialog...

Страница 96: ...de lete an existing e mail address ex port address data to a CSV file or import address data from a CSV file To register an e mail address A Click Add B Make entry to or select an op tion for each of...

Страница 97: ...at you want to delete by clicking the option button to the left of the item C Click Delete D On the confirmation dialog box that appears click OK to delete the item To export the address data to a CSV...

Страница 98: ...ess data that you import Be fore importing the address data be sure to export the current ad dress data for a backup Note It is good idea to start with the CSV file that is exported using the Web Stat...

Страница 99: ...ut See the Web Status Monitor Help for information about setup items that are not described here Information to register in E mail Address You can register destination address es to which you use for...

Страница 100: ...and Con firm Protected Password Enter the password when On is selected for Sender s Password using four to eight digits Each password digit appears as Information to register in File Send Path You can...

Страница 101: ...user name Note When the shared folder you register is on a file server en ter a user name available for logging in to the file server When the shared folder you register is configured an ac cess righ...

Страница 102: ...the Web Status Monitor Help for information about how to reg ister an FTP Server address Program No Enter a number for the FTP server address between 00001 and 50000 You cannot enter a number al ready...

Страница 103: ...scanned files from this machine Login Password and Confirm Login Password Enter the password for the user name displayed in the Login User Name box Note A login password is regis tered using up to 14...

Страница 104: ...of the registered printers on the Web Status Monitor when monitoring printout jobs Enter a printer name within 80 characters Key Display Enter the name to appear on the control panel using up to 16 c...

Страница 105: ...twork printer Printer IP Address When Network Printer is selected for Attachment Type enter the IP address of the printer in the form of xxx xxx xxx xxx xxx 0 through 255 Note You cannot configure thi...

Страница 106: ...you want to change the order of a registered printer select On for Change Order and then enter the number of the new order that applies when you select All in a title list screen of the machine into M...

Страница 107: ...menu of the Web Sta tus Monitor Note however that there are setup items that can only be configured by using the control panel of this machine These setup items are not included in the backup file Not...

Страница 108: ...ered in the File Send Path Login User Name and Login Password boxes Backup File Name Enter a file name for the backup file Enter a name using up to 20 characters F F F F When everything is the way you...

Страница 109: ...assword for the user name displayed in the Login User Name box Each password character ap pears as Note If you are running Windows 98 Me and a shared folder password is required enter it Test Click to...

Страница 110: ...certain operating system set tings In this case launch Setup exe located in the CD ROM root directory If you want to install the software without using Auto Run hold down the Shift key while insertin...

Страница 111: ...rosoft Windows XP Profes sional Microsoft Windows NT Worksta tion 4 0 Service Pack 5 or later Microsoft Windows NT Server 4 0 Service Pack 5 or later Memory Operating system min operation memory 8 MB...

Страница 112: ...oft Windows 2000 Server Service Pack 1 or later Microsoft Windows XP Home Edition Microsoft Windows XP Professional Microsoft Windows Server 2003 Standard Edition Microsoft Windows Server 2003 Enterpr...

Страница 113: ...in an operating system such as Windows NT Workstation and Windows 2000 Professional in which a client server is not permitted to be used in a network you may violate the license agreement of Microsof...

Страница 114: ...Lite SmartDeviceMonitor About SmartDeviceMonitor for Admin and SmartDeviceMonitor for Client SmartDeviceMonitor for Admin is utility software for managing multiple scanners and printers on a network...

Страница 115: ...s into the CD ROM drive of the computer The CD ROM Launcher screen ap pears B B B B Click the key of the software to be installed Click SmartDeviceMonitor for Ad min and then the SmartDevice Monitor f...

Страница 116: ...Configuring the Scanner Settings 108 3...

Страница 117: ...n software you use the network TWAIN driver For details see the network TWAIN driver help When you perform a Send Scan e mail Send File SMB FTP or Delivery Server or a Print Scan operation using the A...

Страница 118: ...14 S LG 8 5 11 S LT 8 5 11 R LT 10 8 S 1 Detected as F4 size 2 Detected as DLT size When set in the ADF Europe Asia A3S 297mm 420mm 11 16 5 B4S 257mm 364mm 10 1 14 3 A4S 210mm 297mm 8 3 11 A4R 297mm 2...

Страница 119: ...cing the following types of originals in the ADF can cause paper misfeeds or result in damage to the originals Place these originals on the exposure glass instead Stapled or clipped originals Perforat...

Страница 120: ...when the scanned file is displayed on a computer the correct placement must be selected The setting orientation differs depending on whether the width of the original is within or larger than 297mm 1...

Страница 121: ...top edge touches the top left of the exposure glass When placing originals on the ADF p 117 Placing the Originals in the ADF Place the top edge of the original first Place the original so that the to...

Страница 122: ...rforming duplex scanning place the originals in the ADF The setting orientation differs depending on whether the width of the original is within or larger than 297mm 11 7 Original width 297mm 11 7 or...

Страница 123: ...t 2 sided print the printout orientation is fixed to top to top When the originals are bound at the top or when you do not set the origi nals as illustrated above you ll never have the printout result...

Страница 124: ...cted cor rectly B B B B With the side to be scanned facing down place the original on the exposure glass and align it with the home position and scale Important Do not press down on the expo sure glas...

Страница 125: ...for information about the origi nal sizes that can be detected automatically Fan the originals to get air be tween the sheets before setting in the ADF A A A A Adjust the side guides to the size of y...

Страница 126: ...Setting Originals 118 4...

Страница 127: ...you use p 120 Scanning Originals A Select the TWAIN driver Menu and Procedure may be different depending on the application you use p 120 Scanning Originals A Place the originals p 109 Setting Origin...

Страница 128: ...anner Properties dialog box Note The name of the scanner cur rently being used is shown on the title bar of the dialog box When multiple ma chines are connected make sure that the indicated ma chine i...

Страница 129: ...f the area towards or away from its opposite corner Note Depending on the scanning resolution the area to be scanned may be subject to re strictions For more informa tion about the relationship betwee...

Страница 130: ...strings that were scanned slanted Printing to the Image This function allows you to im print dates page numbers or your favorite characters on a scan file You can also change the fonts of the imprint...

Страница 131: ...ace originals in the ADF or on the exposure glass p 126 Before Sending Scan Data Select a destination p 128 Selecting Destina tions Select a Cc destination p 130 Selecting Cc Destina tions Select a su...

Страница 132: ...u do not specify a subject Depending on the E mail client software on the side of the receiver such string like No sub ject appears as the subject File name and file type of an e mail attachment A sca...

Страница 133: ...T shows the time offset from Greenwich Mean Time You can specify this setting by using Configuration Basic Settings Scanner Time Zone on the Web Status Monitor Contact information When Sender s Name D...

Страница 134: ...tion you can specify the original orientation and scanning sides manually by pressing Scan on the E mail Send File standby screen and then selecting Manual Instead of manually specifying these setting...

Страница 135: ...ettings from the PC is displayed on the dis play panel the machine is stand ing by for the network TWAIN Press Exit If there are no Exit the Network TWAIN exclusive standby screen is displayed Set 7 S...

Страница 136: ...is automati cally updated when you press Dest See p 61 Auto Update Destination List for details C C C C While To colon is highlighted press Settings Note If To colon is not highlighted use the 1 1 1...

Страница 137: ...want to select and then press Select Note While highlighting a destina tion with its check box select ed press Clear to clear the check box this deselects the destination If you want to select from an...

Страница 138: ...o co lon in Selecting Destinations You can confirm all the speci fied destinations by using the 1 1 1 1 and 0 0 0 0 keys when you have selected multiple destina tions You cannot confirm the Cc destina...

Страница 139: ...e of the screen shows the first destination that you have specified for To co lon in Selecting Destinations You can confirm all the speci fied destinations by using the 1 1 1 1 and 0 0 0 0 keys when y...

Страница 140: ...2 and Us er 3 here If you want to use one of the user settings while chang ing some of them recall the user setting you want to use by high lighting it and pressing OK first And then change the set ti...

Страница 141: ...tings or the scan settings that you have registered to Default User 1 User 2 or User 3 Note You can confirm the Default set tings by selecting Manual in step B below unless you configure the scan sett...

Страница 142: ...press Select This selects the check box next to the sender s name Note Selecting another sender auto matically deselects the sender currently selected so the check mark next to the sender s name is c...

Страница 143: ...n ning to add scanned data to the current image file Press New Job to finish the current scanning job and send the scanned data You can start a new job with the current settings after the scanned data...

Страница 144: ...iginal on the ex posure glass and then press the Start key D D D D Repeat step C C C C as necessary E E E E Press Finish when all the origi nals are scanned Note When Show Options after Each Scan Job...

Страница 145: ...click Admin Info C C C C On the sub menu click Send Info D D D D Check the transmission result Note Up to 20 transmission results are displayed in the Send Info list at a time Each time you perform a...

Страница 146: ...Sending Scan File by E mail 138 6...

Страница 147: ...shared folder that is registered to this machine Procedure Breakdown The following overview diagram shows the flow of the steps for sending a scanned file to a Windows shared folder that is registere...

Страница 148: ...p 61 Auto Update Destination List for details C C C C Press the 1 1 1 1 or 0 0 0 0 key to high light SMB and then press Set tings The list of the shared folders that are registered to this machine ap...

Страница 149: ...iguration File Send Settings File Send Path Assign Title on the Web Sta tus Monitor C Highlight the shared folder name you want to select and then press Select This selects the check box next to the f...

Страница 150: ...skip this step B B B B Use the 1 1 1 1 and 0 0 0 0 keys to highlight File Name and then press Settings The list of the file names that are registered to this machine appears C C C C Use Next and Prev...

Страница 151: ...nitor Note that the underlined steps are essential Note Some of the steps such as making scan settings are identical to those ex plained under Sending Scan Files by E mail See the relevant pages shown...

Страница 152: ...s for information about the setup items at the top through middle of the Enter Custom Send File page Scan Type through File Type See p 112 Original Orientation for information about Original Setting O...

Страница 153: ...the specified shared folder is enabled when data is entered in the File Send Path Login User Name and Login Password boxes File Name Enter the name of the file to store using up to 20 characters A D D...

Страница 154: ...le m is displayed G G G G Press PrevMenu The display of this machine returns to the standby screen that had been dis played before you started the Enter Custom Send File operation Note Be sure to pres...

Страница 155: ...bed below in accordance with the file name you specified In case you did not specify a file name the default file name DOC applies Note It is essential to specify a file name when you use the Enter Cu...

Страница 156: ...ample 5 Specified file name none File format multi page TIFF Original type colour full col our Original page count 2 two sid ed Time when scanned 2003 9 16 13 07 21 The following files are generat ed...

Страница 157: ...making scan settings are identical to those ex plained under Sending Scan Files by E mail See the relevant pages shown to the right of the following overview diagram Place originals in the ADF or on t...

Страница 158: ...1 1 1 1 or 0 0 0 0 key to high light FTP and then press Set tings The list of the FTP servers that are registered to this machine appears D D D D Use Next and Prev to scroll through the pages and disp...

Страница 159: ...lects the check box next to the FTP server name To recall all available destinations A Press the Title key List of titles appears on the screen B Use the 1 1 1 1 or 0 0 0 0 key to highlight All and th...

Страница 160: ...tomatically created File Names Files created by a Scan to FTP opera tion are named as described below in accordance with the file name you specified In case you did not specify a file name the default...

Страница 161: ...TIF Example 5 Specified file name none File format multi page TIFF Original type colour full col our Original page count 2 two sid ed Time when scanned 2003 9 16 13 07 21 The following file iss gener...

Страница 162: ...Sending Scan File by Scan to FTP 154 8...

Страница 163: ...those ex plained under Sending Scan Files by E mail See the relevant pages shown to the right of the following overview diagram 1 The settings that are configured using ScanRouter V2 Professional Lite...

Страница 164: ...registered to the delivery server appears C C C C Use Next and Prev to scroll through the pages and display the destination you want to select D D D D Use the 1 1 1 1 and 0 0 0 0 keys to highlight the...

Страница 165: ...cts the destination If you want to select from an other title press the Ti tle key This displays list of titles again To recall all available destinations A Press the Title key List of titles appears...

Страница 166: ...Sending Scan Files Using Delivery Server 158 9...

Страница 167: ...nter Note that the underlined steps are essential Place the original s on the Exposure glass or on the ADF p 160 Before Print ing Scan Data Specify the number of copies p 163 Specifying the Number of...

Страница 168: ...y Settings You can specify a certain paper tray of a printer by selecting Configuration Print Scan Settings Printer Paper Source Tray on the Web Status Monitor By using the control panel of this machi...

Страница 169: ...play panel the machine is standing by for the net work TWAIN Press Exit If there are no Exit the Network TWAIN exclusive standby screen is displayed In this case restart the machine When a send file p...

Страница 170: ...nt Scan Settings Printer on the Web Status Mon itor For details see Web Status Monitor Help Color Black and White The default setting selected us ing Colour colon Full Colour in 3 Print Scan Settings...

Страница 171: ...Scan oper ation you can change the settings ini tially displayed on the screen which settings are those that you have con figured and registered to Default in 5 Print Settings under the Scanner Featu...

Страница 172: ...ighlight the option you want to select by using the 1 1 1 1 or 0 0 0 0 keys and Next or Prev if necessary and then press OK Note Pressing Cancel discards the selected option and returns to the previou...

Страница 173: ...turns to the Print Scan standby screen and the print settings are displayed on the third line of the screen Confirming the Print Settings You can confirm the current print set tings or the print setti...

Страница 174: ...the check box next to the printer name Note Selecting another printer auto matically deselects the printer currently selected so the check mark next to the printer is cleared While highlighting a prin...

Страница 175: ...lack and White When you perform a Print Scan oper ation you can select between colour scanning and black and white scan ning If you do not select this setting the default setting selected using Col ou...

Страница 176: ...Printing Scanned Image Files 168 10...

Страница 177: ...turn off the power of this machine and then back on If the indicators still show the same status note the status of the indicators and contact your service representative Error description Solution T...

Страница 178: ...F remove the original by the fol lowing procedure A A A A Open the ADF cover and remove if the original is jammed B B B B Open the original table and re move if the original is jammed C C C C Open the...

Страница 179: ...lace the original in the correct orientation p 112 Original Orientation No image results from scanning The original was placed with the front and back reversed When the original is placed directly on...

Страница 180: ...resentative Reference See the network TWAIN driver help when an error message appears on the client computer from which you use this machine as a network TWAIN scan ner Scanner unit error message Mess...

Страница 181: ...osure glass or it is placed but the scan size cannot be automati cally detected If the original is not there place it on the ex posure glass Because the scanner detects the scan size when the ADF is o...

Страница 182: ...rent setting when Scan Type in 4 Scan Settings is set to one of the Colour options Make the value of the following settings larger using the Web Status Monitor Configuration E mail Settings E mail Max...

Страница 183: ...or it is not being serviced The delivery server is temporarily down for reasons such as insufficient memory Cannot communicate with the server Check the server status and connection Exit If you specif...

Страница 184: ...inter Exit The printer is not compatible with this machine Select other printer that is supported for use with this ma chine No response from the device Check the power and cables Exit The printer is...

Страница 185: ...rs In most cases it is required to enter the password into Login Password for the user entered in Login User Name However when accessing a shared folder that is password protected under Windows 95 98...

Страница 186: ...ttings of this machine have returned to their default values for some reasons In this case you have to configure all the nec essary settings including the IP address and scan set tings etc When you us...

Страница 187: ...le for selection In this case press the Title key highlight All and then press OK See p 129 To recall all available destinations for details The e mail destinations including Cc destinations are clear...

Страница 188: ...ry clean cloth when there is dust or soiling present inside Cleaning the Exposure Glass ADF Exposure Glass White Sheet and White Plate R CAUTION A A A A Turn off the power of the scanner and unplug th...

Страница 189: ...to clean the Feed Roller after scanning a document written in pencil or other material that is not firmly fixed to the paper Failure to clean the Feed Roller can cause soiling of the next document sc...

Страница 190: ...the power of the scanner and unplug the power cord from the outlet B B B B Open the cover of the Automatic Document Feeder ADF C C C C Open the Document Tray and wipe off the Document Rolling Unit wi...

Страница 191: ...be performed by the customer Moving Over Short Distance A A A A Turn off the power of the scanner and unplug the power cord from the outlet B B B B Disconnect all cables connected to the scanner C C C...

Страница 192: ...of the scanner to the Lock position C C C C Remove the control panel unit from the scanner unit and discon nect all cables connected to the scanner D D D D Place the scanner in the original box and t...

Страница 193: ...cause them to rupture resulting in injury Note Please return used NIC boards to our authorized dealer or service representative Your cooperation with our recycling activities is ap preciated NIC board...

Страница 194: ...t is necessary to change the net work settings of the computer that you use for configuring wireless LAN settings Be sure to note your computer s network settings be fore you change them for refer enc...

Страница 195: ...he User Tools key on this machine The scanner Features menu ap pears E E E E Press the 1 key The System Settings menu is dis played and 1 Function Priority appears as the setup item currently selected...

Страница 196: ...to the standby screen that is displayed when you turn the power on Important Never turn off the power of this machine before the standby screen is displayed Doing so can discard all the settings you...

Страница 197: ...ia an access point The SSID must be the same as the one set for the access point Ad hoc mode A method of communicating with other computers peer to peer without an access point The same communica tion...

Страница 198: ...ith out the prefix 0x The value entered appears as W W W W Click Apply to apply the settings The set value will be written into this product X X X X Remove the cable you connected in step A A A A Y Y...

Страница 199: ...chine Note Lines 1 through 6 contain information obtained from this machine When you want to update the address book of this machine using a CSV file use an ex ported CSV file and edit it while leavin...

Страница 200: ...her the e mail address information is to be registered to the Freq title 0 Registered 1 Not registered 1 Title1 This item is used only when you select Japanese as the display language of this machine...

Страница 201: ...can display from Configuration E mail Settings E mail Address on the Web Status Monitor Note The last two items shown as in the example are fixed to blank for this machine Device Tag Information The f...

Страница 202: ...g this machine as a network TWAIN scanner Note In the following tables each of the values inside of white cells display the data size in KB determined by the scan area to the left and the resolution a...

Страница 203: ...How File Size Changes Depending on Scan Area and Resolution 195 11 When Binary or Halftone is selected...

Страница 204: ...Appendix 196 11 When Gray scale is selected...

Страница 205: ...How File Size Changes Depending on Scan Area and Resolution 197 11 When 8 colors or 8 colors halftone is selected...

Страница 206: ...Appendix 198 11 When 256 colors is selected...

Страница 207: ...Note In the following tables each of the values inside of white cells display the data size in KB determined by the scan area to the left and the resolution at the top The following tables show file...

Страница 208: ...Appendix 200 11 When Black and White Text Black and White Text Photo or Black and White Photo is selected When Black and White Gray Scale is selected...

Страница 209: ...How File Size Changes Depending on Scan Area and Resolution 201 11 When Color Full Color is selected...

Страница 210: ...tic 2 value con version processing and automatic image area separation Special Table Table Type 7100 Provides comfortable installation of this machine Wireless LAN Card 802 11b Interface Unit Type B A...

Страница 211: ...connection Ethernet interface 1 10BASE T or 100BASE TX Function expansion Type II PC card slot 1 One of the slots is used exclu sively for the USB interface card USB 2 0 that comes with this machine S...

Страница 212: ...n During operation 140W During standby 60W During Low Power mode 12W Warm up time Max 40 seconds Transition time to the low power mode About 15 minutes after the last operation or the end of the last...

Страница 213: ...SHALL THE REGENTS OR CONTRIBUTORS BE LIABLE FOR ANY DIRECT INDIRECT INCI DENTAL SPECIAL EXEMPLARY OR CONSEQUENTIAL DAMAGES INCLUDING BUT NOT LIMITED TO PROCUREMENT OF SUBSTI TUTE GOODS OR SERVICES LO...

Страница 214: ...INCLUDING NEGLIGENCE OR OTHERWISE ARISING IN ANY WAY OUT OF THE USE OF THIS SOFTWARE EVEN IF ADVISED OF THE POSSIBILITY OF SUCH DAM AGE 1 Redistributions of source code must re tain the above copyrig...

Страница 215: ...his distribu tion by permission of L Peter Deut sch sole proprietor of its copyright holder Aladdin Enterprises of Menlo Park CA ansi2knr c is NOT covered by the above copyright and condi tions but in...

Страница 216: ...re larger than usu al but are readable by all standard GIF decoders We are required to state that TIFF Software Copyright c 1988 1997 Sam Leffler Copyright c 1991 1997 Silicon Graphics Inc Permission...

Страница 217: ...O EVENT SHALL CMU OR THE REGENTS OF THE UNIVERSITY OF CALIFORNIA BE LIABLE FOR ANY SPECIAL IN DIRECT OR CONSEQUENTIAL DAMAGES OR ANY DAMAGES WHATSOEVER RESULTING FROM THE LOSS OF USE DATA OR PROF ITS...

Страница 218: ...ditions are met Redistributions of source code must retain the above copyright notice this list of conditions and the following disclaimer Redistributions in binary form must reproduce the above copy...

Страница 219: ...t Copyright 1998 1999 2000 Thai Open Source Software Center Ltd and Clark Cooper Copyright 2001 2002 Expat main tainers Permission is hereby granted free of charge to any person obtaining a copy of th...

Страница 220: ...Scanning Originals 120 Selecting a File Name 142 Selecting an FTP Server 150 Selecting an SMB 140 Selecting a Sender 134 Selecting a Shared Folder 140 Selecting a Subject 130 Selecting Cc Destination...

Страница 221: ...MC Directive 89 336 EEC and its amending di rectives and the Low Voltage Directive 73 23 EEC and its amending directives In accordance with IEC 60417 this machine uses the following symbols for the ma...

Страница 222: ...Image Scanner Operating Instructions GB GB G421 8601...

Страница 223: ...the correct direction Inserting in the wrong direction creates the risk of damage to the plug and the connector Be careful not to pinch the cable when you attach the control panel unit to the scanner...

Страница 224: ...so confirm that is not displayed on the screen or the indicator on the front of this machine is not lit when you turn of the power Otherwise loss of scan data or failure in sending files might occur B...

Отзывы: