64
15. Remote Control Operation
The best remote control is of little use if the batteries used are flat and the rechargeable batteries have not been
charged. Thus, you should Check the transmitter batteries (battery tester) and charge the receiver batteries to the
manufacturer‘s specifications before every day‘s flying. It is important that you don‘t just quickly charge the batteries a
little. Use suitable devices with a discharge function so that you have an exact overview of the current power capacity
of your rechargeable batteries.
Before you operate your model in the flying area, first check the correct setting of the remote control. It is particularly
important to ensure the correct model memory is activated and that the trim buttons are set to the respective centre
settings. Also be sure to test the correct setting of all switches and dials.
Switch on the receiver system in the model and check all control functions at the model then. Only perform a range
test with the engine running before the first flight. For this, a helper has to hold the model about 1m above the ground.
At a direct line of sight, the model must react without defects to the control signals even from a distance of at least
400 m.
Once you have checked your range and all functions are working without defects, you can start your model. If your
model does not fly straight, you have the option of trimming the rudders in flight. Since you should always have sight
contact to the model during flight, changes to the trimming are indicated by a sound. The remote control emits a short
signal sound for each press of a trim stick. The tone height depends on the trimming direction. The middle position is
acoustically indicated by a longer signal.
After landing, switch off the receiver first and then the transmitter.
Attention!
Never turn the transmitter off when the model is still in operation. Signal interference can cause the model
to carry out uncontrolled and unexpected servo movements or electric motor(s) may unexpectedly start to
run at full power.
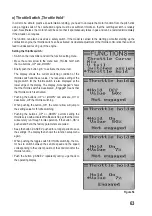
Then set the linkage rods on your model so that the trimming symbol in the display can be returned to the middle
position and the model nonetheless continues to fly in a straight line. In the case of minimal deviations you have the
option of slightly adjusting the sub-trimming.
Содержание HT-6
Страница 1: ... Remote Control HT 6 2 4 GHz Item no 1310037 Version 04 15 7 ...
Страница 69: ...69 ...
Страница 70: ...70 ...
Страница 71: ...71 ...

