background image

OPERATION

AUTOPILOT

NautoPilot 5000 Series

121

4002.DOC010102

Edition: September 2014

4.5.1

”Track Control” mode with RAYTHEON Anschütz ECDIS

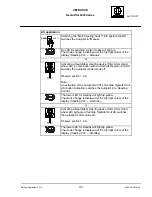
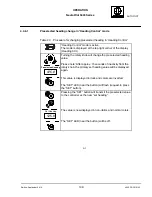
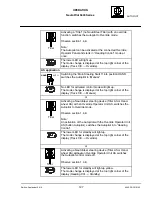
The ”Track Control” mode is started by a track planning system (ECDIS, Raytheon
Anschütz).

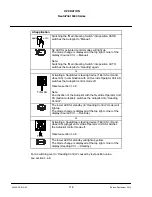
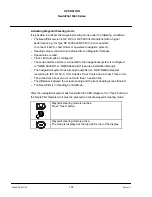
”Track Control” mode is active.

The mode is displayed at the top right corner of the display

(Track Ctrl.).

4.5.2

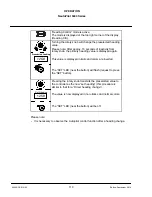
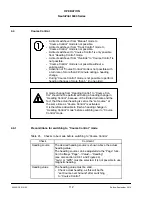
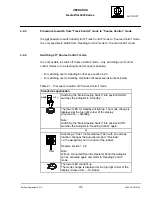
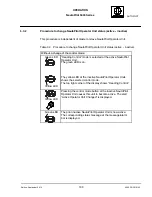
Preconditions for switching to “Track Control” mode

Table 29

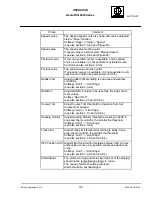
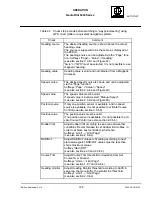
Checks to be made before switching to “Track Control” with

RAYTHEON Anschütz ECDIS

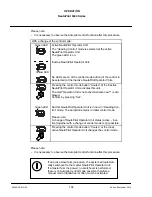
Check

Comment

Heading source

The desired heading source is shown above the actual

heading value.

The source is supposed to be the same as displayed at

the ECDIS.

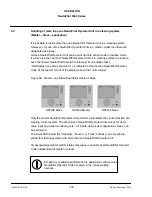
The heading source can be adjusted via the “Page” func-

tion: Softkeys “Page”

“Value”

“Heading”

(see also section 2.3.6.1 and Figure 44).

“Gyro” or “GPS” must be selected. It is not possible to use

magnetic heading.

Heading value

The heading value must be valid.

-- Check actual heading, as this will be the

”set Course over Ground” after switching

to ”Course Control”.

The value is supposed to be the same as displayed at the

ECDIS.

Speed source

The desired speed source is shown and can be adjusted

via the “Page” function:

Softkeys “Page”

“Value”

“Speed”

(see also section 2.3.6.2 and Figure 50)

Speed value

The speed value must be valid.

If speed value is invalid, select “Manual Speed”.

(see also section 2.3.6.2 and Figure 50)

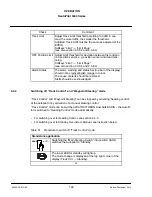
Position source

If only one position sensor is available, and no speed

source is available, it is not possible to activate Course

Control (see also section 2.3.5.5).

Position value

The position value must be valid.

If no position sensor is available, it is not possible to acti-

vate Course Control (see also section 2.3.5.5).

Содержание NautoPilot NP 5100

Страница 1: ...4 31 30 19 0 Fax 49 4 31 30 19 501 Email Service raykiel com www raytheon anschuetz de 4002 DOC010102 Edition September 2014 NautoPilot 5000 Series NP 5100 NP 5300 NP 5400 NP 5500 NautoPilot Operator...

Страница 2: ...xploitation ou communication de son contenu sont interdites sauf autorisation expresse Tout manquement cette r gle est illicite et expose son auteur au versement de dommages et int r ts Sin nuestra ex...

Страница 3: ...aptive mode Weather Adaptivity 12 1 3 11 Information about the Steering Switch 12 1 4 Basic operation modes 14 1 4 1 Explanation of used symbols 14 1 4 2 Standby and not ready 15 1 4 3 Operation mode...

Страница 4: ...dder display 64 2 3 5 4 Acceleration Monitor display only for NP 5400 and NP 5500 66 2 3 5 4 1 Application hints for the Acceleration Monitor 69 2 3 5 5 Position Monitoring display not for NP 5100 71...

Страница 5: ...n Course Control mode 120 4 5 Track Control 120 4 5 1 Track Control mode with RAYTHEON Ansch tz ECDIS 121 4 5 2 Preconditions for switching to Track Control mode 121 4 5 3 Waypoint steering mode in co...

Страница 6: ...hange Manoeuvre 35 Figure 17 Changing TO WPT and NEXT WPT without Interrupting Track Control 36 Figure 18 Intended RETURN TO TRACK manoeuvre Impossible with the Ship too Close to the TO WPT 43 Figure...

Страница 7: ...Page function heading source not available or INS 83 Figure 47 Heading sensor failed 83 Figure 48 Speed sensor and Heading sensor doubtful 84 Figure 49 Speed sensor and Heading sensor failed 84 Figur...

Страница 8: ...s 97 Table 18 Checks to be made before switching from Standby to Heading Control 102 Table 19 Procedure to switch from Standby to Heading Control mode 103 Table 20 Procedure to switch from Course Cont...

Страница 9: ...ent Common Reference System COG Course Over Ground Ctrl Control IBS Integrated Bridge System ID Identification IEC International Electrotechnic Commission II Integrated Instruments NMEA talker for ECD...

Страница 10: ...ameter Memory pt port RAD Radius RoT Rate of Turn RS Recommended Standard Rud Rudder SM Service Manual SOG Speed Over Ground SOLAS Safety of Live at Sea SPD Speed stb Starboard STW Speed Trough Water...

Страница 11: ...e alterations a valid speed input is mandatory Use rate of turn controlled heading course alterations in case of invalid speed data NautoPilot 5000 allows to define a rudder limit value for heading co...

Страница 12: ...dent steering control system please switch to the other mode by use of the steering mode selector switch to retrieve the steering capabilities of the control system see also section 1 3 11 Please note...

Страница 13: ...essels with any kind of rudder control The NautoPilot 5000 Series complies with IMO resolutions By setting a number of easily accessible parameters the Autopilot s steering characteristics can be adju...

Страница 14: ...Control Track Control in combination with Raytheon ECDIS Course Control Course Over Ground NautoPilot 5400 Automatic adaption to weather and sea state using a rudder variance control Increased rudder...

Страница 15: ...ius cross track distance parameters XTD Fast drift compensation by implementation of Kalman filter technology High Precision Option to select Acceleration Monitor Heading Control Course Control high p...

Страница 16: ...been re vised to edition 2 Please not that only NautoPilot 5400 and 5500 have been adapted to the latest test standard introduced with software version E03 NautoPilot 5100 and 5300 are compliant to I...

Страница 17: ...Integrated application of NautoPilot 5000 Series Steering DUAL CAN Bus Follow Up Amplifier Feedback Unit Gateway Compass STD 22 STD 22 DUAL CAN Bus ETHERNET to IBS NautoPilot 5000 Series Distribution...

Страница 18: ...description technical data and operating procedures The Service Manual covers installation commissioning maintenance and repair In some cases the manual for an Autopilot Interface type 102 891 should...

Страница 19: ...storage 40 C to 70 C Outputs Status Status and alarm contacts plugs B3 B4 B5 and B6 Output load 30V DC Imax 1A Inputs Status Status plugs B10 and B11 24V DC Imax 5mA Outputs Inputs Serial in out plug...

Страница 20: ...lead to speed loss in a seaway Decrease of yawing gives a better control performance but with the drawback of more rudder activity Increase of yawing gives a less rudder activity but with the drawback...

Страница 21: ...owly Counter rudder too small parameter 0 The ship overshoots the selected heading Decrease counter rudder if the rudder movement in counter direction at the end of head ing change is too strong or co...

Страница 22: ...limit between set heading and actual heading exceeds a pre ad justed value Page Limit OFF Heading See also section 2 3 6 4 The possible range for pre adjusted OFF Heading value 5 to 30 in increments o...

Страница 23: ...hieving this angle the alarm Course Trim is activated If the Course Trim angle is adjusted too small it could happen that the vessel will be off the track In this case the Course Trim angle must be ch...

Страница 24: ...xcept NautoPilot 5100 reacts automatically to the current weather conditions The Economy mode guarantees a reduction of the rudder movement with less course keeping accuracy The reduction of the rudde...

Страница 25: ...opilot operation is activated in this switch position steering control loop Switch position HAND means no Autopilot operation AS application Switch position AUTO means it is possible to activate an Au...

Страница 26: ...e sensor data is as small as possible Please note Some basic operating modes differ in the type of application either standalone application or AS application 1 4 1 Explanation of used symbols Some sy...

Страница 27: ...ding This is important to note especially during heading change AS application If the status Standby is displayed it means that a NautoSteer System is active If manual mode Manual is displayed at the...

Страница 28: ...ue and the actual heading value Other adjustable parameters like yawing rudder econ omy or precision are taken into consideration The set heading value is adjusted via the rotary knob and activated ei...

Страница 29: ...utton NautoPilot 5000 Series Actual Heading Set Heading Actual Heading Set Heading Actual Heading Set Heading Actual Heading Set Heading Manual Mode Standby Heading Control Adjust Set Heading After He...

Страница 30: ...Heading Control mode and the Course button has been pressed When switching from Heading Control mode to Course Control mode the actual heading defines a Course Over Ground line This courseline will be...

Страница 31: ...Course Control mode Several inputs of set Course Over Ground values can be accepted but only if the last course change has finished see Figure 7 Figure 7 Explanations for a heading change in Course C...

Страница 32: ...Heading Control to Course Control via the Autopilot the actual heading value will be taken as set Course Over Ground The display shows the actual heading see Figure 8 the set Course Over Ground value...

Страница 33: ...ob and acknowledge this value either by pressing the rotary knob or by pressing the SET button NautoPilot 5000 Series Actual Heading Actual Heading Actual Heading Set Course over Ground Set Course ove...

Страница 34: ...e of Turn upon activation of Course Control must not exceed 30 minute Speed influence on Course Control The speed before activation of Course Control mode must not be less than this value which is con...

Страница 35: ...track planning system The NautoPilot 5000 Series is designed to perform Track Control with a RAYTHEON Ansch tz track planning system ECDIS The track planning system defines the input data for the Aut...

Страница 36: ...WPT as long as the associated track change manoeuvre is not terminated and the new track section has not been reached FROM WPT FROM WPT is the previous waypoint NEXT WPT NEXT WPT is the waypoint follo...

Страница 37: ...min before a track change manoeuvre starts the operator is notified of the forthcoming track change manoeuvre by means of a message from the Autopilot The time can be selected at the ECDIS This messag...

Страница 38: ...Example The Autopilot is in the operating mode of Heading Control a radius of 0 8 NM is ad justed and Radius is selected The rudder limit is set to 10 A route has been planned on the ECDIS and the rad...

Страница 39: ...operating mode is manually changed over from Track Control to Heading Control R o T 15 min appears The rudder limit is set to 10 again The following sections 1 4 5 1 1 and 1 4 5 1 2 describe two type...

Страница 40: ...Track Ship s Position Border of 60 Tunnel Border of 60 Tunnel Note Ship has to be inside a 60 Tunnel heading towards the TO Waypoint Requirements for Track Control using the NP5500 Figure 12 Example...

Страница 41: ...position must be before the track and less than 10 nautical miles away 6000 Meters 2000 4000 0 2000 4000 0 101 Track 56 TO WPT 281 101 281 191 11 B The initial heading must be between track course mi...

Страница 42: ...e Autopilot does not switch over to Track Control If the check is passed and the geometrical constellation admits to switch over to Track Control Track Con trol is activated An alert is displayed at t...

Страница 43: ...lanned track makes it impossible to reach the track a warning see section 6 appears at the top bar of the display and the Autopilot does not switch over to Track Control If the check is passed and the...

Страница 44: ...a FROM WPT by the ECDIS TO WPT WOL NEXT WPT FROM WPT APPROACH NOTE In case of failure of the ECDIS during Track Control automatic change over from Track Control to Heading Control takes place In that...

Страница 45: ...distance is required to bring the ship to the necessary rate of turn The minimum distance between both radii depends on the vessels manoeuvrability If this is not the case the result may be that the...

Страница 46: ...3 pulses acoustical sound red and blinking message bar and the below mentioned message about the 30 seconds warning is dropped An alert is displayed at the top bar of the display see section 6 Set WOP...

Страница 47: ...splayed at the top bar of the display see section 6 Approach NEXT Waypoint two pulses Acknowledge the alert App NEXT Wpt After acknowledgement the short text is displayed and the LED is no longer alig...

Страница 48: ...ntrol fails it is automatically changed to Heading Control For more details in this case refer to section 1 4 5 1 7 2 Re approaching the track is the same procedure as starting a new track 1 4 5 1 5 C...

Страница 49: ...5500 This procedure is indicated by messages at the top bar of the display Track change manoeuvre starting An alert is displayed at the to bar of the display see section 6 Set Changed Waypoints Set Se...

Страница 50: ...lert An alert is displayed at the top bar of the display see section 6 T r a c k E n d P a s s e d Change Steering Mode three pulses repeated every 7 seconds Last track point reached and passed Both m...

Страница 51: ...rol the operating mode changes from Track Control to Heading Control As opposed to manual change over from Track Control to Heading Control the setting of the manoeuvre parameters might maintained as...

Страница 52: ...ange ma noeuvre the heading is taken as the new set heading As opposed to manual change over from Track Control to Heading Control the setting of the ma noeuvre parameters might maintain as under Trac...

Страница 53: ...e On straight leg All values will be adopted from Heading Control mode On curved path The radius planned for the next track change manoeuvre is maintained The rudder limit remains at Max Alert Check...

Страница 54: ...es from Track Control to Heading Control Acknowledge the warning Heading Control Track Control The actual heading is taken as the new set heading As opposed to manual change over from Track Control to...

Страница 55: ...tance between FROM WPT and TO WPT or greater than 10 nautical miles Figure 19 Track Control impossible with the Distance to the Track too large FROM WPT TO WPT current ship s position The following al...

Страница 56: ...rol Track Control The operating mode changes from Track Control to Heading Control The track course becomes set course preset heading As opposed to manual change over from Track Con trol to Heading Co...

Страница 57: ...orresponding alert philosophy The operator should closely monitor the progress when sailing on a route In case of de viations from the route or any uncertainty the operator should switch to Auto and u...

Страница 58: ...ight corner of the Autopilot display and the NautoPilot Operator Unit is inac tive For the activation of an Override mode a NFU Tiller must have a short contact to any direction and a FU Tiller or han...

Страница 59: ...LEDs Activates Heading Control mode LED upper green indicates the selected steering mode LED lower yellow indicates Selected steering mode but NautoPilot Operation Unit is inactive control from a seco...

Страница 60: ...button Adjusts brightness of illumination and display See also section 5 3 for dimming active inactive NautoPilot Operator Units Figure 20 6 ACK button with LED red Acknowledges alarm or status messa...

Страница 61: ...ht Display Yawing Rudder Counter rudder Ship Load Track econ Heading Rudder Plot Track Data Acceleration Monitor Acceleration Limit R o T Speed Warning Warning Threshold Position Monitoring OFF Positi...

Страница 62: ...r switching on the NautoPilot Operator Unit the display below appears Figure 22 First display after switching ON the NautoPilot Operator Unit 1 2 3 4 5 6 7 8 9 10 11 12 13 14 15 16 17 18 19 Fields wit...

Страница 63: ...see also section 1 4 8 all types of NautoPilot or Manual see also section 1 4 7 all types of NautoPilot or Standby see also section1 4 2 all types of NautoPilot or see section 1 4 2 all types of Nauto...

Страница 64: ...ilot Limits Values Parameter independent from the configured values but limited by those values Figure 22 13 Softkey for changing the value for a heading change performed either by a rate of turn func...

Страница 65: ...OC010102 Edition September 2014 2 3 1 Tendency bar This bar shows the tendency of data displayed above the bar There are three different forms to display the information Figure 23 Tendency bar Tendenc...

Страница 66: ...ber 2014 2 3 2 Switching between night and day displays Figure 24 First display after switching ON the NautoPilot Operator Unit in night mode black white Use this softkey see Figure 24 to switch betwe...

Страница 67: ...25 Pos 1 Use the and softkeys Figure 25 Pos 2 and 4 to set the value RoT or the value of the radius Each change of value must be acknowledged by pressing the SET button at which point a small icon is...

Страница 68: ...dder activ ity is selected The selected mode is displayed in the top bar Please note It is advisable not to set Economy mode during passages through restricted areas channels waterways or harbours Wit...

Страница 69: ...of NautoPilot Table 5 Softkeys for Display Selection Function Figure 27 1 Softkey Cancel for switching back to the initial display Figure 27 2 Softkey Ship Data see section 2 3 5 6 Figure 27 3 Softke...

Страница 70: ...0102 Edition September 2014 2 3 5 1 HDG Rudder Plot display Figure 28 Displays for HDG Rudder Plot see display below 1 2 4 5 6 7 9 10 11 13 14 15 16 17 18 20 21 22 23 3 19 8 12 Figure 29 Example of a...

Страница 71: ...ding Figure 28 7 Touch icon toggles resolution for the heading axis 20 deg 60 deg Figure 28 8 The actual heading is displayed as a blue graph Figure 28 9 Information regarding heading source and actua...

Страница 72: ...acknowledged with SET a small icon is displayed after a change has been made see Figure 29 Figure 28 21 Softkey for changing entering the counter rudder parameter see also section 1 3 3 Value range 0...

Страница 73: ...numerical and graphical recorded information on Actual heading Set COG or Track Course Distance to courseline or Cross Track Error depends on selected control mode Current operating mode at the AutoPi...

Страница 74: ...d as Set Heading Figure 30 4 Touch icon toggles resolution for the respective value Figure 30 5 Numerical display for the distance to the courseline track or Cross Track Error in meters an arrow next...

Страница 75: ...make a change Changes must be acknowledged with SET a small icon is dis played after a change has been made see Figure 31 Figure 30 14 Softkey for changing entering the yawing parameter see also secti...

Страница 76: ...sed as back up only for the Rudder Angle Indicator required by SOLAS V 19 as ammended This display shows the following numerical and graphical information Actual heading Set heading or Set COG or Trac...

Страница 77: ...er Ground after turning the rotary knob Set COG after releasing the knob in increments of 1 degree or 1 10 degree depends on selected resolution For Track Control this display is designated as Track C...

Страница 78: ...0 In the Acceleration Monitor display the current operating mode for the AutoPilot is also displayed in the upper right corner below the status bar In Figure 33 the current mode is standby Other state...

Страница 79: ...ourse Control this display is designated as Presel COG Preselected Course Over Ground after turning the rotary knob Set COG after releasing the knob in increments of 1 degree or 1 10 degree depends on...

Страница 80: ...at the top of this display Value range 0 0kn to 90 0kn in increments of 1kn Figure 33 19 Softkey for adjusting the Rate of Turn in degrees in combina tion with the speed Adjusted value influences the...

Страница 81: ...ation limit value position 20 can be either adjusted or calculated The base of this value depends on ships speed and turn radius or rate of turn If the maximum tolerable acceleration is known ask the...

Страница 82: ...ety sea trial After the values are input procedure to press SET and the warning is enabled see position 17 an alert is triggered on exceeding this acceleration limit and indicated by an acoustical sou...

Страница 83: ...n Position Monitoring This function compares position information from different source It compares either the position information of two different sensors or the information from one source with Dea...

Страница 84: ...there is a comparison between GPS0 and a dead reckoned posi tion The limit of 530m is not exceeded but there is a difference of approx 300m to the south Figure 36 Display for the Position Monitoring f...

Страница 85: ...line drift line An alert was activated and acknowledged The last drift direction is displayed dotted line drift line Drift changed The dead reckoning position jumps back onto the GPS0 position and ado...

Страница 86: ...steps displayed are 1m 10m 100m 1000m 2m 20m 200m 2000m 5m 50m 500m 5000m The example in Figure 38 shows one range ring at a distance of 200m from the centre and a second range ring at a distance of...

Страница 87: ...OPERATION AUTOPILOT NautoPilot 5000 Series 75 4002 DOC010102 Edition September 2014 Figure 39 Displays for Position Monitoring adjustments see display below 1 2 3 4 5 6 7 8 9 10 11 12 13 14 15...

Страница 88: ...splay shows the direction of the rudder angle Figure 39 6 Softkey for switching to a Setup Dead Reckon display Figure 39 7 Softkey for switching to the previous display Figure 39 8 Softkeys for changi...

Страница 89: ...influences the position of Dead Reckoning on the display Value range 000 0 to 359 9 in increments of 0 1 Figure 39 15 Softkey for adjusting the Off Position Limit This value is the alarm threshold for...

Страница 90: ...September 2014 2 3 5 6 Ship Data display Figure 41 Display of Ships data example All the above mentioned ship s data can be edited in the configuration mode see Ser vice Manual except for the Software...

Страница 91: ...ction to change current parameters values data sources and limits Depending which operation the Page softkey is currently performing one of the follow ing displays will be shown Display with no indica...

Страница 92: ...eed value used by the controller Value range for manual adjustment 5 0kn to 90 0kn in increments of 0 1kn Figure 43 5 Heading monitor displays the configured limit for the Heading Monitor alert Value...

Страница 93: ...ed or RoT Radius adjustments 2 3 6 1 Heading Figure 45 Heading source selection Page function After pressing the Heading softkey the display will appear as shown in Figure 45 Heading values cannot be...

Страница 94: ...navigation data evaluation and distribution GPS Compasses are handled like Gyro Compasses The selected GPS Compass is displayed Gyro GPS 2 if there are more than one GPS Compass Magnet If only one mag...

Страница 95: ...tem CCRS Therefore the heading source cannot be selected see Figure 46 In this case the respective radio button is neither visible nor operable If the heading sensor is not installed or defect than th...

Страница 96: ...ure stating No Heading Figure 47 Figure 48 Speed sensor and Heading sensor doubtful For doubtful values of speed and heading sensor the background turns into yellow color Figure 48 Figure 49 Speed sen...

Страница 97: ...eminds the operator of acknowledging the input by pressing the SET button located on the Autopilot s frontplate Value range 5 0kn to 90 0kn in increments of 0 1kn If manual speed is selected it is sho...

Страница 98: ...in to 500 min in increments of 1 min Radius Use the and softkeys to adjust the min radius for a heading course change Press the SET button to transmit this value to the controller Value range 0 1NM to...

Страница 99: ...guration Refer to Installation Manual chapter on Max Rudder Angle Figure 52 2 Heading monitor activates an alert if the difference between the Gyro heading and the Magnet heading exceeds this value se...

Страница 100: ...f the OFF position according to section 2 3 5 5 is exceeded Value range 0m to 9999m in increments of 1m if configured Figure 52 7 Only for NP 5400 and NP 5500 Adjustment of the acceleration limit see...

Страница 101: ...displayed after a change has been made see Figure 54 Figure 53 3 Softkey for changing entering the counter rudder parameter see also section 1 3 3 Value range 0 to 9 in increments of 1 Use the and sof...

Страница 102: ...nd yellow and the LED for alarm and SET request light up yellow During this test it is possible to check that the LEDs are lit and that the display shows no blank dark dots The following tests request...

Страница 103: ...d counter rudder The application of parameter sets is only possible when the selected mode is non adaptive see Figure 55 The check box for adaptive mode is not active For selection see Service Manual...

Страница 104: ...OPERATION NautoPilot 5000 Series 92 4002 DOC010102 Edition September 2014 2 3 8 1 Calling up parameter sets Figure 56 Displays for parameter sets 1 2 3 4 5 6 7 8...

Страница 105: ...ameter set M1 this parameter set is selected via the check box If a parameter set is selected Parameter Set x will be dis played in the upper right corner of the display Figure 56 3 to Figure 56 6 Par...

Страница 106: ...a parameter set Figure 57 Modification of a parameter set 1 2 3 4 5 Please note A modified parameter value will not be automatically transmitted to the controller it is stored only After the modifica...

Страница 107: ...o make a change Changes must be acknowledged with SET Figure 57 3 Softkey for changing entering the yawing parameter see also section 1 3 1 Value range 1 to 6 in increments of 1 Use the and softkeys t...

Страница 108: ...OPERATION NautoPilot 5000 Series 96 4002 DOC010102 Edition September 2014 Intentionally left blank...

Страница 109: ...be tween set course or track course and actual heading 2 3 6 4 Figure 52 Drift kn Drift for Dead Reckoning 2 3 5 5 Eco Prec Softkey selection between Economy mode and Precision mode 2 3 Heading Headi...

Страница 110: ...1 3 4 2 3 5 1 2 3 5 2 2 3 6 5 Speed Speed for acceleration limit 2 3 5 4 Track Limit Autopilot Autopilot alarm activation if the adjusted track limit is exceeded Page function 2 3 6 4 Warning Activat...

Страница 111: ...r 2014 4 Modes of operation recommended adjustments settings examples 4 1 Explanation of symbols used at the AutoPilot Key activation LED flashing LED off LED on Audible signal on Audible signal off R...

Страница 112: ...rom time to time during a sea trail To prevent dangerous situations check the traffic at sea and the sea area before activating any control function with the Autopilot The Course Control or Track Cont...

Страница 113: ...ot allow a heading change via the Autopilot A display is selected which does not display the heading change value for example during adjustments In this case the unintentional operation of the rotary...

Страница 114: ...and can be adjusted via the Page function Softkeys Page Value Speed see also section 2 3 6 2 and Figure 50 Speed value The speed value must be valid If speed value is invalid select Manual Speed see a...

Страница 115: ...lay Standby Heading Control or Tiller If an override tiller is activated the Autopilot displays Override The Heading Control LED green shows the activated Heading Control mode after release of Overrid...

Страница 116: ...layed at the top right corner of the display Course Ctrl Pressing the Heading button activates Heading Control mode The mode change is displayed at the top right corner of the display Course Ctrl Head...

Страница 117: ...for NP5100 and NP5300 only Track Control mode is active The mode is displayed at the top right corner of the display Track Ctrl All track data are generated and monitored from a con nected ECDIS The A...

Страница 118: ...g Control mode Standalone application HAND AUTO Switching the Main Steering Switch into position HAND switches the Autopilot to Standby The lower LED for standby will light up yellow The mode change i...

Страница 119: ...Unit AS switches the Autopilot control mode off Observe section 1 4 8 Note An activation of the Autopilot with the Override Operator Unit AS button Autopilot switches the Autopilot into Heading Contr...

Страница 120: ...alue with turned rotary knob and pressed rotary knob SET function of the rotary knob Changing the ordered heading directly by pressing and turning the rotary knob simultaneously Preselected heading Ac...

Страница 121: ...g Turning the rotary knob will change the preselected heading value Please note After approx 15 seconds of inactivity from the rotary knob the primary set heading value will be displayed again This va...

Страница 122: ...primary heading value is displayed again This value is displayed in italic and colors are inverted The SET LED near the button will flash request to press the SET button Set Heading 125 8 Pressing th...

Страница 123: ...125 8 Pressing and turning the rotary knob will change the set heading value This value is displayed in italic and colors are inverted Set Heading 125 8 Releasing the rotary knob will transmit the cur...

Страница 124: ...l to Course Con trol should not be performed during a heading change in Heading Control because of the limited turn rate and the fact that the actual heading is set as the set course at the same time...

Страница 125: ...2 3 6 4 RAD RoT Adjust RAD RoT values to be less than the ship s maxi mum values Softkey Rad RoT see also sections 2 3 and 2 3 6 3 Course Trim Adjust Course Trim threshold for deviation from Set Cour...

Страница 126: ...to Course Control mode Heading Control mode is active The mode is displayed at the top right corner of the display Heading Ctrl Pressing the Course button activates the Course Control mode The mode c...

Страница 127: ...le 27 Procedure to switch off Course Control mode Standalone application HAND AUTO Switching the Main Steering Switch into position HAND switches the Autopilot to Standby The lower LED for standby wil...

Страница 128: ...S switches the Autopilot control mode off Observe section 1 4 8 Note An activation of the Autopilot with the Override Operator Unit AS button Autopilot switches the Autopilot into Heading Control The...

Страница 129: ...anew There are 2 ways to change a Course Over Ground COG value Changing preselected COG value with rotary knob and SET button Direct COG change Preselected Changing the value with the rotary knob and...

Страница 130: ...This value is displayed in italic and bold The SET LED near the button will flash request to press the SET button Set Course Over Ground 125 8 Pressing the SET button transmits the preselected value t...

Страница 131: ...flashing request to press the SET button Set Course Over Ground 125 8 Pressing the rotary knob transmits the preselected value to the controller as the new Set Course Over Ground The value is now dis...

Страница 132: ...ppropriate message will be displayed at the top bar If a valid position is available but a position jump is detected a switchover to Heading Control mode is performed to prevent an unwanted rudder mov...

Страница 133: ...see also section 2 3 6 1 and Figure 44 Gyro or GPS must be selected It is not possible to use magnetic heading Heading value The heading value must be valid Check actual heading as this will be the s...

Страница 134: ...Page see also section 2 3 5 5 and 2 3 6 4 Requirements for GO TO WAYPOINT Manoeuvres Check ship s position and heading in reference to current waypoint see section 1 4 5 1 Figure 11 for NP5100 to NP54...

Страница 135: ...thing herein shall apply to ships solely navigating the Great Lakes of North America and the River St Lawrence as far east as a straight line drawn from Cap des Rosiers to West Point Anticosti Island...

Страница 136: ...to the navigational system is configured to NMEA 4800 Bd or NMEA 38400 Bd see also Installation Manual The navigational system has already transmitted an APB NMEA telegram according to IEC 61162 1 th...

Страница 137: ...eed see also section 2 3 6 2 and Figure 50 Position source If only one position sensor is available and no speed source is available it is not possible to activate Course Control see also section 2 3...

Страница 138: ...olour The cause of alerts should be resolved Alerts should be acknowledged 4 5 4 Switching off Track Control and Waypoint Steering mode Track Control and Waypoint Steering can be stopped by activating...

Страница 139: ...e change is displayed at the top right corner of the display Track Ctrl Manual or Tiller Activating a NautoSteer steering device Tiller AS or Hand wheel AS with an Override Operator Unit AS switches t...

Страница 140: ...will stop this mode An automatic switchover to Heading Control mode is performed On straight leg The RAD and RoT values and the rudder limit which were adjusted by the operator are now used and displ...

Страница 141: ...lot Operator Unit upgrade A check reconfiguration should be performed after changing a licence key See the Service Manual for the NautoPilot Operator Unit 5 2 Software update A software update should...

Страница 142: ...the inactive NautoPilot Operator Units at the top left corner of the display above the control mode Figure 58 Master and Slave NautoPilot Operator Units NP5x00 Slave NP5x00 Master NP5x00 Slave Only th...

Страница 143: ...perator Unit only The adjusted dimming value is executed for all con nected NautoPilot Operator Units if the inactive one is switched to an active unit Figure 59 Principle of master slave NautoPilot O...

Страница 144: ...en LED off and yellow LED off show the Manual mode Green LED off and yellow LED on show the Standby mode 5 3 1 OU Display indication This information is displayed at an inactive NautoPilot Operator Un...

Страница 145: ...ellow LED Heading Control mode is selected at the active NautoPilot Operator Unit The green LED is on The yellow LED at the inactive NautoPilot Operator Units shows the selected control mode The top r...

Страница 146: ...The alert Operator Unit is not active Activate now is dis played Confirm by pressing Set But this NautoPilot Operator Unit is in now in Heading Con trol mode The Autopilot remains in initial control...

Страница 147: ...arately for usage Both ore more NautoPilot Operator Units must be switched on for operation S A switching over Master to Master is possible only in Heading Control mode of the Source Master The Destin...

Страница 148: ...OPERATION NautoPilot 5000 Series 136 4002 DOC010102 Edition September 2014 Intentionally left blank...

Страница 149: ...fore continuing with a control mode Please note There are two ways to display alerts Short text Long text Short text is for acknowledged alerts but the cause is still present Long text is for unacknow...

Страница 150: ...ert example Track Control Interrupted No Position at the top bar of the display toggles between both text lines Table 33 Alarms messages alerts Colour Meaning visual Acoustic signals Red Alarm flashin...

Страница 151: ...ne text line those will be displayed one after another In this case the alerts will also be numbered 1 2 If the cause which leads to an alarm or a warning is eliminated without acknowledgement pressin...

Страница 152: ...nowledged alarm A red triangle An exclamation mark in the middle of the triangle This icon is presented together with the alert text A Active responsibility trans ferred alarm A red triangle An arrow...

Страница 153: ...y trans ferred warning A yellowish orange circle An arrow pointing towards the right in the middle of the circle This icon is presented together with the alert text In the meaning of This warning is a...

Страница 154: ...tus information There is more than one NautoPilot Operator Unit and another NautoPilot Operator Unit is activated Activate Track Control only on ECDIS Activate Track C An attempt to activate Track Con...

Страница 155: ...plug B10 automatic hand Check data transmission between NautoPilot Operator Unit and Autopilot Interface Check steering selector switch Check Autopilot Interface APIF autopilot override APIF autopilot...

Страница 156: ...M at the Autopilot Interface and restart the system Re configure the sys tem Autopilot Interface APIF DA converter fail APIF DA convert Incorrect analogue output actual rudder value Refer also to the...

Страница 157: ...configuration of Magnetic Compass input at the Autopilot Interface APIF pos sensor fail Chk Position Sens APIF pos senso There is no positional data from a position sen sor at the corresponding interf...

Страница 158: ...APIF soft restart APIF soft rest Defect in Autopilot Interface electronics watchdog is activated External EMC interference Refer also to the manual for the Autopilot Inter face Replace Autopilot Inte...

Страница 159: ...Occurs when a Track Control or a Course Control mode is aborted and the corresponding alert is not acknowledged Occurs when an alert which announces a track change manoeuvre is not acknowledged Occur...

Страница 160: ...e and master Nauto Pilot Operator Unit has failed The connection between GUI and internal control ler has failed slave to master Check network configuration see Service Manual Check ethernet connectio...

Страница 161: ...art Track Control anew Device activation cur rently not possible Device activatio Attempt to start Heading control mode but the Au topilot cannot activate it self Another steering control element Hand...

Страница 162: ...difference between heading values during sensor change is greater than the configured heading jump threshold Check heading sensors Heading Monitor is dis abled Heading Monitor Value change of Heading...

Страница 163: ...Test 0 Currently not used development only Missing n APIFs Select manual Steering Mode Missing n APIFs There is one Autopilot Interface less than con figured refer also to the manual for the Autopilo...

Страница 164: ...of NautoPilot ap plication is not suitable for this mode example NP 5100 Check type of Autopilot Check configuration and license key No Gyro Heading Se lected No Gyro Heading Attempt to start Course...

Страница 165: ...ent see also section 2 3 5 5 Check position sen sor s Check position sen sor s Check position sen sor s No Position Monitor DR not available No Position Mon Because of a drop out of a speed sensor a D...

Страница 166: ...section 2 3 6 2 Check speed sensor s or select Manual Speed see section 2 3 6 2 Check speed sensor s or select manual speed see section 2 3 6 2 Reset NautoPilot Operator Unit by switching off the sup...

Страница 167: ...n sensor for DR dead reckoning if off and the second position is now a DR position Check Position Sensors No XTE No XTE Wrong operator input Attempt to start Track Control but the ECDIS has not transm...

Страница 168: ...adjustments see section 2 3 6 4 Check OFF Heading Limit adjustments see section 2 3 6 4 Check the control loop for the Track Control One Software Package found one Software Pac At connected USB stick...

Страница 169: ...imit see section 2 3 5 4 Check RAD RoT see section 2 3 6 Reduce speed Check influence of ac celeration on this ma noeuvre Remote Operator Unit Failed Remote OU Failed There are more than one NautoPilo...

Страница 170: ...l Data software already existing Check software version to be installed see section 2 3 5 6 Also refer to Installation Manual section on Soft ware Archive Speed jumped Speed jumped Difference between...

Страница 171: ...netic Com pass TMC Reference se lected TMC Ref selected Status information only Heading sensor is selected as Magnetic Compass by an external device Too many APIFs Check the configuration Too many API...

Страница 172: ...for Course trim see section 2 3 6 4 Check the control loop for the Course Trim see section 2 3 6 4 Switch over to Track Control or Heading Control Track End 000min Track End 000min 000 minutes left t...

Страница 173: ...type Change ships heading towards the waypoint TC Interr Go to Wpt Impossible Heading Trck Ctrl Interr When selecting Track Control with Go TO Waypoint manoeuvre the heading of the ship deviates too...

Страница 174: ...ble For explanation of the error see section 1 4 5 1 7 4 Approach the track by Heading Control and then select Track Control again TC Interr Wheeloverline Overrun Trck Ctrl Interr During Track Control...

Страница 175: ...ast in one direction Safety measurement to prevent a full circle Stop direct heading change mode Updating software Updating software Is displayed during a software update It is not allowed to operate...

Страница 176: ...s red mess age bar generates a Central Alarm For standalone application only with Autopilot Interface The alarms described below are shown in the NautoPilot Operator Unit message bar They are transmit...

Страница 177: ...eck configuration The Autopilot has performed an automatic Reset The first action to take when one of the above alarms has been activated should be to reset the NautoPilot Operator Unit either by swit...

Страница 178: ...splayed at the top bar of the display see section 6 Set CHECK SET HEADING Select a new Set Heading three pulses repeated every 7 seconds Set Only after the heading value is checked or changed and the...

Отзывы: