7
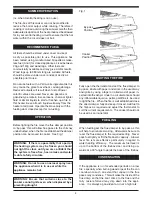
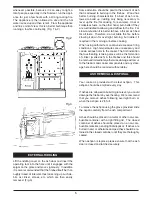
This plate is fitted by removing the hotplate and slid-
ing the insulating plate down between the boiler and
oven side. Make sure that the spacing projections are
facing the oven and the top flange is resting on the
boiler. Replace the hotplate.
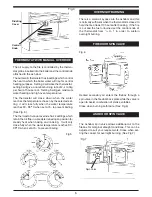
The boiler insulating plate may be used with the sum-
mer plates or on its own as a means of reducing the
boiler output and increasing the heat to the oven.
(See Fig. 8)
BOILER INSULATING PLATE
Fig.8
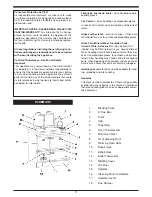
SUMMER GRATE & HEAT SHIELD
ASSEMBLY INSTALLATION INSTRUCTIONS
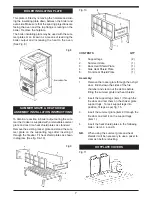
To obtain a reduction in boiler output during the sum-
mer the Cooker is supplied with a removable summer
grate and cast iron heat shield plates as standard.
Remove the existing rocker grate and stand the sum-
mer grate on the supporting legs after inserting it
through the firedoor. Fit heat shield plates as shown
in diagram. (See fig. 9 & 10)
Fig.9
CONTENTS
QTY
1.
Support legs
(2)
2.
Summer Grate
(1)
3.
Back Heat Shield Plate
(1)
4.
Side Heat Shield Plate
(2)
5.
Front Heat Shield Plate
(1)
Assembly:
1.
Remove the rocker grate through the ashpit
door. Brush down the sides of the fire
chamber and clean out the debris before
fitting the summer grate and heat shields.
2.
Insert the support legs (item 1) through the
fire door and rest them on the shaker grate
support lugs. To lock support legs into
position, fit legs as per fig. 15.
3.
Insert the summer grate (item 2) through the
fire door and rest it on the support legs
(item 1).
4.
Insert the heat shield plates in the following
order - items 3, 4 and 5.
NB.
When using the summer grate and heat
shields it will be necessary to use a poker to
clear ash before refuelling.
Fig.10
HOTPLATE COVERS
Fig.11
Содержание 370 SFW
Страница 11: ...11 EXPLODED VIEW ...
Страница 13: ...13 NOTES ...
Страница 14: ...NOTES 14 ...
Страница 15: ...15 NOTES ...
Страница 29: ...13 NOTES ...
Страница 30: ...14 NOTES ...
Страница 31: ...15 NOTES ...


