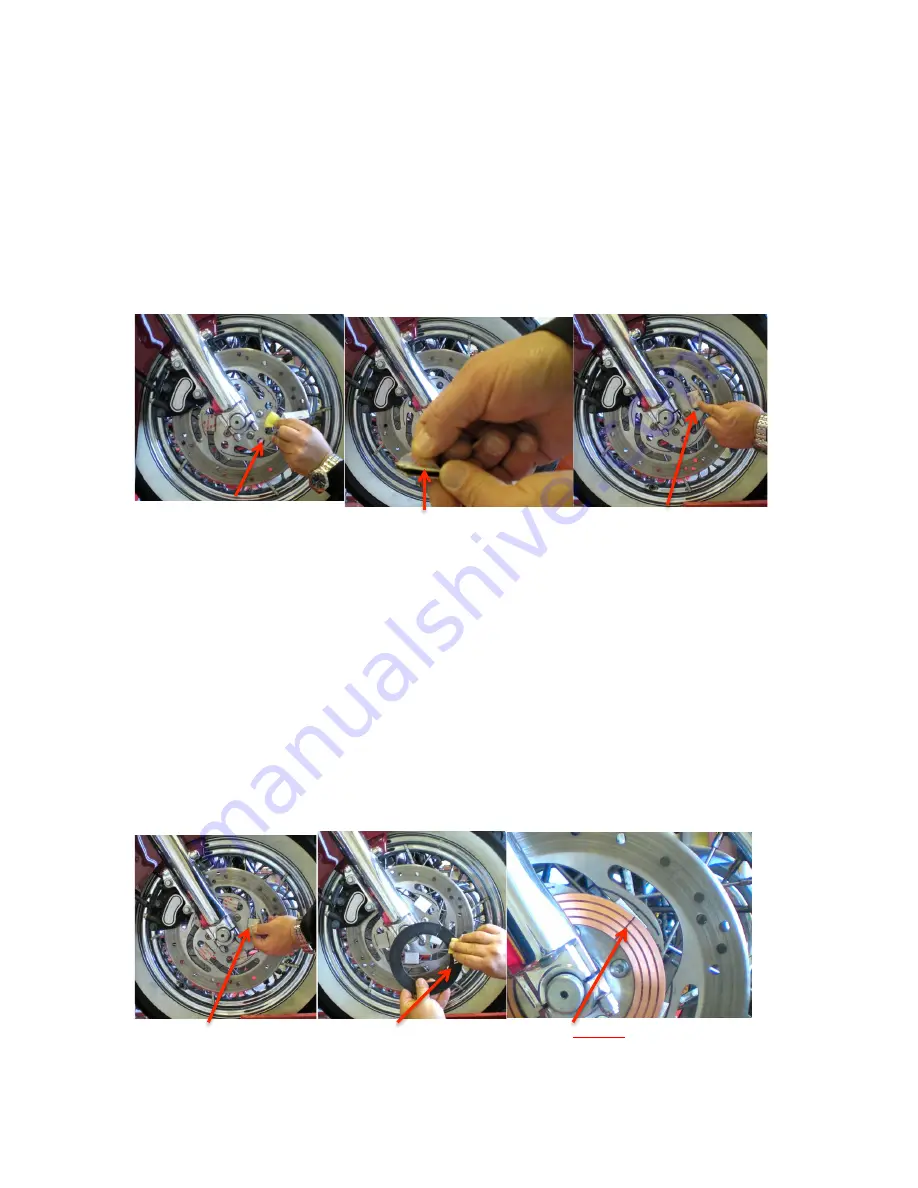
There is a foil pack of adhesive promoter included in your kit. Once you know where the
Velcro will mount, tear off a corner of the pack and pull a section of the applicator out
without removing it. Wipe the entire area with the promoter, peel the protective film from
the double-stick on one side of the Velcro and apply to the rotor. Press and hold it there
for a minute while working all the edges against the rotor. It is best that this is done while
the promoter is still wet. That’s why you are reading these instructions all the way
through before starting. Right? So you will know what to expect and be ready.
Apply adhesive promoter Peel protective film Work strip onto wheel.
When you are done with the promoter, push it back into the foil pack and fold an edge of
the pack over. This will keep the promoter from drying out until you need it again.
The same process is used for applying the PUC to the Velcro,
EXCEPT…the
split in
the ring must be in the middle of one of the Velcro sections!!
This is extremely
important as it aligns the edges of the split. Failure to do so WILL (not might) result in
damage.
Peel the protective film from the back of the Velcro, clean the back of the PUC and apply
the adhesive promoter. Use the natural features mentioned previously, or reference lines
you marked to set the PUC on the Velcro. Again, use pressure to make sure it is seated.
DO NOT TRY AND SEPARATE THE VELCRO BY PULLING ON THE PUC!!! If
you need to make an adjustment we will get to that in a minute, so just leave it alone for
now and let the adhesive set.
Remove film Clean & primer PUC Split
MUST
be on Velcro
Содержание PowerPUC G4
Страница 13: ...New line showing misalignment...
Страница 17: ...Alignment check 12 o clock position Good...
Страница 18: ...Alignment check 9 o clock position Still good...


