Installation and operating instructions
Q
X
³4000
³5000
³6000
³7000
³8000
³10000
³13000
³15000
³18000
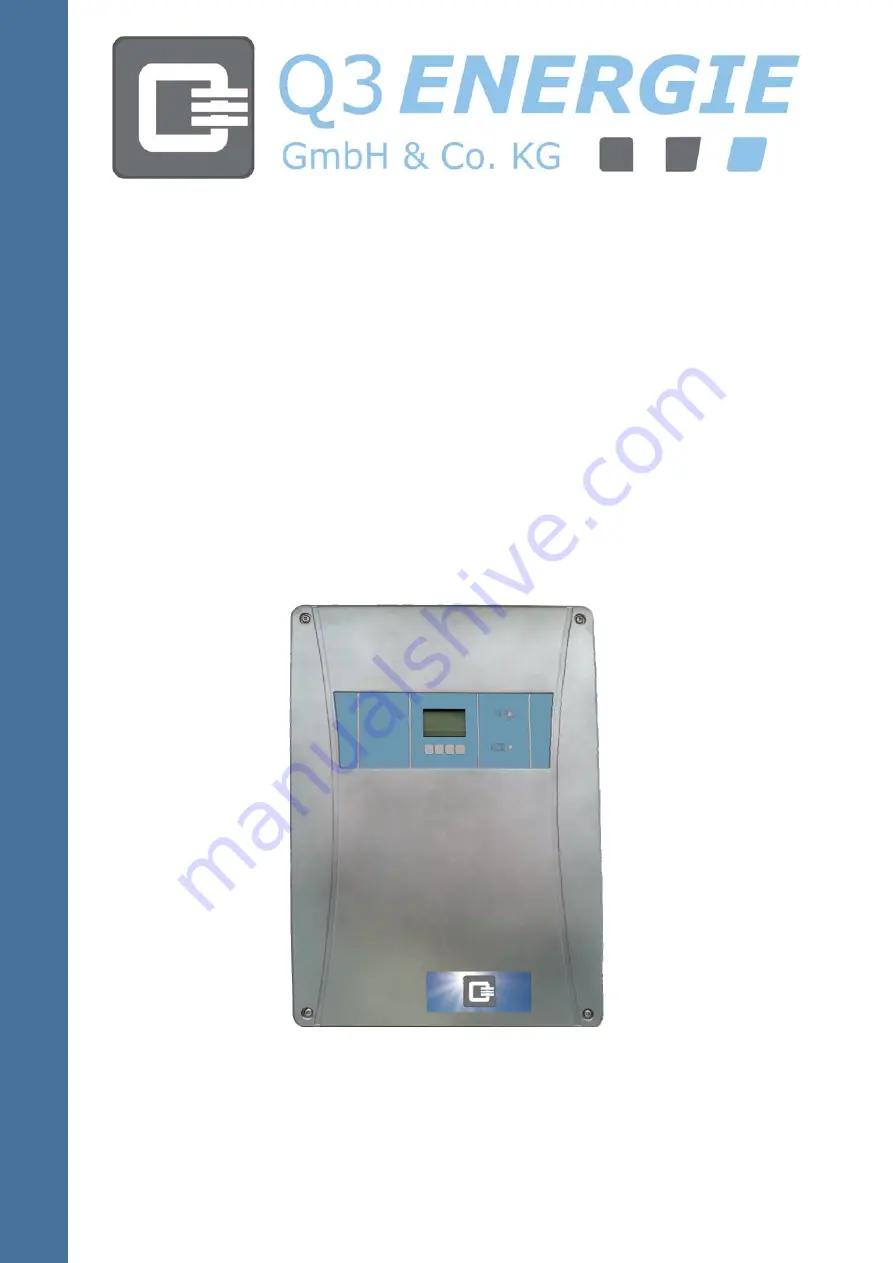
Страница 1: ...Installation and operating instructions QX 4000 QX 5000 QX 6000 QX 7000 QX 8000 QX 10000 QX 13000 QX 15000 QX 18000 ...
Страница 2: ...20 4 Installation 21 4 1 Installation site and minimum clearances 22 4 2 Unpacking the inverter 23 4 3 Installing the inverter 23 4 4 Electrical Connection 28 4 5 Connection range 29 4 5 1 QX 4000 8000 29 4 5 2 Internal connection area for accessories and network 30 4 5 3 QX 10000 18000 31 4 6 Earthing 32 4 7 FI RCD protection 33 4 8 AC mains connection 33 4 9 Assembling the DC plug in connector 3...
Страница 3: ... 1 Measurement values 73 5 4 2 Yields 74 5 4 3 Information 74 5 4 4 Group devices 75 5 5 Backing up data system recovery and inverter update 76 6 Operation and monitoring via the web interface 77 6 1 Operating data 77 6 1 1 Login 77 6 1 2 Overview 78 6 1 3 DC Input 80 6 1 4 AC Output 81 6 1 5 Progression 82 6 1 6 Event log 82 6 2 Settings 83 6 2 1 Language 83 6 2 2 Date and time 83 6 2 3 Location ...
Страница 4: ...te and comprehensive information This information corresponds to the device version at the time of printing Q3 ENERGIE takes no responsibility for direct indirect or incidental damage to persons or material caused by wrong interpretation of or unintended errors in these installation instructions Any liability on the part of the company Q3 ENERGIE for consequential damage arising from improper use ...
Страница 5: ...orrect and safe installation as well as smooth running of the system the user should study these instructions carefully All the information contained therein must be strictly observed This avoids any danger during installation and operation risks to the installer operator material damage In addition downtimes will be reduced and the reliability and service life of the system increased These instal...
Страница 6: ...heres gasses or dust Material risk no danger to humans If this instruction is not followed it may result in property damage Note This symbol indicates peculiarities and indicates tips and hints for handling the device Non observance of the safety instructions and danger warnings can lead to death or serious injury Warning danger level Signalword1 Probability Consequences DANGER Imminent danger Dea...
Страница 7: ...arning against hot surfaces Warning against an electromagnetic field Warning against explosion Warning of danger caused by batteries Warning against suspended loads Warning against ESD sensitive components Do not extinguish with water DC direct voltage or current AC alternating voltage or current Earth Denotes additional information and instructions Recycling marks Communauté Européennes CE markin...
Страница 8: ...nal power QX 4000 4kVA QX 5000 5kVA QX 6000 6kVA QX 7000 7kVA QX 8000 8kVA QX 10000 10kVA QX 13000 13kVA QX 15000 15kVA QX 18000 17kVA 1 3 Documentation structure Keep all the instructions for the PV inverter and the integrated components safely together with the system documentation The system documentation must always be kept available The following documents are delivered together with the PV i...
Страница 9: ...e electrical equipment is part of the installation in readiness for operation Note that the electrical installation and the connection of the inputs and outputs must be carried out in accordance with the local regulations Installation must be carried out by qualified personnel The general setup and safety instructions concerning handling and installation must be observed 2 1 Qualified personnel WA...
Страница 10: ...diately null and void in such cases CAUTION Safety risk if unsuitable PV modules are used The inverter is not suitable for use with PV modules that require pole earthing Only ever operate the inverter with protection class II PV generators Only ever connect to PV modules as energy sources The inverter must be installed as a stationary installation The inverter and all components of the PV system m...
Страница 11: ...akage currents A proper earth connection must be ensured before connecting to the mains DANGER Risk of explosion and fire if not installed correctly DANGER Attention risk of electric shock energy storage device is discharged under time control 5 minutes WARNING When connected all connectors are at mains potential Dangerously high voltages can also be present at the connectors becauseon device inte...
Страница 12: ...t not be disconnected The system must not be operated without a protective earth CAUTION Earthing the PV generator Pay attention to the local regulations for earthing the PV modules and the PV substructure Q3 ENERGIE recommends combined connection and earthing of the substructure and other conductive areas in order to achieve the highest possible protection for the system and for persons CAUTION I...
Страница 13: ... service personnel You can no longer change the country code once it has been set and acknowledged In compliance with regulations the country code can only be changed by Q3 ENERGIE service personnel or the installer NOTE Withdrawal of the operating licence If you operate the inverter with the wrong country code the power supply company can withdraw your operating licence Q3 ENERGIE bears no liabil...
Страница 14: ...e g cooling elements can get hot during operation Allow the device to cool down before undertaking any maintenance work Comply with the regulations for selecting an installation site Keep ventilation openings free Do not store flammable or highly flammable materials near the inverter WARNING Outbreak of fire Dangerous voltages are present within the inverter even when fuses have blown For this rea...
Страница 15: ...ed out by an electrically skilled person Disconnect the PV inverter AC and DC side before starting work After disconnecting wait for at least 15 minutes to allow the internal electric storage devices capacitors to discharge Work on PV generators may only be carried out and supervised by persons with the appropriate specialist knowledge of the required safety rules Unauthorised personnel must be ke...
Страница 16: ...tring configuration can therefore be implemented with one device Integrated data logger and web server for online system monitoring Installation times are reduced in particular by the following features Plug Play installation without having to open the cover of the housing Direct connection to an irradiation and Temperature sensor Direct connection to a ripple control receiver without any addition...
Страница 17: ...ly QX 8000 18000 3 2 Scope of delivery 1 x inverter 1 x installation material 1 x power plug housing Phoenix Contact VC K T3 Z 1 x power plug contact insert Phoenix Contact VC TFS 5 PEA 1 x power plug cable gland PG21 Phoenix Contact VC K KV PG21 PV plug in connector plus Phoenix Contact PV CF S 2 5 6 6 x for QX 13000 18000 4 x for QX 8000 10000 PV plug in connector minus Phoenix Contact PV CM S 2...
Страница 18: ...l selected the inverter has two or rather three independent inputs each with its own MPP tracker Maximum Power Point This allows the operation of various sub generators also with different configurations string length alignment pitch on one device Even projects with partial shading can be realised efficiently Thanks to its wide input voltage range and a high degree of flexibility in the design of ...
Страница 19: ...rameters can be viewed at any time on the graphical display Intuitive user navigation allows you to access the sub menus quickly using the four navigation keys Please visit our website for the applicable standards of different destination countries and the CE declaration of conformity 3 4 1 Block circuit diagram Function elements No DESCRIPTION No DESCRIPTION 1 PV input plug 6 RCD 2 PV circuit bre...
Страница 20: ...n the return current cannot be greater than the maximum short circuit current of the intact string in the event of a fault As only the same strings may be connected in parallel there is no danger of the return current exceeding the current load capacity in the cable wiring of the defective string with such a configuration So no additional string breaker is needed with this configuration and there ...
Страница 21: ...safety instructions concerning handling and installation must be observed CAUTION Secure the PV inverter against unintentional start up CAUTION The DC circuit breaker on the underside of the device must always be kept accessible CAUTION The electrical supply cable must be protected by an upstream circuit breaker which is accessible at all times please refer here to Chapter 10 1 Technical data CAUT...
Страница 22: ...ed for vertical wall mounting The inclination of the device from the vertical to the left right and rear must not exceed a maximum of 10 The device must not be installed inclining forwards or horizontally The ambient Temperature must be between 20 C und 50 C Humidity must be between 0 and 95 non condensing At least the following clearance distances must be kept in order to ensure sufficient coolin...
Страница 23: ... Place the inverter carton with the underside downwards Unpacking No Action 1 Open the box with a suitable tool 2 Remove the accompanying documentation and the mounting parts 3 At least two persons should now remove the inverter from the carton To do this take hold of the long side of the inverter with two hands and lift the upright inverter up and out of the carton 4 3 Installing the inverter App...
Страница 24: ..._____________________________________ Q3 ENERGIE Installation and operating instructions QX series 24 109 Version 1 0 Stand 27 04 2015 Installation and operating instructions QX series 4 3 1 QX 4000 8000 Minimum clearance inverter group Wall mounting bracket ...
Страница 25: ...being lifting out accidentally Installing the inverter No Action 1 Use the wall mounting bracket as a drilling template to mark the positions of the drill holes at the installation site 2 Drill the holes 3 Screw the wall mounting bracket to the intended subsurface with suitable mounting material 4 At least 2 persons should now hang the inverter on the prepared wall mounting bracket 5 Fix the inver...
Страница 26: ..._________________________ Q3 ENERGIE Installation and operating instructions QX series 26 109 Version 1 0 Stand 27 04 2015 Installation and operating instructions QX series 4 3 2 QX 10000 18000 Minimum clearance inverter group Wall mounting bracket Wall mounting bracket ...
Страница 27: ... drill holes at the installation site 2 Drill the holes 3 Screw the wall mounting bracket to the intended subsurface with suitable mounting material 4 At least 2 persons should now hang the inverter on the prepared wall mounting bracket The two persons should for example each carry the inverter with one hand in the ventilation openings on its side and the other hand holding the device from underne...
Страница 28: ...tputs must be carried out in accordance with the local regulations CAUTION Safety risk if unsuitable PV modules are used The inverter is not suitable for use with PV modules that require pole earthing Only ever operate the inverter with Protection Class II PV generators modules and cabling Only ever connect to PV modules as energy sources CAUTION Incorrect handling can damage the inverter CAUTION ...
Страница 29: ...ng instructions QX series 4 5 Connection range 4 5 1 QX 4000 8000 Piktographs Symbols Pos DESCRIPTION 1 DC disconnecter switch 2 Cable lead through for communication lines 3 Cable lead through for sensor remote lines 4 Cable lead through for AC connection 5 Earthing point 6 DC plug in connectors SUNCLIX for connecting the PV strings 7 DC plug in connectors SUNCLIX for connecting the PV strings 8 V...
Страница 30: ...ections for the accessories and the network interface have been moved to the inside of the housing DANGER Attention risk of electric shock energy storage device is discharged under time control 5 minutes The respective relevant part of the connections is dealt with separately in the following chapters of the description Attachment for cable shield Plug in connection designation Pos DESCRIPTION 1 C...
Страница 31: ...ch 2 USB port 3 Communication port selectable Ethernet RS485 4 Potential free make contact 5 Communication port RS485 6 Sensor connection radiation Temperature S0 7 Remote connection connection for external ripple control receiver 8 AC connection grid connection 3 phase 3L N PE 9 Connection for fan left 10 Connection for fan right 11 Earthing point 12 6 x DC plug in connectors SUNCLIX for connecti...
Страница 32: ...ug must be inserted and firmly fixed to the device The power plug must not be removed if the generator is connected otherwise the earth connection will be broken The relevant regulations in some countries in which the device is installed require a second protective earth A second permanently installed protective earth can be connected to the inverter at the protective earth terminal screw M6 inten...
Страница 33: ...rcuit breakers MCB Protect the inverter with a separate three pole MCB that complies with the maximum permissible protection for the inverter as indicated in Chapter 10 1 Technical data This protects the cable and the inverter in the event of a fault and can be used where necessary for disconnecting the power supply for example during maintenance Screw type fuses must not be used The protection mu...
Страница 34: ...able length The following table shows the maximum cable lengths in dependence on the cable cross section The maximum cable length should not be exceeded in order to limit the ohmic voltage drop in the cable to 1 Cable length Device Max Current Minimum cable cross section Max Cable length QX 4000 QX 5000 8A 5x 1 5mm 24 m 5x 2 5 mm 40 m 5x 4 mm 64 m QX 6000 10A 5x 1 5 mm 19 m 5x 2 5 mm 32 m 5x 4 mm ...
Страница 35: ...In order to safeguard the designated protection class please ensure that the connection cable and the gland match The correct PG gland will prevent any water penetrating the plug connector It also serves as strain relief WARNING Risk of fatal injury due to electric shock Disconnect the power supply connection before connecting the device to the AC power supply grid Check for absence of voltage and...
Страница 36: ... 18000 with wire end ferrule Recommendation use flexible cable to make installation easier B Cable diameter QX 4000 8000 9 17mm QX 10000 18000 VC K KV PG21 14 18 mm VC K KV PG21 17 20 5 mm Scope of delivery includes VC K KV PG21 14 18 mm C Stripping the sheath QX 10000 18000 approx 40mm QX 4000 8000 approx 80mm D Stripping length approx 12mm Ensure the PE core is 5mm longer than the L and N cores ...
Страница 37: ...t opened NOTE The cable gland seals the housing against humidity and relieves the cable from mechanical stressing AC connections work steps No Action 1 Observe the technical connection requirements TAB of the power supply company 2 Check the supply voltage and compare it with the inverter type plate 3 Switch off the DC switch disconnecter on the inverter 4 Prepare the AC grid cable as shown 5 Conn...
Страница 38: ...from the earth potential PE A sufficiently large earth resistance of 1MΩ must be ensured WARNING Never disconnect the SUNCLIX plug in connector while under load WARNING Use only the Photovoltaic plug in connectors SUNCLIX from Phoenix Contact that are included in the scope of the delivery Please observe the manufacturer information when assembling the DC device plugs WARNING Use only 2 5 6 mm sola...
Страница 39: ...ting instructions QX series Tools needed Slotted head screwdriver with 3 mm wide blade Materials needed PV plug in connector PV plug in connector PV1 F solar cable Design of DC plug in connector Pos DESCRIPTION 1 Sleeve 2 Contact and clamping spring 3 Contact insert 4 Rubber seal 5 Cable gland Preparing the PV cable No Action 1 Strip the cable back 15 mm Take care while doing this not to cut off a...
Страница 40: ...ires carefully until it will go no further You must be able to see the wire ends in the spring 3 Press down the spring Make sure the spring has snapped into place 4 Push the insert into the sleeve 5 Tighten the screw connection with a torque of 2 Nm Opening the PV plug in connector removing the cable No Action 1 Unscrew the screw connection of the cable 2 Release the DC plug in connector by prying...
Страница 41: ...s apply to the connected PV generator for each input A B and C The generator must be dimensioned in such a way that the lowest open circuit voltage calculated for the lowest Temperature that can occur at the installation site is lower than the maximum open circuit voltage of the inverter as indicated in the technical data A safety clearance of 50V is recommended for the lowest Temperature If 2 str...
Страница 42: ...necter must be in the position Off WARNING Risk of electric arc if the PV cable is pulled out The plug connector of the PV generators must not be disconnected while under load and only with the DC switch disconnecter switched off position Off When delivered from the factory the inverters are programmed for three independent inputs Below you can see the preferred circuit configuration Input A Input...
Страница 43: ... These configurations are summarised in the two illustrations below In this application one generator terminal box must be set In order to protect the inverter in the event of a fault the maximum total current of the PV strings connected in parallel must be limited to the short circuit current specified in the Technical Data chapter In addition the fuse protection in the generator terminal box mus...
Страница 44: ...ON If the DC string configuration is not configured correctly the MPP cannot be optimised There is risk of loss of yield The plus and minus connections of different MPP trackers must not be connected to each other The following threshold values for the DC input of the inverter must not be exceeded Threshold values at the DC Device Max MPP current Max short circuit current3 Maximum voltage with Tmi...
Страница 45: ...d assemble the DC plug in connector SUNCLIX as described above 3 Move the DC switch to the position Off 4 Carry out measurements to verify that both strings on an input each have the same electrical data e g open circuit voltage 5 Connect the PV strings to the selected female connectors of the device observe polarity and lock the plug in connector It is imperative that strings with different confi...
Страница 46: ...scope of the delivery Schematic drawing Pin configuration Sensor remote configuration Pin Meaning 1 5V 2 GND 3 Temperature 4 Radiation 5 S0 input Shield Shield Assembling the sensor plug remote No Action 1 Remove 28mm of insulation from the cable bent versions 35mm 2 Strip the cable 3 Shorten the shield to 12mm 4 Affix shielding foil 2 around the shortened shield 5 Strip single wire cores 11mm 6 P...
Страница 47: ...angeover contact 3 Relay 1 NC contact 4 Relay 2 NO contact 5 Relay 2 changeover contact 6 Relay 2 NC contact Communication sensor and remote connection pin assignments Pin Meaning 1 5V common supply 2 GND common supply 3 Ripple control receiver Input 1 4 Ripple control receiver Input 2 5 Ripple control receiver Input 3 6 Ripple control receiver Input 4 7 Reserved 8 Reserved 9 Temperature sensor ex...
Страница 48: ... 4 11 1 Radiation and temperature sensor An optional radiation and Temperature sensor can be connected to capture the solar radiation and the Temperature of the module The SIS 01TC T type sensor is approved as a radiation and Temperature sensor Connect the sensor with an UV stable shielded connecting cable taking care that there is a good connection between the cable shield and the plug housing Re...
Страница 49: ...ion Communication sensor and remote connection pin Pin Meaning 1 5V Common supply 2 GND Common supply 9 Temperature sensor external optional 10 Radiation sensor external optional Sensor Remote Belegung Pin Meaning 1 5V 2 GND 3 Temperature 4 Radiation 5 S0 Input Shield Shield Pin configuration Connect the connections as per the designation in the tables above Please pay attention to shield connecti...
Страница 50: ... the invoicing measurement device In addition the S0 interface can be used to optimise your own consumption for more information please refer to 7 2 10 Own consumption CAUTION Faulty functioning possible without shield connection 4 11 4 1 QX 10000 18000 Schematic drawing Pin configuration Assignment for S0 Interface Pin Meaning 1 Not used 2 GND 3 Not used 4 Not used 5 Interfaceninput S0 as perEN62...
Страница 51: ...on and operating instructions QX series 4 11 4 2 QX 4000 8000 Sensor and remote connection Communication sensor and remote connection pin Pin Meaning 2 GND Common supply 11 Interface input S0 as per EN62053 31 Connect the connections as per the designation in the tables above Please pay attention to shield connection as described in chapter 5 1 2 1 Internal connection area for accessories and netw...
Страница 52: ...there are several inverters the ripple control receiver is connected to only one of these information is transmitted from this inverter to the other inverters via the RS485 interface See chapter 5 11 Interconnecting an inverter group CAUTION Faulty functioning possible without shield connection The power limitation parameters are set as follows in the factory Contact 1 K1 at 0 rated output Contact...
Страница 53: ...es 4 12 1 QX 10000 18000 Schematic drawing Pin configuration Remote assignment Pin Plug Ripple control receiver 1 5V Common supply 2 Input 1 Relay 1 3 Input 2 Relay 2 4 Input 3 Relay 3 5 Input 4 Relay 4 Shield Shield Black large cross section or shielding Ripple control receiver connection No Action 1 Connect the ripple control receiver 2 Connect the signals of the ripple control receiver to the s...
Страница 54: ...0 8000 Sensor and remote connection Communication sensor and remote connection pin assignments Pin Meaning 1 5V Common supply 3 Ripple control receiver Input 1 4 Ripple control receiver Input 2 5 Ripple control receiver Input 3 6 Ripple control receiver Input 4 Connect the connections as per the designation in the tables above Please pay attention to shield connection as described in chapter 5 1 2...
Страница 55: ... relay in the factory default setting Please refer to 7 2 10 Own consumption for an alternative use CAUTION Please observe the maximum permissible current via the relay See chapter 10 1 Technical data 4 13 1 QX 10000 18000 Schematic drawing Pin configuration Relay Assignment Pin Plug Relay contakt 1 Output 1 Make contact 1 NO open in idle mode 2 3 Output 2 Make contact 2 COM 4 Recommended cable cr...
Страница 56: ...operating instructions QX series 4 13 2 QX 4000 8000 Relay contacts Relay contacts pin assignments Pin Meaning 1 NO contact 2 changeover contact 3 NC contact 4 NO contact 5 changeover contact 6 NC contact Connect the connections as per the designation in the tables above Please pay attention to shield connection as described in chapter 5 1 2 1 Internal connection area for accessories and network 3...
Страница 57: ...e individual devices and a twisted pair shielded cable for the field bus cable connection Observe the specifications of the plug connector here For Protection Class IP54 please use Phoenix Contact plug in connector types with the Protection Class IP67 for the Ethernet CAUTION The overall protection class for the entire device indicated in the data sheet can only be guaranteed if the specified plug...
Страница 58: ... Connecting via field bus 4 14 2 1 QX 10000 18000 Connecting two inverters Connecting several inverters For technical reasons bus termination the LAN interface Ethernet must be activated at the first and last inverter in the inverter group Socket 1 is configured as Ethernet with the setting LAN active Bus termination is then automatically activated for socket 2 In this configuration the Ethernet i...
Страница 59: ...unication All field bus subscribers must be connected as follows Connect all Field bus communication cables and all Field bus communication cables together Set up of an RS485 bus PV Wechselrichter 01 PV Wechselrichter 02 PV Wechselrichter n PV Wechselrichter 03 Please pay attention to shield connection as described in chapter 5 1 2 1 Internal connection area for accessories and network For technic...
Страница 60: ...terface is only available for internal service purposes for your installer as far as inverters QX 4000 8000 are concerned 4 16 Commissioning Risk of damage to the product During transport in cold weather or when the product is exposed to extreme temperature changes care must be taken that no moisture or inside the device condensation The product is to slowly adjust to room temperature before it is...
Страница 61: ... successfully completed feeding into the public grid will commence if there is sufficient radiation 4 18 Setting up communication and accessories Carry out all other settings via the display or the web server of the inverter NOTE You can change all settings at any time with the exception of the country settings 4 19 Making the connection to the web server of the inverter You can make the connectio...
Страница 62: ...untry code yourself once it has been set and applied In compliance with regulations the country code can only be changed by service personnel or your installer If the device has already been put into operation then the country code has already been set and in this case you will not be prompted again to enter it CAUTION Withdrawal of the operating licence If you operate the inverter with the wrong ...
Страница 63: ...he DC power of the PV generators connected to this inverter in the following step This setting is necessary for calculating the 70 rule 6 Setting the voltage increase protection In the next step please set the desired threshold value for the rise in voltage protection You must consult the power supply company for this setting 7 Setting the power reduction functions Set the type of power reduction ...
Страница 64: ...w it These keys below the display can be used to operate the device The information concerning the operation of the Web server can be found in chapter 7 Operation and monitoring via the web interface After commissioning the inverter operates independently Regular operation is not needed If there is sufficient module voltage the inverter starts feeding into the grid Control elements Control element...
Страница 65: ... supply company is limiting the feed in power actively 160 FLASHING ON The inverter is limiting the feed in power because the inverter temperature is too high div OFF ON Inverter fault Use display text and chapter 8 Status and fault handling LED 1 Infeed operation LED 2 Fault 5 2 Menu display The inverter switches the background lighting off in idle mode in order to save energy adjustable One pres...
Страница 66: ...the inverter on again then proceed as follows First connect the AC supply by switching the external circuit breakers to the ON position Next turn the DC disconnecter switch to the ON position If the fault appears again on the display please contact the Q3 ENERGIE Service Department you will find the contact data in Chapter 11 Contact Main menu No Menu Function 1 Measured values1 Measured values fo...
Страница 67: ..._______________ Q3 ENERGIE Installation and operating instructions QX series 67 109 Version 1 0 Stand 27 04 2015 Installation and operating instructions QX series The following pages show the menu structure of the inverter display Main menu Measured values yields and information ...
Страница 68: ...________________________________________________ Q3 ENERGIE Installation and operating instructions QX series 68 109 Version 1 0 Stand 27 04 2015 Installation and operating instructions QX series Main menu Group devices configuration and USB stick ...
Страница 69: ...1 Werteingabe min 1 max 999 step 1 Wechselrichter Währung Vergütungssatz Kurzbezeichnung Zähler Korrekturfaktor Zählerstandkorr Werteingabe min 0 max 999 9900 step 0 0001 Texteingabe max 3 Werteingabe min 0 9 max 1 1 step 0 001 Werteingabe min 0 max 2 000 000 step 1 default 0 Sensoren Einstrahlsensor Temperaturfühler Auswahlmenü vorhanden nicht vorhanden Auswahlmenü vorhanden nicht vorhanden Displ...
Страница 70: ...______________________________________________ Q3 ENERGIE Installation and operating instructions QX series 70 109 Version 1 0 Stand 27 04 2015 Installation and operating instructions QX series Configuration LAN RS485 S0 interface passwords service ...
Страница 71: ...you operate more than one inverter in your PV system we recommend assigning each inverter an unambiguous name so they can be identified easily An expected remuneration result is projected for your yield based on the remuneration rate The currency you set is used here as the currency unit Using the meter correction factor you can adjust your PV inverter meter to the calibrated invoicing measuring p...
Страница 72: ...te that each bus address must only be used once within the whole inverter group 5 3 8 S0 Interface If your inverter is connected directly to your invoicing measuring device meter you can adjust your inverter to the requirements of the invoicing measuring device Set the necessary pulses per measured kWh 5 3 9 Passwords In this menu item you can change your password or reset your web password to the...
Страница 73: ...very or software update 1 See Chapter 6 3 Configuration See Chapter 6 5 Backing up data system recovery and inverter update 5 4 2 Measurement values If you select the item measured values in the main menu the menu shown in the table will open Measured values1 No Menu Function 1 Total power Displays the current total power of the system 2 Normalized power Displays the normalized power to maximum po...
Страница 74: ...d over the current year 6 Total Displays the amount of energy gained since the device was installed 7 S0 Input Displays the energy measured by the electricity meter Requires an energy meter connected to the S0 interface 5 4 4 Information If you select the item Information in the main menu the menu shown in the table will open Information No Menu Function 1 Log book Opens the logbook 2 System info ...
Страница 75: ...rter n Opens the submenu for inverter n 4 Inverter 30 Opens the submenu for inverter 30 Group No Menu Function 1 1 Total power Displays the total power of the inverter group in kW 1 2 Revenues Displays the total yield of the inverter group in EUROS 1 3 Energy Displays the total energy of the inverter group in kWh 1 4 Total Opens the submenu in which the energy and revenues for the total operating ...
Страница 76: ...update Select submenu USB stick Select submenu USB stick the USB stick provides the following functions USB Stick No Menu Function 1 Save measured Saves the measured values on the USB stick 2 Backup system Saves the settings on the USB stick 3 Recover system Loads the settings from the USB stick 4 Software update Starts the firmware update from the USB stick The USB interface is only available for...
Страница 77: ...you can set the IP address and the net mask manually on the display of the inverter The DCHP client menu item LAN submenu DHCP must be deactivated for this NOTE The IP address could change if a new DHCP lease is allocated The IP address 192 168 1 100 is assumed for the example inverter in the rest of these Operating and Installation Instructions This could deviate from the IP address assigned by t...
Страница 78: ...t any time by clicking on Overview You can access every function directly via the navigation menu Each individual function is explained in this chapter In the window Inverter you can view all the key operating data of your inverter Inverter Field Function AC power Current power of the inverter E today Energy fed in today Total energy produced Energy fed in since installation CO2 saving Amount of C...
Страница 79: ...on Field Function Status The current status of the inverter Name The designation of the inverter e g Left inverter Location The location e g Hall 1 Description A freely configurable text Firmware Version The software version Serial number The serial number of your device In the window Last 24 hours you can see a diagram depicting the AC power W over time h You can see the yield time of the inverte...
Страница 80: ...racker for example you will only see one display DC Input Field Function DC Power total The current total power of your generator DC Power MPP Tracker 1 The partial power of MPP Tracker 1 DC Power MPP Tracker 2 The partial power of MPP Tracker 2 DC Power MPP Tracker 3 The partial power of MPP Tracker 3 MPP Tracker 1 DC Voltage The current DC voltage of MPP Tracker 1 MPP Tracker 2 DC Voltage The cu...
Страница 81: ...ut Field Function AC Power power The current feed in power of the system AC Power L1 The current partial power of line 1 AC Power L2 The current partial power of line 2 AC Power L3 The current partial power of line 3 AC Voltage L1 The current voltage of line 1 with respect to N AC Voltage L2 The current voltage of line 2 with respect to N AC Voltage L3 The current voltage of line 3 with respect to...
Страница 82: ...cted from a list of the desired measurement channel You can select the desired year from the selection menu Select year on the bottom edge of the screen Please note that you can only select years in which measured values were recorded If you select the desired week by clicking on the calendar graph this week is displayed in the fields for the daily values Clicking again on the graphs of the daily ...
Страница 83: ...ction menu and confirm the selection with Apply The complete user interface is now at your disposal in your language 6 2 2 Date and time You can set the date and time in this window either manually or automatically with an NTP5 server If you country location changes from summer to winter time and vice versa you can activate this summer winter changeover6 automatically To carry out the summer winte...
Страница 84: ...e Short name of the location Location Name of the location Description Additional information Remuneration factor Feed in remuneration in remuneration currency kWh Remuneration currency Currency defined for remuneration e g EUR USD AC energy meter calibration factor If there is an optional electricity meter S0 connected then an energy meter correction can be carried out Factory setting 1 0 Yield m...
Страница 85: ..._________________________________________________________________ Q3 ENERGIE Installation and operating instructions QX series 85 109 Version 1 0 Stand 27 04 2015 Installation and operating instructions QX series 6 2 4 MPP Tracker ...
Страница 86: ...zontal 90 panel is vertical Generator rated power Wp Enter the rated power of the strings connected to the MPP tracker This value is used for projecting the yield Expected annual normalized power kWh kWp Enter the value for your location here This value is used for projecting the yield Search for global maximum Activates the search for the global maximum Under certain shading conditions e g shadow...
Страница 87: ...et settings manually or using a DHCP server to do this If you select the option DHCP active the boxes IP address net mask standard gateway and DNS server are not writeable 6 2 6 Safety You can change your password in this screen Enter your current password in the box Old password and your new one in New password and again in Repeat password and acknowledge your entries by clicking on Change passwo...
Страница 88: ...oup The field bus address must be unambiguous and may only be assigned once You can see the inverters that are currently active in the field bus in the lower area This table is dynamically updated depending on the current data transmission 6 2 8 Sensors The setting of the S0 input can be deactivated greyed out if the installer uses the S0 input for optimising your own energy consumption See chapte...
Страница 89: ... as mains undervoltage If you use the relay to optimise your own consumption you can make individual settings You can also control the relay manually e g to test your circuit The relay contact can be switched in dependence on the current output power of your inverter for example To do this enter the minimum switch on and switch off values at which the relay will be closed or opened You can also se...
Страница 90: ...e You can update the software of the inverter here To do this you need a firmware file that you can obtain from Q3 Please send a mail to info q3 energie de Download the file onto your computer and use the Browse button to select the file When you have done this please click on Upload firmware file NOTE Never disconnect your inverter from the supply voltage or switch off it off for the whole durati...
Страница 91: ... 27 04 2015 Installation and operating instructions QX series 6 2 11 Logging off Admin Please log off on this page before you exit the web interface 6 3 Installer area You can only access this area with the installer password 6 3 1 Installation panel configuration Configure the MPP tracker for you system More information can be found in chapter 5 6 Connecting the PV DC generator ...
Страница 92: ..._________________________________________________ Q3 ENERGIE Installation and operating instructions QX series 92 109 Version 1 0 Stand 27 04 2015 Installation and operating instructions QX series 6 3 2 Installation power supply company settings ...
Страница 93: ...r the corresponding power reduction for every possible logical combination or for every contact here Select static power reduction of 70 To do this enter the rated power of your generator in the provided box Select dynamic power of 70 measurement of own consumption via S0 interface Select external control by a measurement and control module More information can be found in the following Chapter 7 ...
Страница 94: ...e configuration with little effort The copied settings include Location information and description of the inverter Country and time settings String configuration and expected energy yields Setting parameters and language settings for the operating interface Network settings Solar portal configuration data External sensor configurations Power reduction settings and cos Phi adaptation Settings for ...
Страница 95: ...rol REMOTE the network operator can reduce the power of the inverter or the inverter group Configuration is effected using a table that is displayed dynamically when this option is selected Reduction of static power to 70 The feed in power of the inverter or the inverter group is limited to 70 of the set DC rated power PV generator output Please note that in the case of inverter group operation th...
Страница 96: ...rwise the maximum power of the inverter or the inverter group is limited to 70 of the total PV generator output power This also guarantees the 70 limitation specified by the grid operator in the event of a fault in the S0 interface e g due to a defective cable External control via network interface The Q3 photovoltaic inverters can be operated via the integrated network interface LAN to monitor th...
Страница 97: ...r Cause high radiation or over dimensioned generator 30 Status Ext power reduction Feed in actively limited by the power supply company or inverter is reducing the power due to overfrequency as per the default characteristic P f 40 Status Self test The inverter is running through the specified self test before connecting to the grid 50 Status DC power too low Insufficient generator output power hi...
Страница 98: ... grid conditions Contact the grid operator if this event occurs repeatedly 250 Grid fault 10min average Shutdown due to high 10min Check connection and grid quality Overvoltage could have occurred due to local grid conditions Contact the grid operator if this event occurs repeatedly 260 Grid fault Steady message is persistent high Shutdown due to large steady component in output current If this fa...
Страница 99: ...stallation and operating instructions QX series Status and fault messages OID Display text Meaning Remedial measure string is higher than the maximum permissible string input voltage DC switch on the underside of the inverter housing from the inverter DC disconnecter switch in position off Contact the installer Leave the DC disconnecter switch in the off position until the fault is rectified ...
Страница 100: ...ol panel with aggressive cleaning agents use a dry or damp cloth instead Clean the fan grille Activate the DC disconnecter switch at least once a year in order to prevent soiling of the contacts CAUTION Damage to the inverter due to severe soiling Do not remove the fan grids permanently otherwise protection against the penetration of dirt cannot be guaranteed 8 1 Switch off inverter Switching off ...
Страница 101: ...t touching hot parts Hot surfaces on the device housing possible Risk of injury Risk of injury Risk of burns Do not touch cooling vents or the top of the housing while in operation surface temperatures can exceed 70 C Allow sufficient time for the device to cool down before touching it CAUTION Risk of injury due to great weight At least two persons are required to dismantle the inverter Shutting d...
Страница 102: ...the earthing bolt of the device 6 Remove all remaining plugs from the waste device The plugs must be re connected to the replacement device in the same way Commissioning a new device No Action 1 Switch the DC disconnecter switch 1 on the underside of the device to OFF 2 Disconnect the AC grid connection 2 and verify absence of voltage 3 If applicable attach the earth connection 4 to the earthing b...
Страница 103: ..._________________________ Q3 ENERGIE Installation and operating instructions QX series 103 109 Version 1 0 Stand 27 04 2015 Installation and operating instructions QX series 9 Appendix 9 1 Technical data 9 1 1 Temperature behaviour power reduction QX 4000 9 1 2 QX 5000 ...
Страница 104: ...___________________________________________________________ Q3 ENERGIE Installation and operating instructions QX series 104 109 Version 1 0 Stand 27 04 2015 Installation and operating instructions QX series 9 1 3 QX 6000 9 1 4 QX 7000 ...
Страница 105: ...___________________________________________________________ Q3 ENERGIE Installation and operating instructions QX series 105 109 Version 1 0 Stand 27 04 2015 Installation and operating instructions QX series 9 1 5 QX 8000 9 1 6 QX 10000 ...
Страница 106: ...__________________________________________________________ Q3 ENERGIE Installation and operating instructions QX series 106 109 Version 1 0 Stand 27 04 2015 Installation and operating instructions QX series 9 1 7 QX 13000 9 1 8 QX 15000 ...
Страница 107: ...even as early as the development phase Only halogen free flame retardants are used in all key components The question of environmental compatibility plays a key role in the selection of suppliers For the most part recyclable packing is used for the transport of the individual components The complete production process at Q3 ENERGIE is completely emission free Packaging Recycled materials are used ...
Страница 108: ...n the respective chapters 10 Contact Please contact the Q3 ENERGIE Helpdesk Team if you have any technical problems with our products We require the following information to be able to provide specific assistance Inverter type Serial number Type and number of the connected PV modules Event number or display message of the inverter Place of installation Optional equipment e g communication devices ...
Страница 109: ...s substances EC directive 2002 95 EC on the restriction of the use of certain hazardous substances in electrical and electronic equipment PV Photovoltaic Pmax Max output power S0 Interface Hardware interface for transmitting measured values TAB Technical Connection Requirements THD Total Harmonic Distortion Harmonic content total harmonic distortion non linear distortion of an electrical or acoust...