SECTION 4
MAINTENANCE
42
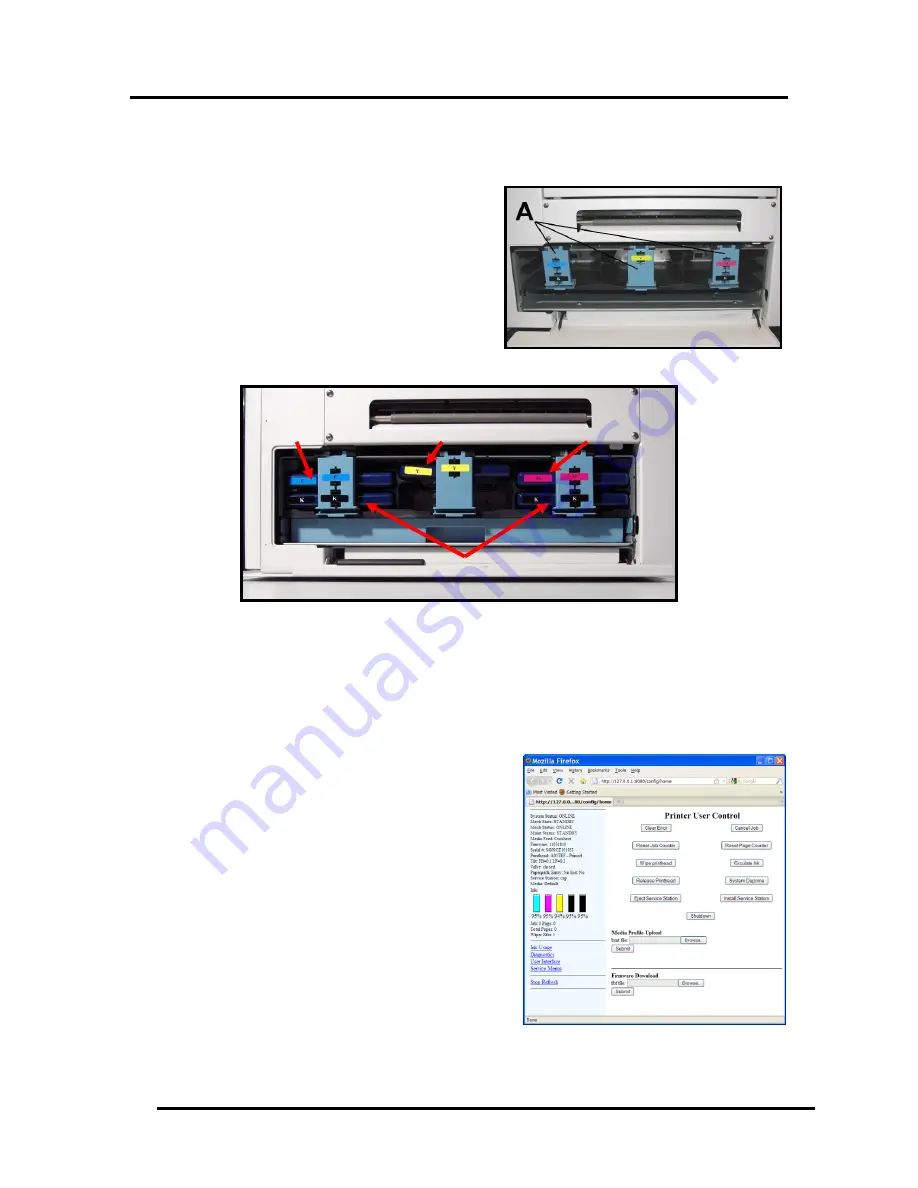
CYAN (C)
YELLOW (Y)
MAGENTA (M)
BLACK (K) x 2
4.
Power-down the printer using the ON/OFF Button. Wait about 45 seconds for the print engine to
shut-down (ON/OFF button light will turn off).
Note:
You may lose communication with the “M Series Toolbox” at this time.
5.
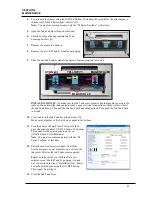
Open the Ink Tank Door (hinged at bottom).
6.
Unlock and Open the appropriate Ink Tank
Securing Latch(s) [A].
7.
Remove the empty Ink Tank(s).
8.
Remove the new Ink Tank(s) from the packaging.
9.
Slide the new Ink Tank(s) (label side up) into their appropriate color slots.
INSTALLATION TIP –
To make sure the Ink Tank seats properly (septum needles penetrate the
seals on the tank and the tank contacts make a good electrical connection with the system): Insert
the Ink Tank firmly. Then pull the Ink Tank back out about an inch. Then push the Ink Tank back
in, firmly.
10.
Close and lock the Ink Tank Securing Latches [A].
Make sure both sides of the Latch are engaged at the bottom.
11.
Turn the printer’s Main Power Switch ON; then
press the control panel’s ON/OFF button. Wait about
45 seconds for the print engine to power on
(ON/OFF button will illuminate).
Note
: You may lose communication with the “M
Series Toolbox” at this time.
12.
Refresh your web browser window. Watch the
Toolbox screen on your computer; you will see the
ink colors fill in as the Ink Tanks are recognized.
Tip:
If an ink color does not fill in after a few
minutes; reseat the Ink Tank by popping it in and
out; as described in Step 9 “Installation Tip”. Power-
down the print engine using the ON/OFF button.
Then repeat from Step 11.
13.
Close the Ink Tank Door.
Содержание iJet Press
Страница 1: ...Digital Color Printer OPERATOR S GUIDE ...
Страница 6: ......


