background image

9.45, 9.45i Treadmill

Page 3

Technical Specifications 

Physical Specifications

Length:

71 inches or 180 cm (Extended deck treadmills
are 5 inches longer)

Width:

Handrails 31.5 inches (80 cm)
Base 28.5 inches (72 cm)

Height:

50 inches (127 cm)

Running surface:

53 inches by 18 inches (135 cm by 46 cm)

Motor:

2 hp continuous duty

Speed:

0.5 to 10 mph (0.8 to 16 kph)
10 mph is equivalent to a 6 minute mile

Incline:

-2% to +12% grade

Power:

50/60 Hz 120v AC (dedicated circuit)
50/60 Hz 240v AC (dedicated circuit)

Weight:

265 lbs (119 kg)

Shipping weight:

326 lbs (147 kg)

About The Smart Rate System

The Smart Rate system is the heart rate system mounted in the display housing. The Smart Rate 
system receives a heart rate signal from chest strap transmitter worn by the user. Smart Rate 
software displays a heart range on green, red and yellow LED's mounted on the upper PCA. The 
LED’s indicate whether the heart rate is below, within or above the desired rang.

Содержание 9.45

Страница 1: ...in this product This document contains general product information software diagnostic procedures when available preventative maintenance procedures inspection and adjustment procedures troubleshootin...

Страница 2: ...es on this treadmill Section Three Checking Treadmill Operation This section provides you with a quick way of checking treadmill operation Check treadmill operation at the end of a maintenance procedu...

Страница 3: ...alent to a 6 minute mile Incline 2 to 12 grade Power 50 60 Hz 120v AC dedicated circuit 50 60 Hz 240v AC dedicated circuit Weight 265 lbs 119 kg Shipping weight 326 lbs 147 kg About The Smart Rate Sys...

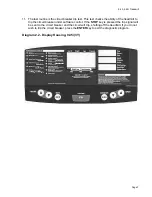
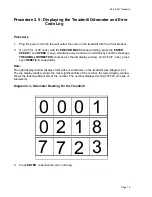
Страница 4: ...t Press the INCLINE keys while you watch the right display window see Diagram 2 1 The lift calibration number increments as the INCLINE key is pressed and decrements as the INCLINE key is pressed Pres...

Страница 5: ...o trip the circuit breaker under software control If the STOP key is pressed and held the trip signal will be sent to the circuit breaker and the circuit will trip shutting off the treadmill If you do...

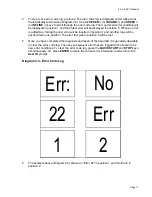
Страница 6: ...key is pressed and decrements as the INCLINE key is pressed Press ENTER to continue 7 The third routine is the power bits display Power bits is a number that indicates the amount of time that power i...

Страница 7: ...mill to trip the circuit breaker under software control If the STOP key is pressed the trip signal will be sent to the circuit breaker and the circuit will trip shutting off the treadmill If you do no...

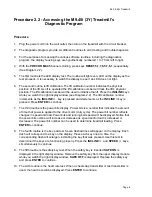
Страница 8: ...4 Procedure 1 Plug the power cord into the wall outlet then turn on the treadmill with the circuit breaker 2 With the PRECOR M9 45 or PRECOR M9 45i banner scrolling press the INCLINE INCLINE SPEED an...

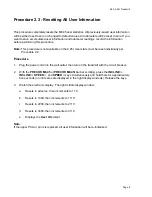
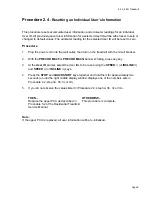
Страница 9: ...2 With the PRECOR M9 45 or PRECOR M9 45i banner scrolling press any key 3 At the User ID prompt select the User IDs to be reset using the SPEED or INCLINE and SPEED or INCLINE keys 4 Press the STOP an...

Страница 10: ...s until the message TREADMILL ODOMETER scrolls across the left display window On 9 45 3Y units press keys RESET 6 5 sequentially Note The right display window displays total miles or kilometers on the...

Страница 11: ...nserted in position 1 and all other logs will be pushed down one position The error that was in position 5 will be lost 5 Once you have completed the diagnosis and repair of the treadmill it is genera...

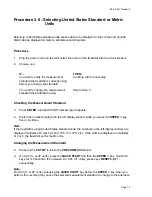
Страница 12: ...NTER until the WEIGHT indicator light appears 4 Watch the number displayed in the left display window while you press the SPEED key five or six times Note If the treadmill is using United States stand...

Страница 13: ...9 45 9 45i Treadmill Page 13 measurement standardUse the SPEED or SPEED keys to select the alternate measurement standard 7 Press ENTER twice to return to the User ID prompt...

Страница 14: ...the treadmill with the circuit breaker 2 On 9 45 1L or 2P units with the PRECOR M9 45 banner scrolling press the ENTER key On 9 45 3Y units with the PRECOR M9 45 banner scrolling press keys RESET 5 1...

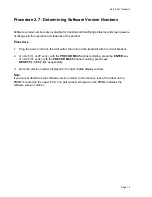
Страница 15: ...hen you ship it to Precor When a problem occurs record the following information Model and serial number Software version number Note Determine the version number as in Procedure 2 7 User and program...

Страница 16: ...lights as the information corresponding to that LED is displayed on the electronic console d Measure and note the AC input current at 3 MPH eith the treadmil unloaded and at 3 MPH with the treadmill...

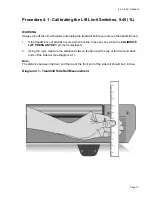
Страница 17: ...the treadmill is not already at zero percent incline press any key when the CALIBRATE LIFT PRESS ANY KEY prompt is displayed 2 Using the ruler measure the distance between the floor and the top of the...

Страница 18: ...ont and back treadmill front and back treadmill measurements measurements are equal then are equal then press RESET press RESET 8 Turn off the treadmill with the circuit breaker then unplug the power...

Страница 19: ...9 45 9 45i Treadmill Page 19 Diagram 4 2 Switch Mounting Bracket Assembly Lower Limit Switch Actuator Upper Limit Switch Zero Switch Capacitor Lift...

Страница 20: ...e switch actuator THEN OTHERWISE Move the switch bracket down until Move the switch bracket up until the the widest part of the actuator is widest part of the actuator is centered centered on the whee...

Страница 21: ...INCLINE or INCLINE keys to set the lift calibration number to 19 7 Press and hold STOP to get back to the Enter Your Weight banner 8 Turn off the treadmill with the circuit breaker then unplug the tr...

Страница 22: ...he upper display assembly to the upper handrail Carefully pull some excess interconnect cable out from the targa upright Rotate the display housing so that the rear of the upper PCA is facing upward a...

Страница 23: ...readings match those listed in Tables 5 1 and 5 2 and one or more keys do not function replace the upper PCA 8 If the voltage readings in Table 5 1 are incorrect disconnect the keypad cable from the...

Страница 24: ...ves you the information you need to determine which of these components is malfunctioning Procedure 1 If you are referring to this procedure because the HEART RATE indicator did not blink properly whe...

Страница 25: ...d to continue with this procedure 6 Re adjust the fit of the chest strap If the HEART RATE indicator still does not blink as described in Step 4 If the chest strap transmitter has a replaceable batter...

Страница 26: ...perates a magnet mounted in the hub passes the hall effect sensor once per motor revolution The hall effect sensor send one pulse to the lift control system per revolution The system knows how far the...

Страница 27: ...A There are no good means of troubleshooting these components other than substituting known good components Replace only one component at a time If the component that you replaced does not correct the...

Страница 28: ...asure approximately 0 Vdc when the switch is not operated and approximately 5 Vdc when the switch is operated If the operated voltage is 0 Vdc or significantly low remove both blue wires from the zero...

Страница 29: ...th step 3 3 Set the treadmill circuit breaker in the off position Using an ohmmeter measure between terminal 4 brown wire and terminal 6 orange wire of the P2 connector on the lower PCA The measuremen...

Страница 30: ...moves normally skip to step 10 The voltage will only be present until such time as an error occurs If line voltage is not present skip to step 11 If line voltage is measured but the motor does not mo...

Страница 31: ...it breaker with a capacity of less than 20 amps the A C circuit must be corrected to be a 20 amp dedicated circuit before any reliable troubleshooting can be performed on the treadmill More importantl...

Страница 32: ...circuit breaker If the circuit breaker is greater than 20 amps the circuit breaker should be replaced with a 20 amp circuit breaker If the circuit breaker is less than 20 amps the circuit breaker mus...

Страница 33: ...ure 5 1 of the Residential Treadmill Service Manual 2 Disconnect the wires from the SCR terminals listed in Table 945 4 Table 6 1 SCR Electrical Connections WIRE SCR TERMINAL Black wire Red wire Blue...

Страница 34: ...osition the screws that secure the SCR to the treadmill frame Using the torque wrench torque each screw to 10 in lbs 6 Connect the wires listed in Table 6 1 to the SCR terminals 7 Check the operation...

Страница 35: ...n connect the wires to either terminal stud However you cannot mix brown and blue wires on any one stud see Wiring Diagram 7 1 or 7 3 Diagram 6 3 Terminal Block Wiring 5 Connect the blue wires and the...

Страница 36: ...tor capacitor but leave the remaining black wire connected to the terminal 4 Disconnect the connector on the white lift motor lead Note Do not disconnect J3 from the lower PCA The connector disconnect...

Страница 37: ...agnet Note When you position the magnet in the magnet hub place the north pole towards the center of the magnet hub The north pole of the magnet should be marked with a spot of white paint If the magn...

Страница 38: ...two nuts that secure the sensor bracket to the lift motor 20 Position the sensor bracket removed in the previous step on the lift motor 21 Replace the two nuts that secure the sensor bracket to the l...

Страница 39: ...the lift motor capacitor that already has a red wire 30 Connect the connector on the white lift motor lead that connects the lift motor to pin 4 of lower PCA connector J3 31 Connect the molex connecto...

Страница 40: ...nnected to the upper and lower limit switches carry line voltage Turn off the treadmill and unplug the power cord from the wall outlet before you perform the following steps 3 Carefully remove the red...

Страница 41: ...crew and switch actuator 13 Remove the shoulder screw that connects the actuator shaft and actuator block to the lift platform Note If necessary hold the actuator shaft with the pliers and support the...

Страница 42: ...tuator block to the actuator shaft 22 Position the shoulder screw removed in Step 13 through the actuator block and into the base of the lift platform 23 Tighten the shoulder screw that connects the a...

Страница 43: ...nnect the black wires disconnected in Step 6 to the limit switch terminals 34 Choose one If Then Otherwise You are replacing the Continue with the next Skip to Step 38 zero sense switch step Replacing...

Страница 44: ...ift motor capacitor in the capacitor mounting bracket Note Wire length and wire assembly configuration may limit the mounting orientations of the lift motor capacitor Make sure that the wires you remo...

Страница 45: ...AL Blue wire 10 Brown wire 8 Blue wire 6 Black wire 5 Red wire 4 Black wire 2 Red wire 1 3 Remove the screws that secure the transformer to the treadmill frame 4 Remove the transformer from the treadm...

Страница 46: ...wire assembly from the lower PCA 3 Remove the screw that secures the speed sensor to the sensor mounting bracket 4 Remove the speed sensor from the mounting bracket Diagram 6 5 Speed Sensor Mounting...

Страница 47: ...he gap between the speed sensor and flywheel as described in Procedure 3 4 of the Residential Service Manual 9 Check the operation of the treadmill as described in Section Three in the appendix of the...

Страница 48: ...ensor wire assembly from the lower PCA 3 Remove the screw that secures the speed sensor to the sensor mounting bracket 4 Remove the speed sensor from the mounting bracket Replacing the Speed Sensor 5...

Страница 49: ...y to the lower PCA 8 Inspect and adjust the gap between the speed sensor and flywheel as described in Procedure 3 4 of the Residential Treadmill Service Manual 9 Check the operation of the treadmill a...

Страница 50: ...eadmill Service Manual 2 Place the treadmill on its left side Note To avoid scratching or marring the treadmill put a drop cloth underneath the treadmill when you perform Step 2 3 Remove the lower bol...

Страница 51: ...lift platform are Kep nuts which do not require a separate washer If you do not use Kep nuts to mount the lift platform use washers when you mount the lift platform to the treadmill frame 8 On 1L uni...

Страница 52: ...ove the target from the flywheel Remove as much of the old adhesive as possible from the flywheel Ensure that any remaining adhesive is firmly bonded to the mounting location 4 Clean the end of the fl...

Страница 53: ...nd nut that secure the lift tube to the lift platform Set aside the lift motor Replacing the Lift Motor 7 With the treadmill still on its side line up the mounting holes at the top of the lift motor w...

Страница 54: ...LCC44 Each of these packages should be removed with a proper IC removal tool see the illustrators below 4 The IC s may inserted into their socket by hand by carefully aligning the notch on the IC with...

Страница 55: ...9 45 9 45i Treadmill Page 55 Wiring Diagram 7 1 9 45 1L Unit...

Страница 56: ...9 45 9 45i Treadmill Page 56 Block Diagram 7 2 9 45 1L Units...

Страница 57: ...9 45 9 45i Treadmill Page 57 Wiring Diagram 7 3 9 45 2P 3Y Units...

Страница 58: ...9 45 9 45i Treadmill Page 58 Block Diagram 7 4 9 45 2P 3Y Units...

Отзывы: