Connecting the Eagle™
••••
20
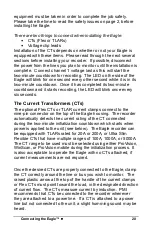
equipment must be taken in order to complete the job safely.
Please take the time to read the safety issues on page 2, before
installing the Eagle.
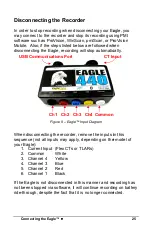
There are two things to connect when installing the Eagle:
•
CTs (Flex or TLARs)
•
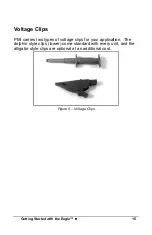
Voltage clip leads
Installation of the CTs depends on whether or not your Eagle is
equipped with these items. Please read through the next several
sections before installing your recorder. If possible, disconnect
the power from the lines you plan to monitor until the installation is
complete. Connect channel 1 voltage last as this will start the
two-minute countdown for recording. The LED on the side of the
Eagle will blink for one second every other second while it is in its
two-minute countdown. Once it has completed its two-minute
countdown and it starts recording, the LED will blink once every
six seconds.
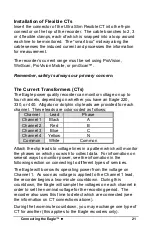
The Current Transformers (CTs)
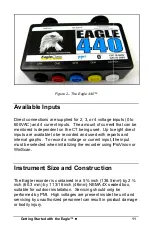
The optional Flex CTs or TLAR current clamps connect to the
nine-pin connector on the top of the Eagle housing. The recorder
automatically detects the current rating of the CT connected
during the two-minute initialization countdown which starts when
power is applied to the unit (see below). The Eagle recorder can
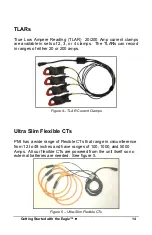
be equipped with TLARs rated for 20A or 200A, or Ultra Slim
Flexible CTs that have multiple ranges of 100A, 1000A, or 5000A.
The CT range to be used must be selected using either ProVision,
WinScan, or ProVision mobile during the initialization process. It
is also acceptable to operate the Eagle with no CTs attached, if
current measurements are not required.
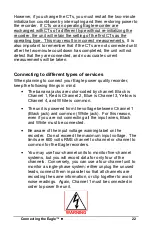
Once the desired CTs are properly connected to the Eagle, clamp
the CT correctly around the line or bus you wish to monitor. The
raised plastic arrow at the top of the handle of the current clamps
or Flex CTs must point toward the load, in the designated direction
of current flow. The CTs measure current by induction. PMI
recommends that CTs be connected to the recorder whenever
they are attached to a power line. If a CT is attached to a power
line but not connected to the unit, a slight humming sound may be
heard.
Содержание Eagle 220
Страница 2: ......
Страница 3: ...Eagle Power Quality Recorder User s Manual...
Страница 8: ......
Страница 12: ......
Страница 14: ......
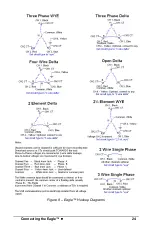
Страница 32: ...Connecting the Eagle 24 Figure 8 Eagle Hookup Diagrams...
Страница 38: ......
Страница 42: ......
Страница 90: ......
Страница 95: ......
Страница 96: ......


