background image


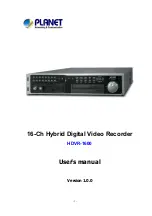
16-Ch Hybrid Digital Video Recorder   

H

D

VR-1600 


User’s manual 


Version 1.0.0 


 - 

Содержание HDVR-1600

Страница 1: ...16 Ch Hybrid Digital Video Recorder HDVR 1600 User s manual Version 1 0 0 1...

Страница 2: ...nual is subject to change without notice and does not represent a commitment on the part of PLANET PLANET assumes no responsibility for any inaccuracies that may be contained in this User s Manual PLA...

Страница 3: ...3 Revision User s Manual for PLANET VoIP Analog Telephone Adapter Model DVR Rev 1 0 0 2009 May Part No EM HDVR 1600...

Страница 4: ...onal Keys 16 3 2 Enter OSD Setup Menu 18 3 2 1 User Management 19 3 3 Power On Shutdown the Unit 20 3 4 System Date Time Setting 20 3 4 1 Set Date Time 21 3 4 2 Daylight Saving Time 21 3 4 3 Network T...

Страница 5: ...ded Video 37 4 3 1 Search by Time 37 4 3 2 Search by Event 38 4 3 3 Search by Text 39 4 4 Video Export 40 4 4 1 Export from OSD Setup Menu 40 4 4 2 Quick Video Export through Front Panel 42 4 5 Dome C...

Страница 6: ...Event List 59 5 3 6 Take a Snapshot 59 5 3 7 Remote Monitoring Software Trouble Shooting Guide 59 Appendix A Recommended HDDs 61 Appendix B Remote Controller 62 Appendix C USB Mouse Operation 64 Appen...

Страница 7: ...nterface Not only control HDVR 1600 but also capability to control most types of PTZ protocols and even more convenience to control them via to expand the Control Keyboard HDVR KB100 HDVR KB200 HDVR K...

Страница 8: ...tallation guide User s manual CD Power cord HDD Bracket x 4 Key x 2 SATA cable x 2 Remote Controller Mounting Kit Physical Details Front Panel Front Panel of HDVR 1600 Item Description 1 USB 2 0 Port...

Страница 9: ...normal direction keys 2 In the OSD setup menu the direction keys are used to move the cursor to previous or next fields To change the value in the selected field press UP DOWN keys 14 ENTER 1 In OSD...

Страница 10: ...rm I O and RS 485 ports that offer users the flexibility required to connect the unit to other devices 11 NAS Device 1 The NAS connector allows users to connect to a Network Attached Storage NAS devic...

Страница 11: ...ducting techniques to transfer internal heat to the case especially to the bottom side of the unit NOTE Be sure the rubber feet are not removed and always leave a space for air ventilation on the unit...

Страница 12: ...used to display full screen video of all installed cameras in sequence The BNC call monitor connector allows user to connect the DVR with a call monitor VGA Output VGA output connectors are offered f...

Страница 13: ...In 1 25 Alarm In 9 2 RS485 D 10 Normal Open B 18 Alarm In 2 26 Alarm In 10 3 Ground 11 Ground 19 Alarm In 3 27 Alarm In 11 4 Normal Close A 12 Normal Close C 20 Alarm In 4 28 Alarm In 12 5 Common Node...

Страница 14: ...er from left to right All other pins on the bottom row are for ground connection Audio In A terminal block titled AUDIO IN provides connections to audio source devices of all channels for the purposes...

Страница 15: ...back mode Freeze mode and Sequence mode will be displayed on the bottom left corner of the screen The date time information will be display on the bottom right corner of the screen Ch4 1 2008 11 09 PM...

Страница 16: ...ort video Refer to section Video Export for detailed information CALL In Live mode press this key once to control the call monitor Alternatively press and hold this key for 3 seconds to control the 2n...

Страница 17: ...or text Direction Keys In Zoom mode these keys function as Direction keys In the OSD setup menu the LEFT RIGHT keys are used to move the cursor to previous or next fields To change the value in the s...

Страница 18: ...d username A preset username admin can be inputted via pressing the hot key MENU Move to OK and press ENTER to proceed Input Username A B C D E F G H I J K L M N O P Q R S T U V W X Y Z a b c d e f g...

Страница 19: ...stomized username password and authority level in this menu The username is case sensitive The authority level rank from level 1 8 and level 8 has highest authority Alternatively select Disable to sto...

Страница 20: ...as follows Shutdown 1 Power Off 2 Reboot Execute Execute Power Off Select this item to shut down the unit Do not remove the power during shut down until the message You can safely turn off DVR now dis...

Страница 21: ...Display Mode This function allows user to set the OSD display type of the date There are three options to select from Y M D M D Y or D M Y Y represents Year M represents Month and D represents Day Mov...

Страница 22: ...for daylight saving time The available options are in minutes 3 4 3 Network Time Protocol Setup Time Zone Select Time Zone to enter the time zone To find out the correct local time zone please visit...

Страница 23: ...mber of IP cameras to be connected The supported channels of IP cameras will be from the largest numbers for example CH16 for 16ch models NOTE The DVR must be rebooted in order to apply the change of...

Страница 24: ...port of the IP camera Streaming Format Access this item to select the streaming format MPEG4 MJPEG or H264 of the IP camera Advance Streaming Option Select OFF and the Streaming Port and Streaming Pro...

Страница 25: ...E Once the connection to the IP camera is activated menu items Hostname IP Model and Connection Setup will be grayed out and cannot be accessed 3 5 5 Status After the connection to the IP camera is ac...

Страница 26: ...the start time of Day and Night Time using Direction keys Press ENTER to confirm the settings or ESC to cancel If a weekend record is required select ON to enable the Weekend Schedule in advance and t...

Страница 27: ...o return to Record Setup menu Please note that the total normal PPS for all channels cannot exceed 120 NTSC 720 240 120PPS 100 PAL 720 288 100PPS To increase one channel s PPS others may have to be re...

Страница 28: ...al PPS and press ENTER then press UP DOWN to make a choice The How Many Days To Record will be computed automatically Select Average Normal Quality and press ENTER then press UP DOWN to make a choice...

Страница 29: ...into the HDD spaces while overwrite the oldest recorded video Alternatively if linear mode is selected the DVR will stop recording when the HDD is full In the meantime the internal buzzer will start b...

Страница 30: ...h this function the financial transaction data can be linked to specific camera images and recorded to the DVR To enable this function enter OSD Setup menu with proper account and select Text Setup Pr...

Страница 31: ...s enabled only transactions which meet both Exception String and By Numerals creteria will be marked as exceptions The selections are as the following OFF The function is disabled Specific When the va...

Страница 32: ...t Baud Rate 8 Text Bits 9 Text Stop 10 Text Parity Serial Port Direct Connected 1 ASCII Canonical 9600 8 1 None Port Selection It is essential to select a correct port for the POS device Meanwhile mak...

Страница 33: ...r TSP800 Sibnet TPG Axiohm A794 STAR SCD400 PD WP 520 ESC POS Soteke VFD2025 Soteke VFD2029 TEC Toledo 8217 TYSSO VFD Series Ultimate Technology PD1100XL Wedderburn DS 770 Manual Filter Setup Once ent...

Страница 34: ...e ways of viewing both live and recorded video Following presents these view formats Viewing in Full Screen Press any CHANNEL key directly to view the corresponding camera image in full screen format...

Страница 35: ...d video user can press PLAY key directly After pressing the PLAY key the unit starts to continue playing back the recorded video from the suspended point of record If it is the first time to use the P...

Страница 36: ...gain to resume the playback operation 4 2 Sequence Setup This section introduces the way to view sequence mode with both Main Monitor and Call Monitor if connected Sequence function can avoid manual b...

Страница 37: ...is shown as follows Search Search By Time From End Select 2008 01 01 00 00 00 2008 05 01 00 00 00 2008 01 01 00 00 00 Begin Playback Search By Event Select Channel CH1 CH2 CH3 CH4 Event List Search B...

Страница 38: ...3 08 16 29 10 2008 03 08 03 22 17 Ch 2 5 3 1 1 7 6 4 2 8 2 Type Motion Alarm Alarm Motion Alarm Motion Motion Alarm Motion Motion Alarm The list displays events by date time triggered camera and alarm...

Страница 39: ...word strings Search for videos with data containing EITHER ONE of the word strings AND Enter two sets of word strings Search for videos with data containing BOTH of the word strings Specific Specify o...

Страница 40: ...txt Make sure an external storage device is available and connected to the appropriate port for video export From the Main menu select Video Export and press ENTER The menu is displayed as below Vide...

Страница 41: ...ends Move the cursor using LEFT RIGHT keys and press ENTER to select the date time items adjust the selected date and time value by UP DOWN keys Select Events Select this item to display the event lis...

Страница 42: ...leting data 4 4 2 Quick Video Export through Front Panel Through front panel control the DVR allows users to easily export wanted video as drv file with the built in DVD RW or to an external device su...

Страница 43: ...playback mode play the video and press COPY once to mark the starting point of the export video The playback continues Press COPY again to mark the ending point of the export video Then the ezBurn wi...

Страница 44: ...hown on the screen 4 5 Dome Control The DVR allows user to control a dome camera by the front panel In Live mode user can press CHANNEL key to display the desired dome camera in full screen To enter d...

Страница 45: ...onic_N and None NOTE The settings become effective after saving the changes and exiting from the menu 4 5 3 RS485 Setup The DVR controls the dome cameras via RS 485 communication protocol The RS 485 p...

Страница 46: ...Press it again to redisplay the screen Iris Open Use to open the Iris on the dome camera Focus Near Use to focus the dome camera near Zoom In Use to zoom in the dome camera This function enables the...

Страница 47: ...Pan Tilt CH1 Set Go Preset CH2 Hint Screen On Off Dome Control Press 1 to access the Set Go Preset function The Dome Preset menu is displayed Dome Preset First Page Index 1 2 3 4 5 6 7 Set Preset No...

Страница 48: ...unication starts below message will be shown on the screen INTERCOM YOU ARE NOW COMMUNICATING WITH CHANNEL 02 At this time users will be able to hear audio from the camera site even if the audio outpu...

Страница 49: ...an be found in My Network Places folder Double click on the icon will open an internet browser that connects to the DVR via the remote control software 4 7 2 UPnP NAT Traversal Function The UPnP NAT t...

Страница 50: ...te monitoring software The tasks can be performed with the remote monitoring software are listed below Remote viewing of live recorded video Remote setup of the DVR Remote control of dome cameras Alar...

Страница 51: ...rname and password to access OSD setup menu Select System Setup Network Setup then LAN Setup to check the IP Start the IE it can be started either by clicking on the desktop icon or by using the Start...

Страница 52: ...rompt Click OK to apply the setting and close the Security Settings screen Click OK to close Internet Options dialog Now the installation can continue to the next step 5 2 2 Install Remote Monitoring...

Страница 53: ...or example the IP address should be entered as 192 68 80 6 81 A version check starts to verify whether the remote monitoring software was installed already and also check if the version is the same as...

Страница 54: ...ssfully the main window will display live video of the attached cameras If the IE browser is closed the remote system is logout and disconnected from the DVR at the same time 5 2 2 2 Software Upgrades...

Страница 55: ...Mode Choose the number of windows to be displayed on the main window Click one of the display buttons in MODE section Available selections are 4 9 and 16 camera displays To view certain window in full...

Страница 56: ...more or less light into the camera Click on Iris to open iris or Iris to close iris Zoom Users are allowed to zoom in or zoom out using the adjusting buttons Zoom in to enlarge a certain area and zoom...

Страница 57: ...e playing back recorded video on the PC either remote playback or local playback 5 3 3 1 Playback Remote Video To view remote video click Play on the main window toolbar and then Remote Playback tab T...

Страница 58: ...ancel to abort View the video playback using the Playback controls To end the playback click Live to return to live video 5 3 3 3 Playback Controls When the local or remote video is being played the r...

Страница 59: ...each event by its number the date and time of the event the type of the event including Alarm In Motion Detection Video Loss and Over Speed and the camera channel where the event occurred To view an e...

Страница 60: ...tions and then click the General tab Click the Delete Files button in the Temporary Internet Files field the Delete Files screen displays as below Check the Delete all offline content box and click OK...

Страница 61: ...uda 7200 10 ST3500630AS 500G Barracuda 7200 10 ST3750640AS 750G Barracuda 7200 11 ST3500320AS 500G Barracuda 7200 11 ST31000340AS 1000G Barracuda ES 2 ST3500320NS 500G Seagate Barracuda ES 2 ST3100034...

Страница 62: ...Appendix B Remote Controller A remote control is provided for the DVR The function keys on the remote control are listed as below figure DVR Control mode Dome Camera Control mode 62...

Страница 63: ...Unit ID to any number between 224 and 239 and exit the menu The ID Table is listed below for reference DVR Unit ID 224 225 226 227 228 229 230 231 Remote Control 1 2 3 4 5 6 7 8 DVR Unit ID 232 233 2...

Страница 64: ...lay viewing modes 2x2 3x3 and 4x4 Click on P to display the previous viewing mode Click on S to switch monitor control to the second main VGA monitor Clicking the left button of the USB mouse function...

Страница 65: ...Appendix D Keyboard Access Sketch The following sketch shows the keys used to access and control the connected DVR 65...

Страница 66: ...s VGA Digital Output Simultaneous Output Resolution Digital Output VGA BNC Main BNC Call S Video Hybrid Display on VGA Playback On VGA Dual Main Enabled 800 X 600 O O O O O O O Enabled 1024 X 768 O O...

Страница 67: ...kwise counterclockwise causes the unit to playback faster forward backward According to the rotating angle the shuttle ring users can choose the playing speed from 1 2 4 8 16 and 32 in both forward an...

Страница 68: ...era Step 1 Enter the IP address for example 192 168 0 20 of the ICA M230 Internet Camera to access its web management page Access the Setting menu and login using the administrator s username and pass...

Страница 69: ...JPEG 640x480 and the maximum frame rate is 30 fps Step 5 Access the OSD setup menu of the DVR to select the number of IP cameras to be connected System Setup IP Camera Support The DVR will reboot in...

Страница 70: ...e different set Advance Streaming Option to ON and the values can be modified manually Connection Setup 1 Account 2 Password 3 Management Port 4 Streaming Format 5 Advance Streaming Option 6 Streaming...

Страница 71: ...the menu item Hostname IP Try to connect the IP camera via the browser directly and see if the video shows correctly 3 Make sure the settings of the items Account Password and Management Port in Conne...

Страница 72: ...e 1x DVD RW 1x HDD Removable Rack Recording Resolution NTSC 720x480 PAL 720x576 HDVR 1600 H 264 D1 NTSC 60 fps PAL 50 fps MPEG 4 M JPEG D1 NTSC 120 fps PAL 100 fps All codec CIF NTSC 480fps PAL 400fps...

Страница 73: ...are Camera PTZ Control RS 485 Backup Device DVD RW USB DVD RW USB Flash Drive and Network Power Source AC 100 240V 50 60Hz Power Consumption 100W Manual Select Operating Temperature 0 40 Degree C Dime...

Страница 74: ...9 336 EEC For the evaluation regarding the EMC the following standards were applied Emissions Immunity EN 55022 2006 Class A EN 61000 3 2 2006 EN 61000 3 3 1995 A1 2001 A2 2005 EN 55024 1998 A1 2001 A...

Отзывы: