


Digital Video Recorder User Manual
136
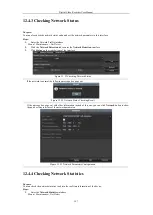
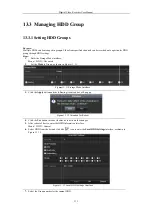
13.5
Configuring Cloud Storage
Purpose
The Cloud storage facilitates you to upload and download the recorded files at any time and any place, which can
highly enhance the efficiency.
Steps
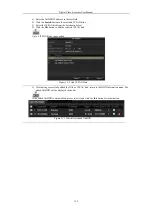
1.
Enter the Cloud Storage interface
Menu > HDD > General > Cloud Storage
2.
Check the
Enable Cloud
checkbox to enable the feature.
3.
Select the Cloud Type from the dropdown list to One Drive, Google Drive or Drop Box.
4.
According to the prompts, you are required to use a mobile browser to scan the QR code to log in the
selected cloud to get the authentication code. And then copy the authentication code to the
Authentication
Code
text filed.
5.
Click
Apply
and then back to the main menu.
6.
Enter the cloud storage interface again about 20s later. When the
Status
shows online, it indicates the
successful registration.
7.
Configure the recording schedule.
Back to enter the
record interface, choose a certain camera from the
Camera
dropdown list and check the
Enable
Schedule
checkbox to enable the schedule recording. For detailed recording schedule, refer to 5.2
Configuring Recording Schedule.
This POS recording is supported by some DVRs only.
8.
Upload the event triggered recording files to the cloud storage.
1)
Back to enter the cloud storage interface, and select the camera you have set in the recording schedule
interface.
2)
Select the in the
Upload Type
text filed.
3)
Check the
Enable Event Upload
check box.
4)
Click
Apply
to finish the settings.
l
Only the sub-stream recorded files can be uploaded the Cloud Storage.
l
Please configure the event triggered recording schedule and enable the corresponding event type.
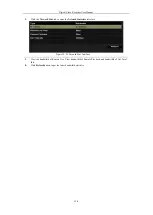
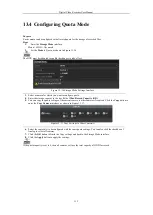
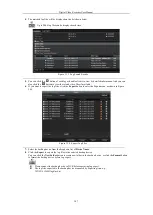
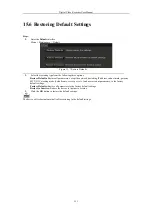
9.
(Optional) You can click the
Copy
button to copy the cloud storage settings to other cameras. You can also
click the checkbox of Analog/IP Camera to select all cameras.
Click
OK
button to back to the cloud storage interface and click
Apply
to finish the settings.
Figure 13. 18
Copy to Interface
Содержание DVR-TVI-04
Страница 1: ...Digital Video Recorder User Manual ...
Страница 13: ...Digital Video Recorder User Manual 12 Chapter 1 Introduction ...
Страница 21: ...Digital Video Recorder User Manual 20 Chapter 2 Getting Started ...
Страница 32: ...Digital Video Recorder User Manual 31 Chapter 3 Live View ...
Страница 40: ...Digital Video Recorder User Manual 39 Chapter 4 PTZ Controls ...
Страница 49: ...Digital Video Recorder User Manual 48 Chapter 5 Recording Settings ...
Страница 67: ...Digital Video Recorder User Manual 66 Chapter 6 Playback ...
Страница 78: ...Digital Video Recorder User Manual 77 Chapter 7 Backup ...
Страница 82: ...Digital Video Recorder User Manual 81 Chapter 8 Alarm Settings ...
Страница 87: ...Digital Video Recorder User Manual 86 Figure 8 9 Copy Settings of Alarm Input ...
Страница 96: ...Digital Video Recorder User Manual 95 Chapter 9 POS Configuration ...
Страница 102: ...Digital Video Recorder User Manual 101 Chapter 10 VCAAlarm ...
Страница 110: ...Digital Video Recorder User Manual 109 Chapter 11 VCA Search ...
Страница 116: ...Digital Video Recorder User Manual 115 Chapter 12 Network Settings ...
Страница 130: ...Digital Video Recorder User Manual 129 Chapter 13 HDD Management ...
Страница 142: ...Digital Video Recorder User Manual 141 Chapter 14 Camera Settings ...
Страница 146: ...Digital Video Recorder User Manual 145 Chapter 15 DVR Management and Maintenance ...
Страница 153: ...Digital Video Recorder User Manual 152 Chapter 16 Others ...
Страница 161: ...Digital Video Recorder User Manual 160 Chapter 17 Appendix ...


