
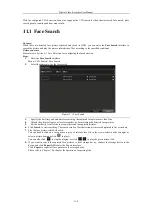
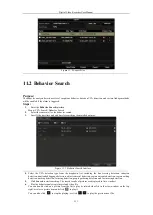
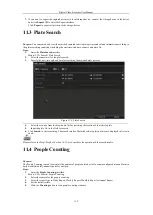

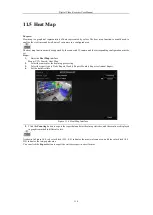


Digital Video Recorder User Manual
119
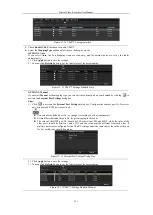
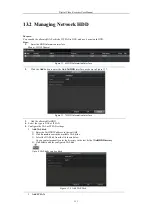
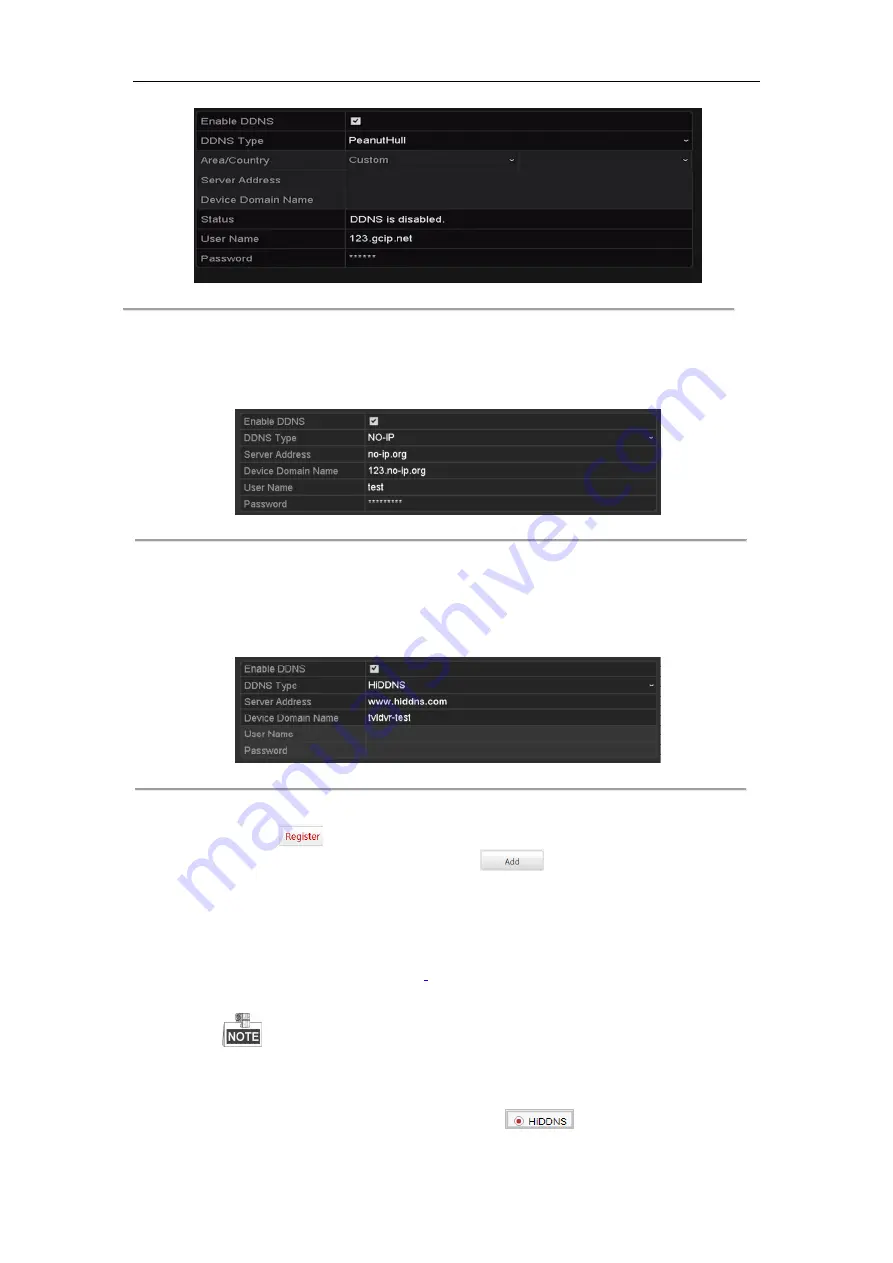
Figure 12. 6
PeanutHull Settings Interface
•
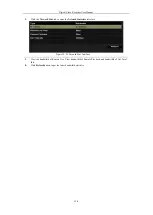
NO-IP:
Enter the account information in the corresponding fields. Refer to the DynDNS settings.
1)
Enter
Server Address
for NO-IP.
2)
In the
Device Domain Name
text field, enter the domain obtained from the NO-IP website
(www.no-ip.com).
3)
Enter the
User Name
and
Password
registered in the NO-IP website.
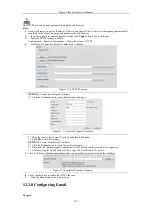
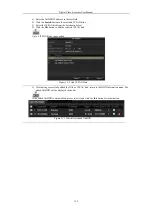
Figure 12. 7
NO-IP Settings Interface
•
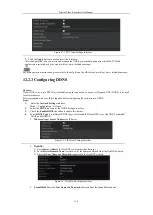
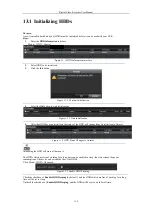
HiDDNS:
1)
Select the continent/country of the server on which the device is registered.
2)
Enter the
Device Domain Name.
You can use the alias you registered in the HiDDNS server or
define a new device domain name. If a new alias of the device domain name is defined in the NVR,
it will replace the old one registered on the server. You can register the alias of the device domain
name in the HiDDNS server first and then enter the alias to the
Device Domain Name
in the NVR;
you can also enter the domain name directly on the NVR to create a new one.
Figure 12. 8
HiDDNS Settings Interface
Ø
Register the device on the HiDDNS server.
1)
Go to the HiDDNS website: www.hiddns.com.
2)
Click
to register an account if you do not have one and use the account to log in.
3)
In the Device Management interface, click
to register the device.
4)
Input
Device Serial No.
,
Device Domain (Device Name)
and
HTTP Port
. And click
OK
to
add the device.
Ø
Access the Device via Web Browser or Client Software
After having successfully registered the device on the HiDDNS server, you can access your device
via web browser or Client Software with the
Device Domain Name
(
Device Name
).
l
OPTION 1: Access the Device via Web Browser
Open a web browser, and enter
http://
www.hiddns.com/alias
in the address bar. Alias refers to the
Device Domain Name
on the device or the
Device Name
on the HiDDNS server
.
Example:
http:// www.hiddns.com/nvr
If you mapped the HTTP port on your router and changed it to port No. except 80, you have to
enter
http:// www.hiddns.com/alias:HTTP port
in the address bar to access the device. You can
refer to
Chapter 9.2.11
for the mapped HTTP port No.
l
OPTION 2: Access the devices via
CMS
For NVMS7000, in the Add Device window, select
and then edit the device
information.
Содержание DVR-TVI-04
Страница 1: ...Digital Video Recorder User Manual ...
Страница 13: ...Digital Video Recorder User Manual 12 Chapter 1 Introduction ...
Страница 21: ...Digital Video Recorder User Manual 20 Chapter 2 Getting Started ...
Страница 32: ...Digital Video Recorder User Manual 31 Chapter 3 Live View ...
Страница 40: ...Digital Video Recorder User Manual 39 Chapter 4 PTZ Controls ...
Страница 49: ...Digital Video Recorder User Manual 48 Chapter 5 Recording Settings ...
Страница 67: ...Digital Video Recorder User Manual 66 Chapter 6 Playback ...
Страница 78: ...Digital Video Recorder User Manual 77 Chapter 7 Backup ...
Страница 82: ...Digital Video Recorder User Manual 81 Chapter 8 Alarm Settings ...
Страница 87: ...Digital Video Recorder User Manual 86 Figure 8 9 Copy Settings of Alarm Input ...
Страница 96: ...Digital Video Recorder User Manual 95 Chapter 9 POS Configuration ...
Страница 102: ...Digital Video Recorder User Manual 101 Chapter 10 VCAAlarm ...
Страница 110: ...Digital Video Recorder User Manual 109 Chapter 11 VCA Search ...
Страница 116: ...Digital Video Recorder User Manual 115 Chapter 12 Network Settings ...
Страница 130: ...Digital Video Recorder User Manual 129 Chapter 13 HDD Management ...
Страница 142: ...Digital Video Recorder User Manual 141 Chapter 14 Camera Settings ...
Страница 146: ...Digital Video Recorder User Manual 145 Chapter 15 DVR Management and Maintenance ...
Страница 153: ...Digital Video Recorder User Manual 152 Chapter 16 Others ...
Страница 161: ...Digital Video Recorder User Manual 160 Chapter 17 Appendix ...


