background image

21

Das Fax

The following points are the most common causes of errors when
sending faxes!  Don’t send

... pages from newspapers (printer’s ink).

... stapled pages or pages held together with paper-
clips. Remove all staples and clips before sending.

... creased or torn pages.

... wet pages or pages with corrections made with cor-
rection fluid; dirty pages or pages with a glossy or
laminated surface.

... pages joined with sticky tape or glue, with adhesive
stickers such as “post-it®” notes, or pages which are
too thin or too thick.

... pages written in faint pencil, crayon, chalk or artist’s
charcoal.

Documents smaller than A5 risk getting stuck in the machine.

Write clearly and legibly. Only use pens with dark ink (black/
dark-blue, not yellow/orange/light green).

Documents printed on your fax machine are visible on the used
up ink film. In case of confidential texts the ink film should be
destroyed after usage.

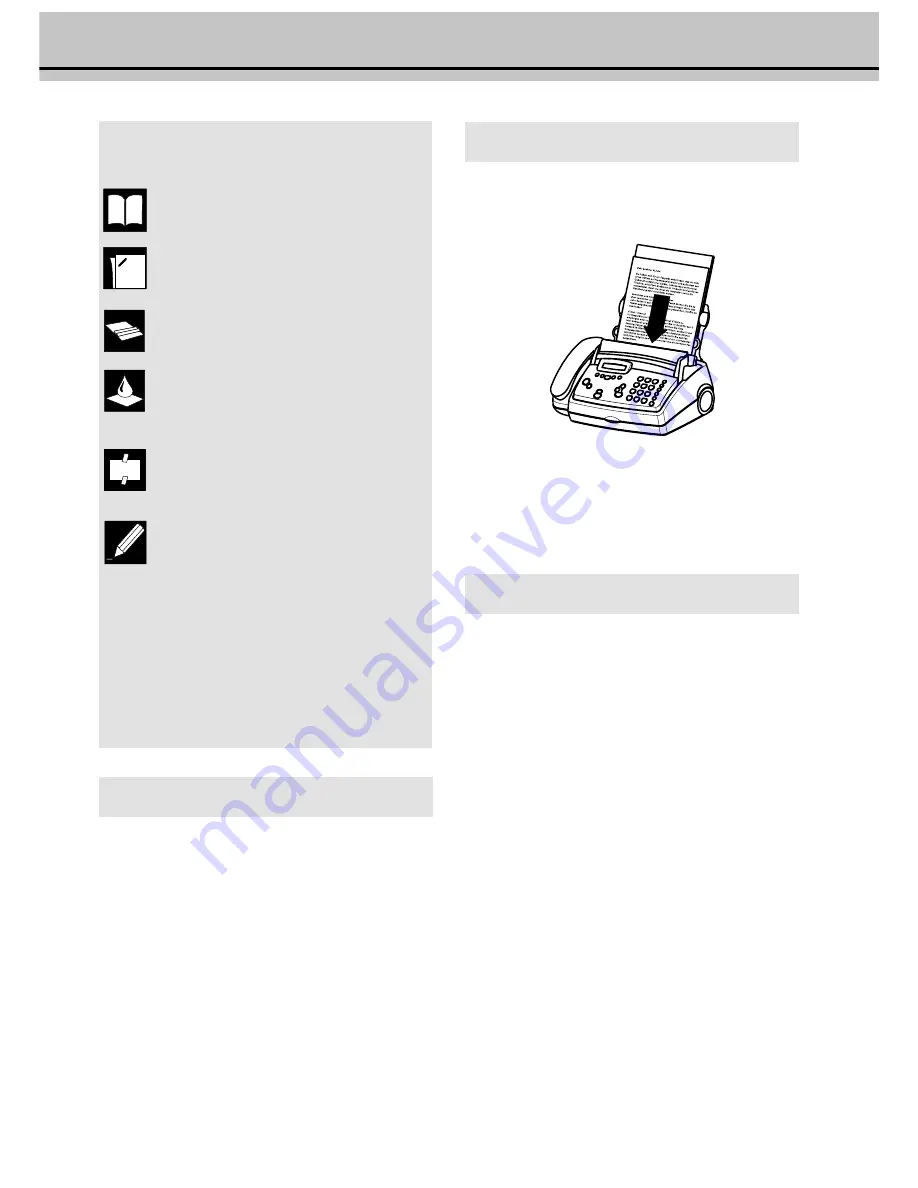
Feeding documents in

1

To avoid more than one page being fed at the same time, first fan
out the stack and then straighten it on a smooth surface.

2

Insert your documents (max. 10 sheets) loosely 

with the printed

side up

 into the document feed slot. In case a document jam

occurs, remove the scanner from the device and remove the
document.

Sending faxes

1

Dial the number you require.

2

Insert your documents face up into the document feed slot
(max. ten pages).

3

If you want to select a higher resolution, press 

FINE/PHOTO

.

4

Press 

START

. Transmission now begins. In case the connection is

not successful your fax machine will redial later.

5

If you want to interrupt transmission, press 

STOP

.

Broadcast

This feature is very useful, in case you want to send the same
document to more than one party (Circular send).

1

Insert the document face up into the document feed slot. If you
want to select a higher resolution, press 

FINE/PHOTO

.

2

Select 

MENU 

25

. Press 

OK

. The inserted document will

be stored into the memory.

3

Enter the first telephone number or e-mail address and
press 

OK

. This will be your first entry in the recipient list.

Repeat the procedure until you have entered data for max.
five recipients.

4

 To send the document press 

START

. The document will be

sent successively to every party entered. If transmission to
one of the recipients is not possible your fax machine will
continue transmission according to the list and retry
transmission to the party missed. After transmission a
transmission report will be printed out automatically.

 6 Fax

Содержание NORELCO 2

Страница 1: ...HELP INSTALLtwice yourfaxmachinewillprintout apagedescribingthebasicfunctions Italsoprovidesinformationabout additionalhelppagesconcerningfaxmachineuse Quick and easy installation EASYINSTALLwillguideyouthroughtheinstallationofyourfax machine PressHELP INSTALLformorethantwosecondsanda sheetwillbeprintedout Usingthissheettogetherwiththedisplay promptstoaidtheinstallationofyourmachine Onceyouhavegon...

Страница 2: ...ersonnel Yourfaxmachinehasbeentestedinconformitywithstandards UL1950 EN60950andIEC950respectively andmayonlybe operatedwithtelephonesystemsandpowerequipmentwhich meetthesestandards International guarantee PHILIPSproductshavebeendesignedandmanufacturedtothehighest qualitystandards If unfortunately somethingshouldgowrongwiththis product PHILIPSguaranteesfreeofchargelabourandreplacement partsduringap...

Страница 3: ...freeoperation 20 only with built in answering device Mute 20 Callinglineidentification 20 6 Fax 21 Feedingdocumentsin 21 Sendingfaxes 21 Broadcast 21 Imagequality 22 Transmissionreport errorreport 22 Overseasfunction Transmission 22 Sizecompression 22 Faxjournal 22 Polledreception 22 Pollingsend 23 Sendlater 23 Paperlessfaxreception 23 7 Scanner 24 Scanning 24 Copying 24 Contrast 25 8 E mail 26 Ab...

Страница 4: ...view of the machine Thefollowingitemsareincludedinthepackaging 1 Telephonecablewithplug 2 Mainscablewithplug 3 Telephonehandset 4 Spiralcablefortelephonehandset 5 Faxmachine 6 Papertray 7 Document support 8 Usermanual 9 Installationguide 10 Folderwithe mailregistrationform 8 Scanner 9 Front ink film compartment 10 Rear ink film compartment 11 Printer roller ...

Страница 5: ...resolutionuseFINE PHOTO 3 Fax switch Page 31Day setting the DAY operating mode S 16 32 Night setting the NIGHT operating mode M 16 33Timer setting the TIMER operating mode U 17 34 Easylink codes for use with additional telephones 17 4 Others 41 Fax journal log of the last ten fax documents received and sent 22 42 Dialling list print out of stored names and numbers 20 43 Transmission report automat...

Страница 6: ...utgoing mes sage PLAY Toplaybackmessages Thekeyflasheswhennewmessagesand memos have been recorded After playback the key stays lit until messages have been deleted HELP INSTALL pressbriefly twice printoperatinginstructionsforthemost importantfunctionswithreferencestoadditionalhelppages pressandhold twoseconds tostarttheautomaticinstalla tion of your fax machine printout of Easy Install toselectopt...

Страница 7: ...ween two figures PP PP PP PP PP press briefly to repeat the last five numbers you have dialled pressandhold twoseconds tobrowsethelistofcallers DIAL l l l l l MIC fordiallingwithoutliftingthehandset Fordeviceswithbuilt in answering machine for hands free operation CLEAR pressbriefly todeletemessages entries individualsymbols press and hold two seconds tocancelthewholeentry STOP stops procedures ST...

Страница 8: ... such a way as to ensure free circulation of air around it 4 If you would like to use a cordless phone there should be a distanceofatleast15cminbetweenthefaxmachineandthebase station otherwiseyoumayhearacousticinterferenceinyour handset Connecting the fax machine To the telephone socket Connect the telephone cable to the fax machine by inserting it inthesocketonthebottomofthemachineidentifiedwithL...

Страница 9: ...ll inkfilm 1 Before loading a new ink film you must remove the paper from the paper feed mechanism Also follow the instructions on your ink film packaging 2 To obtain optimum quality please use only ink films as specified on your original roll For safety reasons do not use any other brands because they can damage your fax machine 3 Open the machine by carefully lifting the operation panel at the r...

Страница 10: ...rip is fixed to the start of the ink film so the quality of the first few pages may be impaired Loading paper Before you can copy documents paper must be loaded in your fax machine Please use only the following paper format standard A4 210 x 297 mm The fax machine works with normal paper used for writing and copying and has been optimised for smooth 80g m2 papier The smoother the paper surface the...

Страница 11: ... stop in the paper feed mechanism max 50 sheets 5 Close the paper feed flap Neverloadpaperwhilethefaxmachineisprinting Donot usepaperthathasalreadybeenprintedononeside This couldleadtoapaperjam Removing paper 1 Pull the paper feed flap forward 2 Pull the paper out 3 Close the paper feed flap Paper jam Open the operation panel Pull the paper carefully outwards from the inside Before closing the pan...

Страница 12: ...ine even if they are in different rooms Make sure that the fax machine is the first device connected Pleasenote Ifyouconnectadditionaldevicestoseparatesockets e g in separaterooms youractivefaxswitchcannotcontrolthem whichmeans thatyourfaxmachinebehaveslikeanyordinaryfaxmachine Forthis reasone g calltransferisnotpossible Thereforewerecommendyouto connect your additional devices to the same socket ...

Страница 13: ...ither 0 R in some systems also described as FLASH or a number key Press OK 4 Press OK Your machine will then check that the outside line can be obtained 5 if the check is successful briefly appears CHECK OK 6 if the check is unsuccessful briefly appears CHECK NOT OK 7 You will be asked to repeat the entry Check the key for obtaining an outside line However if you have chosen the correct key and on...

Страница 14: ...g 150500forMay15 2000 4 Press OK Entering your number Use or toenterthe thatisoftenusedininternationalfax numbersinfrontofthecountrycode and toenteraspace Themaximumnumberofdigitsyoucanuseforyournumberis20 1 Select function 13 by pressing MENU and numbers 1 and 3 2 PressOK 3 Enter your telephone or fax number Country codes UK 44 Ireland 353 Hong Kong 852 Singapore 65 4 Press OK Your number is now ...

Страница 15: ...djustthevolumeoftheringsignalifthefaxmachineisinstand bymodeorifitisjustringing Pleasenotethatdifferentvolumescanbe set inS and M mode see Fax switch 1 By pressing the display shows the current setting for about three seconds 2 Change the volume by pressing until the desired volume is achieved Volume of the loudspeaker 1 You can adjust the volume of the loudspeaker at any time by pressing DIAL wit...

Страница 16: ...R VOL Low Medium High LISTEN IN ON OFF 1 Selectfunction31 Day bypressingMENUandnumbers3 and1 ConfirmwithOK 2 Selectnumberofringswith beforeyouransweringdevice will be activated TAM RINGS 5 2 3 Confirm your entry with OK 4 Now enter the number of ringing signals after which the automatic fax switch should accept the call and separate faxes from voice messages Although the caller will continue to he...

Страница 17: ...e opportunity to check whether your answering machine holds any messages without incurring telephone costs if your answering machine turns itself on after only two ringing signals you will know that new messages have been left After listening to your new messages your answering machine will at the next call switch itself on again after five ringing signals Mode U U U U U The default operating mode...

Страница 18: ...sage 3 If your fax machine is unable to recognise older fax machine models which do not transmit those signals that are commonly used in today s technology you should advise your callers in your answering message to press and 5 followed by START to commence the fax reception 4 If the automatic fax reception is impossible press START to manually begin receiving the fax 5 If your answering machine p...

Страница 19: ...youcanusetostorenum bersore mailaddressesyoudialfrequently Storing numbers 1 Press n for two seconds 2 Choose a number between 0 and 9 3 Open the flap on the operation panel and enter a name using the e mail keyboard Press OK 4 Enter the telephone number or e mail address you wish to store and confirm with OK Using short dial 1 Press n and choose a number between 0 and 9 The stored name or telepho...

Страница 20: ... to the fax ma chine 1 Press and 0 during the phone call If the connection is establishedsuccessfully youwillhearatone Replacethehandsetof theadditionaltelephonewithinthreeseconds 2 Yourfaxmachinewillringforabout30seconds Ifthehandsetis notliftedintime theadditionaldevicetakesoverthecallagainand ringsforabout20seconds Ifyoudonotliftthehandsetintimethe callwillbedisconnected Hands free operation on...

Страница 21: ...vethescannerfromthedeviceandremovethe document Sending faxes 1 Dial the number you require 2 Insert your documents face up into the document feed slot max ten pages 3 Ifyouwanttoselectahigherresolution pressFINE PHOTO 4 PressSTART Transmissionnowbegins Incasetheconnectionis notsuccessfulyourfaxmachinewillrediallater 5 If you want to interrupt transmission press STOP Broadcast This feature is very ...

Страница 22: ...n switch off reduction using function46 1 PressMENU 4 6and OK 2 Select with and confirm with OK Fax journal The fax journal is a list of the last ten received and transmitted faxes 1 Call up function 41by pressing MENU 41and OK 2 Select with if and when the fax journal will be printed out immediately or after ten transmissions 3 Confirm your choice with OK Polled reception Bymeansofthisfunctiondoc...

Страница 23: ...er and then press START orOK 4 The fax machine is now ready to send the inserted docu ment You can still make telephone calls while this function is activated 5 If you remove the inserted document the stand by mode is cancelled Paperless fax reception If there is no paper in the paper feed mechanism or if the ink film is finished any incoming fax will be received into memory storage capacity for d...

Страница 24: ...a warning signal indicating that the scanning process of the document was not successful Start the scanning again 5 After the scanning process is completed the document will be printed if you press START or automatically after approximately four seconds Documents larger than A4 will be split up into more than one page automatically During the printing process printed information will be simultane ...

Страница 25: ...s has been achieved the next page will be stored etc Automatic sorting is therefore not an option 4 The document that has been pulled through will come out on the top side of the fax machine 5 To stop copying press STOP The document and the copy will be ejected You can only enlarge or reduce documents with the scanner inserted In case a paper jam occurs or the ink film or the memory capacity is us...

Страница 26: ...tly your Internet provider will send a confirmation stating that you now have Internet access After an introductory phase you will be charged for Internet access by your provider To be able to use all your e mail functions your Internet account must have been set up If you select an Internet function without having set up your Internet account you will be requested to perform set up Select functio...

Страница 27: ...board and press START Download Internet pages InordertodownloadInternetpages entertheInternetaddress The desiredInternetpagewillbesenttoyourfaxmachineandprintedout Linkstootherwebpagesareonlypossiblebyenteringthecorrectsite address e g www philips com 1 SelectMENU 27 PressOK Enter address 2 Open the flap Enter the desired Internet site address using the e mail keyboard Use the dial pad in case you...

Страница 28: ... 00852 for Hong Kong and 0088 for Taiwan 3 PressSTART Internet Ifyourfaxmachinecannotestablishcontactwithyourserverright away itwillrepeattheconnectingprocedurethreetimes Ifthisis unsuccessfulitwilluseregularfaxtransmission PressSTOPto interruptprocedure Automatic fax transmission via Internet The factory settings do not provide for the automatic sending via the Internet You can switch on this fac...

Страница 29: ...Confirm with OK Listening to messages 1 IfPLAYflashes messageshavebeenrecordedforyou PressPLAY tolistentothefirstmessage Thedateandtimethemessagewas receivedwillbeshownonthedisplay 2 The next message will be replayed if you press PLAY while listening to any message If you want to switch to the first message while listening to the other messages press 1 3 After listening to your messages PLAY will ...

Страница 30: ...essage Youcannotrecordatelephoneconversationwhilehands free operationisactivated VIP code Ringing despite answering device Persons you had given this code can make the telephone ring after the answering machine has taken the call This is useful if both ring counts in function 31 and 32 have been set to 0 1 To enter the code select MENU 53 and press OK Enter a four digit code Confirm with OK 2 This...

Страница 31: ...be playedback Ifnonewmessageshavebeenrecorded youwillheara secondconfirmationtone 3 Thenyoucanenter commandsasusualorterminatetheremote controlbyreplacingthehandset Overview of commands 1 The message you are just listening to will be repeated 2 Your messages will be played back 3 Move to the next message 4 Recordanewoutgoingmessage Ifyoupress4againaftertwo confirmationtones youwillhearalongconfirm...

Страница 32: ...fax machine is faulty There is paper in the sheet feeder The scanner is dirty Your fax machine is faulty Thermal printhead is dirty Scanner not put in Scanner has not clicked in Remedy Your fax correspondent must feed the document properly Test the fax machine by making a copy If your copy is faultless the correspondent s fax machine might be defective Call service if necessary Change the resoluti...

Страница 33: ...s too high for the answering machine or the total number of ringing signals for a device without answering machine You are operating your fax machine on a private branch exchange and have not set it accordingly Remedy Press the scanner firmly against the document or put the document on a flat surface Move the scanner in the direction marked with an arrow across the document symbol on the right sid...

Страница 34: ...e correctly Document loaded the wrong way up Printer or scanner faulty The caller is trying to send a fax Remedy Switch the automatic fax despatch via the Internet off using function 29 In function 31 or 32 you can put the tollfree rings to a higher level under FAX RINGS see chapter Fax switch Setting the operating mode You have just noticed how the automatic fax switch operates After the first ri...

Страница 35: ...ecord a message without music Record a shorter announcement no longer than 20 seconds Open the operation panel and pull the paper carefully outwards from the inside Remove the scanner and pull the paper carefully outwards in one direction This is not a fault Get a new ink film In order to use e mail functions your Internet account must be set up correctly function 17 All incomplete e mail transmis...

Страница 36: ...you shouldnotusethisfunction Function 45 Service code is used to delete some or all of your changes to the factory settings This function enables you to partially or fully reconfigure your device It is especially helpful if you have modified settings but find that your fax machine does not respond as expected After deleting some or all of your custom settings please rerun EASYINSTALL The following...

Страница 37: ...el by carefully lifting it upwards at the recess in the middle 2 Using a cloth as described above wipe the printer roller A To clean the entire roller turn the roller by hand 3 When cleaning is complete close the operation panel Donotusethefaxcleanersavailableonthemarketwhich aredrawnthroughthemachineautomatically Bydoingso youcandamageyourfaxmachine ...

Страница 38: ...twork providers DMM Dynamic Message Memory Messages of the built in answering machine as well as fax messages that had not been printed will be stored in this memory document The written note you want to send by fax to another party DTMF short for Dual Tone Multiple Frequency With this signal you can start fax reception from an additional telephone which has tone dialling e mail Electronic mail me...

Страница 39: ...ation 6 Conversation Record 30 Copy key 24 Copying 24 Cordless telephone 1 Correct Entries 19 20 Correction 14 19 D Data Technical 38 Data compression 38 Date 14 Day 1 14 18 Day mode 16 Delayed send 23 Delete Entries 20 Entry 19 Message 29 Numbers 19 Description Machine 4 Dial key 19 DIAL MIC 7 Dimensions 38 Display 5 Language 15 Display lamp 6 DMM 5 Explanation 38 Document Feed in 21 Download Int...

Страница 40: ...elephone 19 Record a conversation 30 Telephone book 7 19 List of numbers 20 Telephone cable 8 Telephone numbers List 20 Time 14 23 Timer 1 5 16 17 Timer mode 17 Activate 17 Check 17 Configure 17 Deactivate 17 Tipps 32 Toggling calls 19 Tone dialling Explanation 39 Transmission report 22 Transmission speed 38 U URL Explanation 39 V VIP code 30 Volume 29 Loudspeaker 15 Ring signal 15 W Web page Expl...

Отзывы: