


AT-OMNI-121 / AT-OMNI-122
61
Device Operation
NOTE:
Multiple multiview configurations can be created and saved. To display a different
multiview, go to the
HDMI Output
menu, locate the
Video
section and click the
Input
drop-
down list to select the desired multiview configuraiton.
Multiview Configuration
1.
Click
Multiview
in the menu bar.
2.
Click the
ADD MULTIVIEW
button.
3.
The
New Multiview
dialog box will be displayed.
4.
Enter a name for the multiview configuration in the
Name
field. Since this decoder will be a picture-in-picture
layout, use the name
pip
.
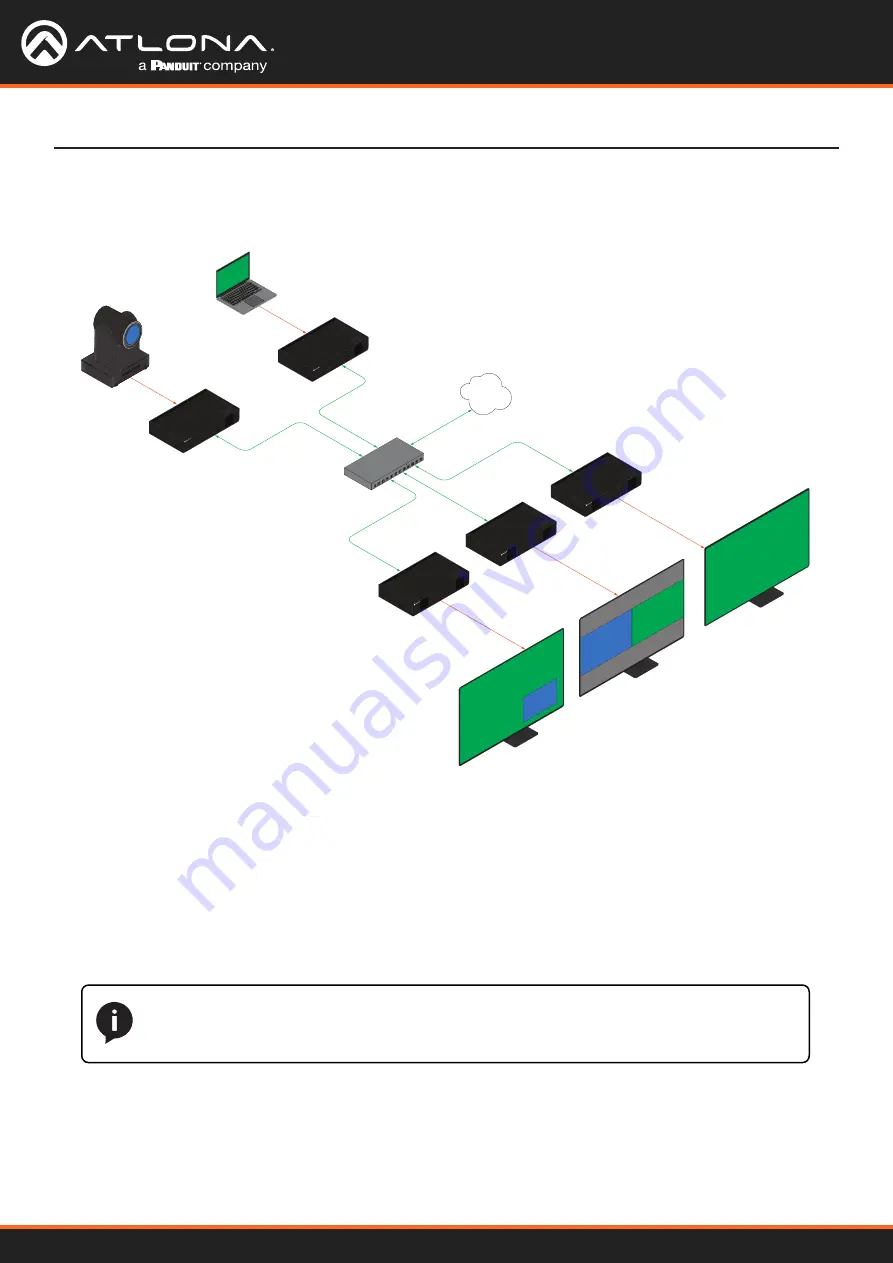
The final step is to configure the decoders to display the proper stream(s), as outlined in the tutorial diagram (shown
below).
AT-OMNI-111
AT-OMNI-121
PoE Network Switch
Laptop
Ethernet
Ethernet
Ethernet
Ethernet
HDMI IN
HDMI OUT
HDMI OUT
HDMI OUT
LAN
HD
MI
PW
R
LIN
K
TM
OMNI
STREAM
ID
TM
OMNI
STREAM
LINK
PW
R
AT-OMNI-121
Display
Display
Display
Ethernet
TM
OMNI
STREAM
LINK
PW
R
AT-OMNI-121
Ethernet
TM
OMNI
STREAM
LINK
PW
R
AT-OMNI-111
HDMI IN
HD
MI
PW
R
LINK
TM
OMNI
STREAM
ID
HD camera
4K
4K
720p
1080p
1080p
1
0
X
Z
o
o
m
F
1.
6-
F
3.0
f4
.7
mm
-
f
4
7
m
m
1
0X
Z
oom
F1.
6-
F3
.0
-
f
4
7
m
m
4K + 1080p
1080p + 720p
Encoder #1
Encoder #2
Decoder #1
Display #1
Display #2
Display #3
Decoder #3
Decoder #2
Decoder #1
5.
Click the
Resolution
drop-down list and select
3840x2160
.
6. Click the
Layout
drop-down list to view the available layouts, and select
pip-bottom-right
.
7.
Click the
1 main (3840x2160)
drop-down list and select
ip_input3(226.0.0.3:1000)
.
8. Click the
2 bottom_right (1280x720)
drop-down list and select
ip_input2(226.0.0.2:1000)
.


