3.2 Programming the VoIP Gateway Card in the Los Angeles Office
36
Getting Started
3.2.8
Confirming the IP Address Assignment
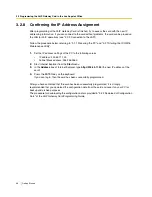
After programming of the VoIP Gateway Card is finished, try to access the card with the new IP
addressing information. If you can connect to the card without problems, the card can be placed on
the LAN for VoIP operations (see "2.2.3 Connection to the LAN").
Follow the procedure below, referring to "3.1.1 Preparing the PC" and "3.2.1 Starting the IP-GW16
Maintenance Utility".
1.
Set the IP address settings of the PC to the following values:
•
IP address: 200.45.11.100
•
Subnet Mask address: 255.255.255.0
2.
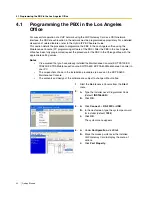
Start Internet Explorer from the
Start
menu.
3.
In the
Address
box of Internet Explorer, type
http://200.45.11.35
(the new IP address of the
card).
4.
Press the ENTER key on the keyboard.
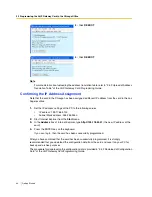
If you can log in, then the card has been successfully programmed.
After you have confirmed that the card has been successfully programmed, it is strongly
recommended that you download the configuration data from the card and save it on your PC for
backup and archive purposes.
The procedure for downloading the configuration data is provided in "2.4.2 Download of Configuration
Data" of the VoIP Gateway Card Programming Guide.
Содержание KX-TDA0490
Страница 4: ...4 Getting Started ...
Страница 20: ...2 2 Cable Connection 20 Getting Started ...
Страница 45: ...Getting Started 45 Appendix A Guidance for VoIP Installation ...
Страница 55: ...Getting Started 55 Appendix B Alternative Numbering Plan Example ...
Страница 63: ...Getting Started 63 Appendix C Initialisation of the VoIP Gateway Card ...
Страница 66: ...C1 Initialising the VoIP Gateway Card 66 Getting Started ...
Страница 67: ...Getting Started 67 Appendix D Using the KX TDA0490 and KX TDA0480 in One Network ...
Страница 69: ...D1 Considerations in Installation Getting Started 69 ...
Страница 76: ...1 1 Starting the IP GW16 Maintenance Utility 6 Programming Guide ...
Страница 125: ...2 5 Others Programming Guide 55 2 5 2 Log Out 1 Click LOGOUT in the main menu 2 Click OK to log out ...
Страница 126: ...2 5 Others 56 Programming Guide ...
Страница 138: ...3 4 Others 68 Programming Guide 3 4 2 Log Out 1 Click LOGOUT in the main menu 2 Click OK to log out ...
Страница 139: ...Programming Guide 69 Index ...


