


7.7 Managing Registered Devices (BL-C210A/
BL-C230A Only)
A compatible Panasonic VIERA TV can be used to view camera images and configure certain camera features.
In order to use this feature, the camera and TV must be registered to each other. This page allows you to
confirm and delete devices (TVs) that are registered to the camera. Additionally, you can set the camera to
Registration Mode, so that it can be registered to additional TVs.
For details on registration, refer to the Setup Guide (for VIERA Connection). For details on viewing camera
images and configuring the camera with a TV, refer to the Operating Instructions (for VIERA Connection).
Note
•
This page is not available when accessing the camera using HTTPS.
•
If the camera is accessed while the camera is in registration mode, [Registering...] is displayed.
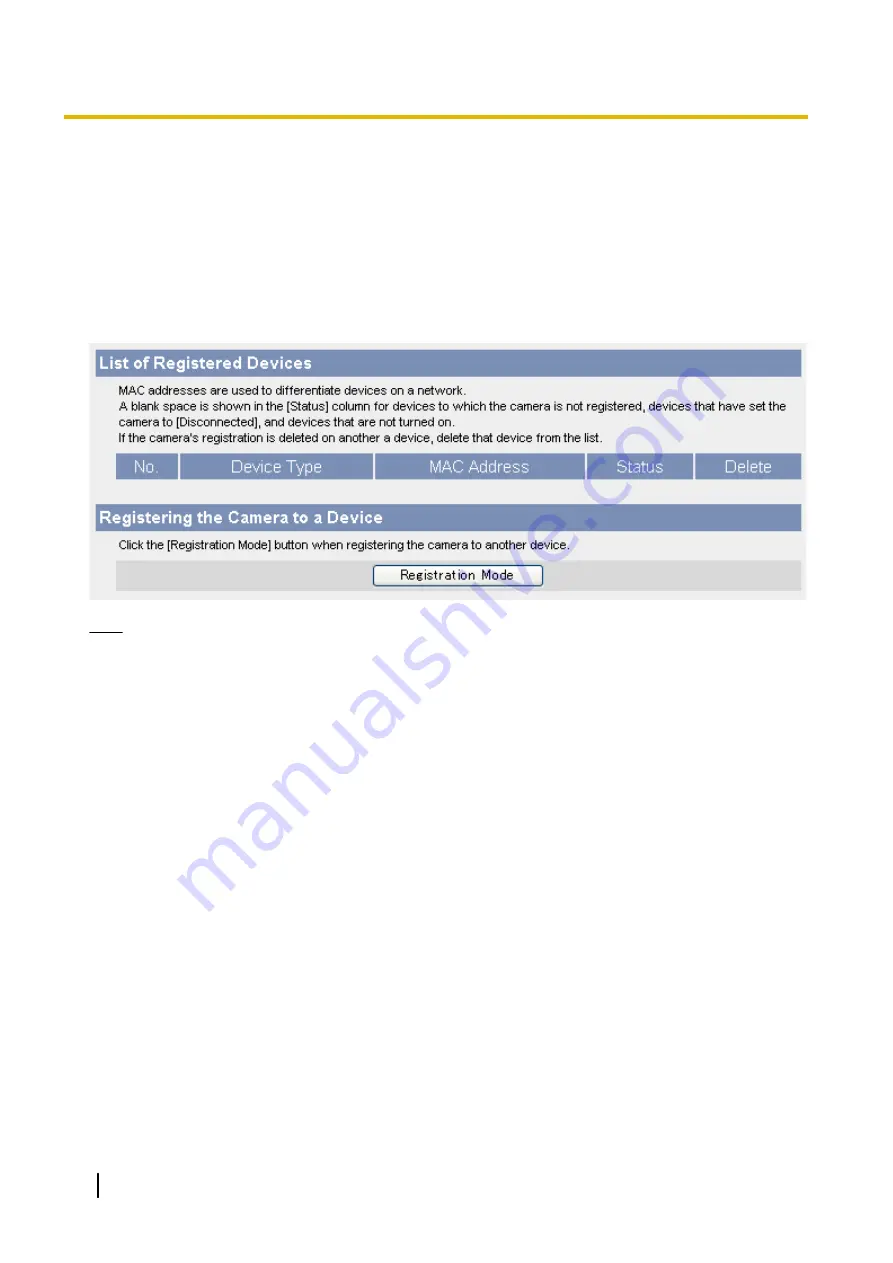
Confirming a TV’s status
1.
Click the [Setup] tab.
2.
On the left side of the screen under [Advanced], click [Registered Devices].
•
The following information is displayed.
–
The type of device
–
The device’s MAC address
–
The device’s status
[X] is displayed in the [Status] column if the TV is not turned on, if the camera is not registered to
the TV, or if the TV has set the camera to [Disable]. If the camera’s registration is deleted on the
TV, delete that TV from the camera’s registered devices list.
Deleting a TV
1.
Click the [Setup] tab.
2.
On the left side of the screen under [Advanced], click [Registered Devices].
3.
Click [Delete] to delete a TV.
•
After deleting a TV, we recommend deleting this camera’s registration from that TV.
172
Operating Instructions
7.7 Managing Registered Devices (BL-C210A/BL-C230A Only)
Содержание BL-C210 Series
Страница 122: ...4 Click Certificate Error in the address bar then click View certificates 122 Operating Instructions 5 2 HTTPS Settings ...
Страница 124: ...6 After the wizard is displayed click Next 124 Operating Instructions 5 2 HTTPS Settings ...
Страница 126: ...9 Click Next 126 Operating Instructions 5 2 HTTPS Settings ...
Страница 127: ...10 Click Finish Operating Instructions 127 5 2 HTTPS Settings ...
Страница 131: ...6 Click Finish 7 Click Yes Operating Instructions 131 5 2 HTTPS Settings ...
Страница 196: ...3 Click the Connections tab then click LAN Settings 196 Operating Instructions 11 1 Proxy Server Settings ...


