


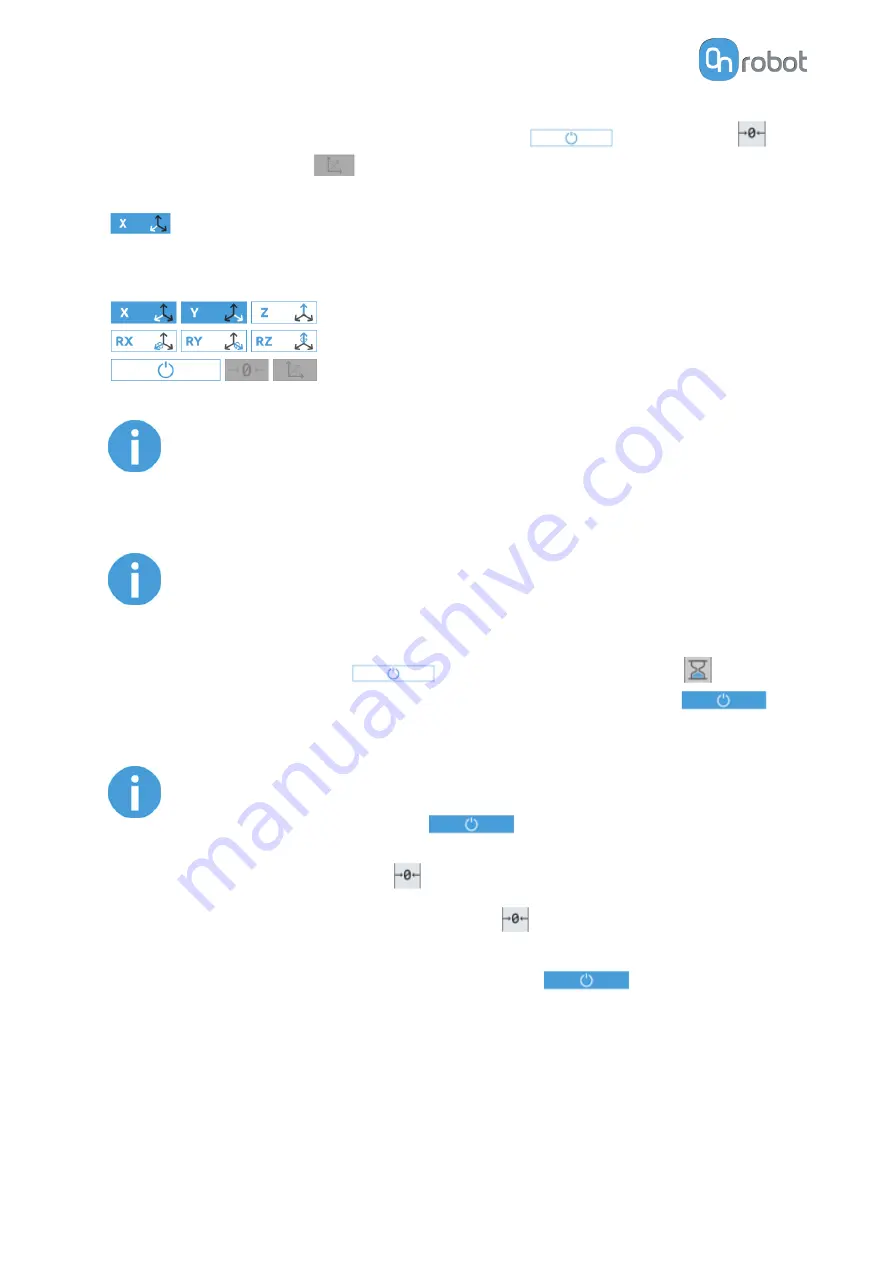
The toolbar contains the available axes, the enable button
, the zero button
and the snap to axes button
.
To select an axis, tap on the appropriate item. An axis is selected if it turns from white to blue
.
In the following example, the X and the Y items are selected to limit the movement along the
X and Y axis (planar):
NOTE:
The used coordinate system is the Tool.
To deactivate any axis that has been selected, tap on the item again.
NOTE:
It is possible to activate or deactivate axes during hand guiding.
To start hand guiding the UR robot, first make sure that you do not touch the tool and then
press and hold the enable button
. The button turns to an hourglass
icon
while the hand guiding is being initiated. Wait until the enable button turns blue
and drive the robot by hand with the help of the OnRobot sensor.
NOTE:
Make sure that you do not touch the tool before the hand guiding is activated
(enable button turned to blue
), otherwise the robot can behave
abnormally (e.g..: the robot could move without any external force exerted). In
this case, press the zero
button, while you are not touching the tool.
Make sure that you do not use the zero
button while touching the tool.
To stop hand guiding the UR Robot, press the enable button
.
OPERATION
44
Содержание RG2-FT
Страница 1: ...USER MANUAL FOR UR ROBOTS v1 4 1 Original Instructions ...
Страница 61: ...On the Users tab click on the Add new user button to add more users ADDITIONAL SOFTWARE OPTIONS 61 ...
Страница 66: ...Proximity Sensor Typical Accuracy HARDWARE SPECIFICATION 66 ...
Страница 68: ...Dimensions of the Gripper s finger in millimeters HARDWARE SPECIFICATION 68 ...
Страница 74: ...8 2 4 Tools 8 2 4 1 RG2 FT All dimensions are in mm and inches HARDWARE SPECIFICATION 74 ...
Страница 82: ...12 Certifications CERTIFICATIONS 82 ...
Страница 83: ...12 1 EMC CERTIFICATIONS 83 ...
Страница 84: ...12 2 Declaration of Incorporation 12 2 1 RG2 FT CERTIFICATIONS 84 ...


