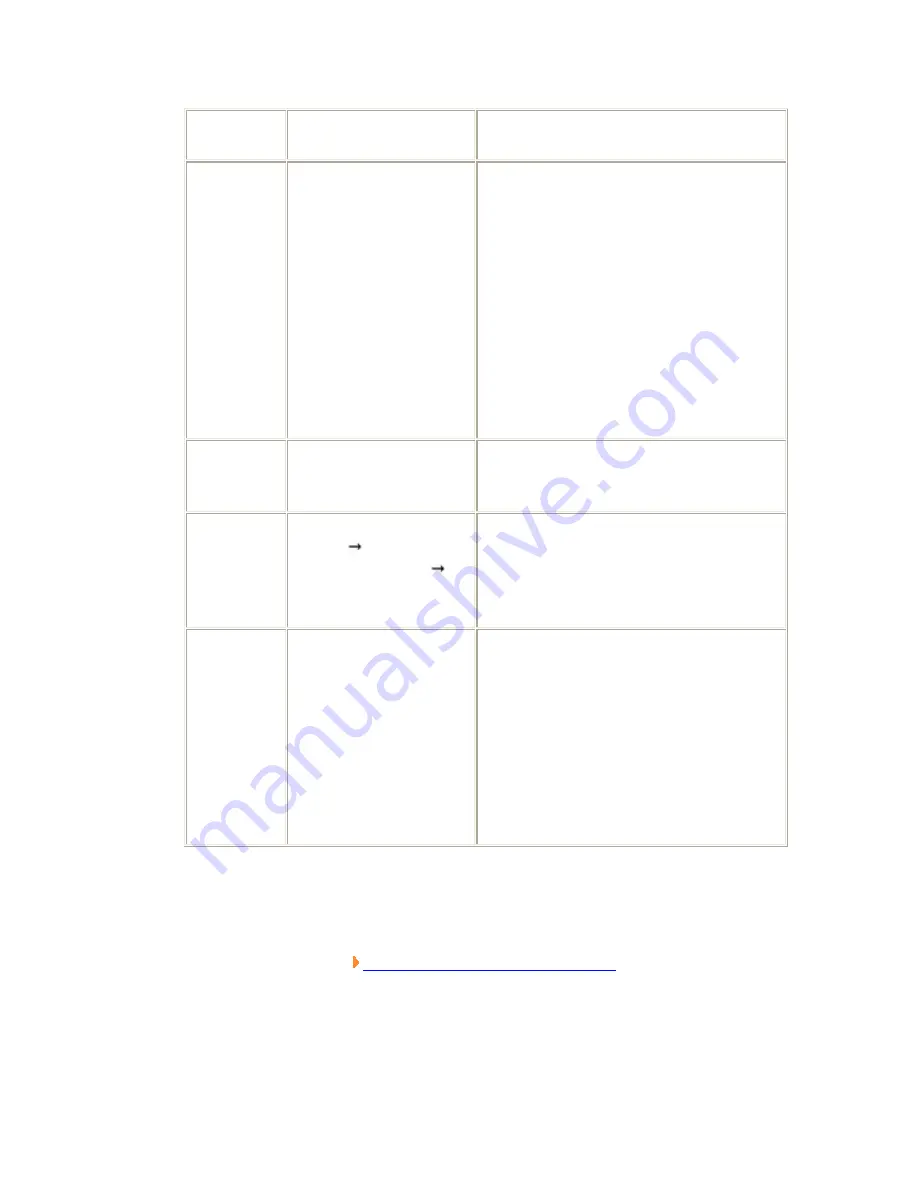
Setting
Item
Set Value
[Factory default]
Description
Auto
Update
o
Not
update
o
First
measure
o
[Always
update]
Select to update only the year, month,
and day. The clock time is always
updated.
When "Not update" is selected, the date
of registration of the processing unit is
memorized. And the date can be updated
later when performing date update is
performed later in the menu.
When "First measure" is selected, the
date is updated at the first measurement
after start.
When "Always update" is selected, the
date is updated every measurement.
Zero
suppress
o
[0]
o
Space
Select how the tens digits of the month
and day are displayed.
Calcuration
order
o
[Month
Day]
o
Day
Month
Select whether to calculate the month
first or the day first when the usage
period is set. (This affects calculation of
end of month.)
Month end
adjust
o
[Last day
of now]
o
First day
of next
o
Gap day
of next
Select the adjustment method when the
month and day become an invalid month
or day as a result of usage period
calculation.
Example) When the current date is
January 31st and the usage period is one
month
"Last day of now" = February 28
"First day of next" = March 1
"Gap day of next" = March 3
4. In the "Time margin setting" area, tap [...] and specify a value for each item.
The figure number can be specified by tapping [<] [>].
How to input a value:
User's Manual, "Inputting a Value"
Содержание FZ2 Series
Страница 1: ...Cat No Z275 E1 01 FZ2 Series Vision Sensors USER S MANUAL...
Страница 6: ...Operation Flow Here describes the operation flow...
Страница 19: ...Input Operation This section describes the basic operations of input devices of this product...
Страница 23: ...The numerical value is input 3 Tap OK Verify the value and close the numeric keyboard...
Страница 51: ...6 Tap OK when drawing is over The settings are registered...
Страница 61: ...Example When judging the type and classifying measurement conditions according to images branch processing...
Страница 62: ......
Страница 64: ...Verifying Items This product can operate with a single controller or is connected to external devices...
Страница 66: ......
Страница 88: ...A new processing unit is inserted above the tapped unit and the number of the units below is incremented by one...
Страница 90: ...The Rename Unit window closes and the processing unit is renamed...
Страница 97: ...3 Tap OK The scene switches...
Страница 100: ...Locating Measurement Objects Not Inclined...
Страница 101: ......
Страница 102: ...Locating Measurement Objects Inclined Internal and External Measurement...
Страница 103: ...Presence Measurement...
Страница 104: ...Dimension Measurement Measurement...
Страница 105: ...Burr Measurement Text Comparison Measurement Defects Measurement...
Страница 106: ...Quantity Measurement Measurement Mixing Measurement...
Страница 107: ...Measuring Height 3D Measuring Position of Holes 3D...
Страница 108: ......
Страница 123: ......
Страница 138: ...The data copied from the source scene is written over the scene selected as the destination 5 Tap Close...
Страница 140: ...Scene data is deleted 5 Tap Close...
Страница 145: ...The data copied from the source scene group is written over the scene group selected as the destination 6 Tap Close...
Страница 147: ...4 Tap Yes Scene group data is deleted 5 Tap Close...
Страница 155: ...7 Tap Measure in the Toolbar on the Main screen The measurement on the selected image is performed...
Страница 168: ......
Страница 197: ...Analyzing Measured Data with PC This section describes how to analyze the measured data with PC...
Страница 203: ......
Страница 214: ...6 Tap OK The window to show the status of transfer is displayed and the data is sent to the destination...
Страница 216: ...5 Tap OK The window to show the status of transfer is displayed and the data is sent to the destination...
Страница 225: ...Communication Processing Flow Ethernet Connection The procedure to connect Ethernet Example Input measurement command...
Страница 264: ...Input measurement trigger with in STEP signal range Example When setting 2 for Number of delay Note...
Страница 329: ...value 0 000 Field of view Calculated value 640 This is an actual dimension in the X direction...
Страница 369: ...F Calculated value 0 000 Sight Calculated value 640 This is an actual dimension in the X direction...
Страница 410: ...limit Lower limit 0 to 255 vividness This can only be set when Fine is selected...
Страница 416: ...For the following operations see Setting up Color Data...
Страница 423: ...Region Setting Color Data...
Страница 426: ...133 Lower limit for density deviation for monochrome cameras only Set Get 0 to 127...
Страница 461: ...For the following operations see Setting up Flexible Search...
Страница 475: ...For the following operations see Setting up Edge Position...
Страница 494: ...For the following operations see Setting up Edge pitch...
Страница 509: ...Please verify the sequent operations by following Setting up Defect...
Страница 524: ...For the subsequent operations see Setting up Fine matching...
Страница 568: ...For the subsequent operations see Setting up Gravity and Area...
Страница 572: ...For the following operations see Setting up Gravity and Area...
Страница 588: ......
Страница 592: ...For the following operations please refer to Setting up Labeling...
Страница 640: ...For the subsequent operations see Setting up Character Inspection...
Страница 648: ...Reduce the measurement region size in Region Setting Region Setting Character Inspection...
Страница 688: ...edge For the subsequent operations see Setting Up Scan Edge Position...
Страница 716: ...specified edge color is detected as the edge For the subsequent operations see Setting Up Scan Edge Width...
Страница 895: ...Chapter 5 Branch Control This chapter describes how to set up branch processing Conditional Branch DI Branch End...
Страница 960: ...color R 157 Background color G Set Get 0 to 255 158 Background color B Set Get 0 to 255...


