22
Part I: Fast Track to Super Snaps
✓
Choose a different menu:
Press the up- or down-arrow keys to move the
highlight over the menu. To access the option that enables the Custom
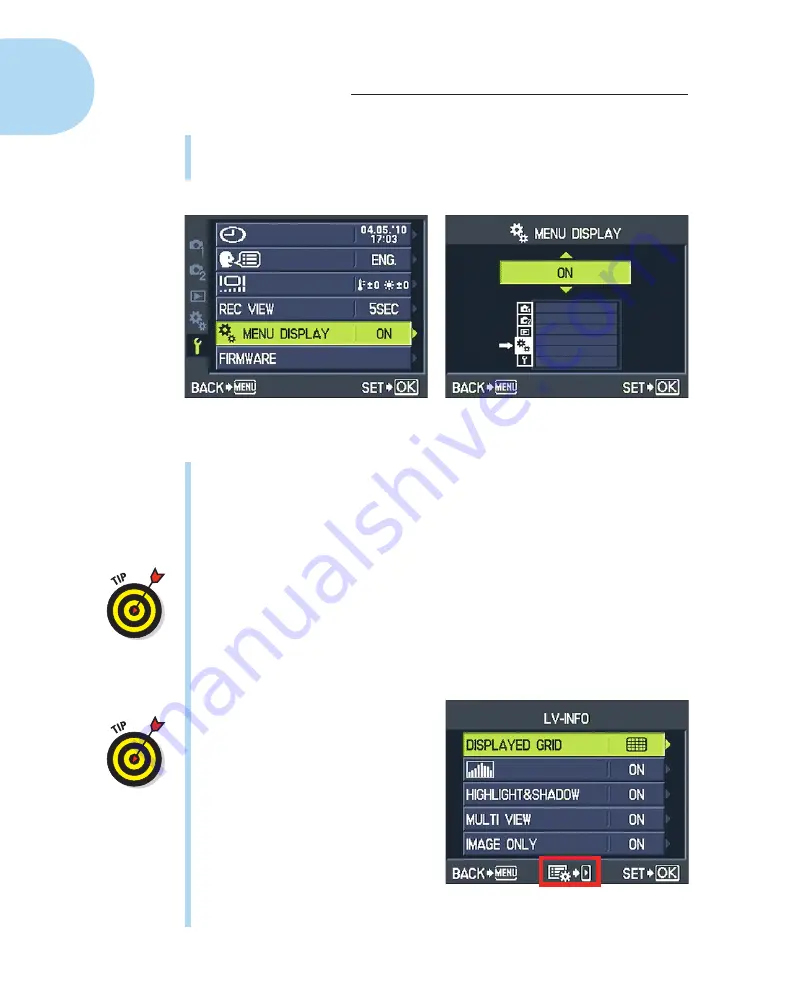
menu, select the Setup menu, as shown on the left in Figure 1-15.
Figure 1-15:
To display the hidden menu, choose this setting on the Setup menu.
✓
Select a menu item:
Press the right-arrow key to jump from the menu
icons to the options on the selected menu. Then press the up- or down-
arrow key to move the highlight over the option you want to choose. To
enable the Custom menu, choose Menu Display, as shown on the left in
Figure 1-15. Press OK to display the screen that offers available settings
for the menu item, as shown on the right in the figure.
Olympus aficionados often refer to the Custom menu as the
gear menu
because of the tiny gear symbols used to represent it. For the same
reason, some people call the Setup menu the
wrench menu.
I use the offi-
cial menu names, but you may encounter the unofficial lingo when visit-
ing online camera forums and other photography sites.
✓
Change the setting for the selected item:
After highlighting the option,
you typically take one of two routes: Either press OK or press the right-
arrow key.
How do you know which button to
push? The camera reminds you by
displaying symbols at the bottom
of the menu screen. For example,
in Figure 1-15, the symbols tell you
to press the Menu button to go
back one screen and to press the
OK button to select the highlighted
option. But in Figure 1-16, note the
middle icon: It tells you that on this
screen, you press the right-arrow
key to access a secondary menu of
options.
Figure 1-16:
This icon tells you to press the
right-arrow key to access a submenu.
05_879504-ch01.indd 22
05_879504-ch01.indd 22
6/28/10 1:31 PM
6/28/10 1:31 PM
Содержание PEN E-PL1
Страница 36: ...42 Part I Fast Track to Super Snaps ...


