18
Part I: Fast Track to Super Snaps
✓
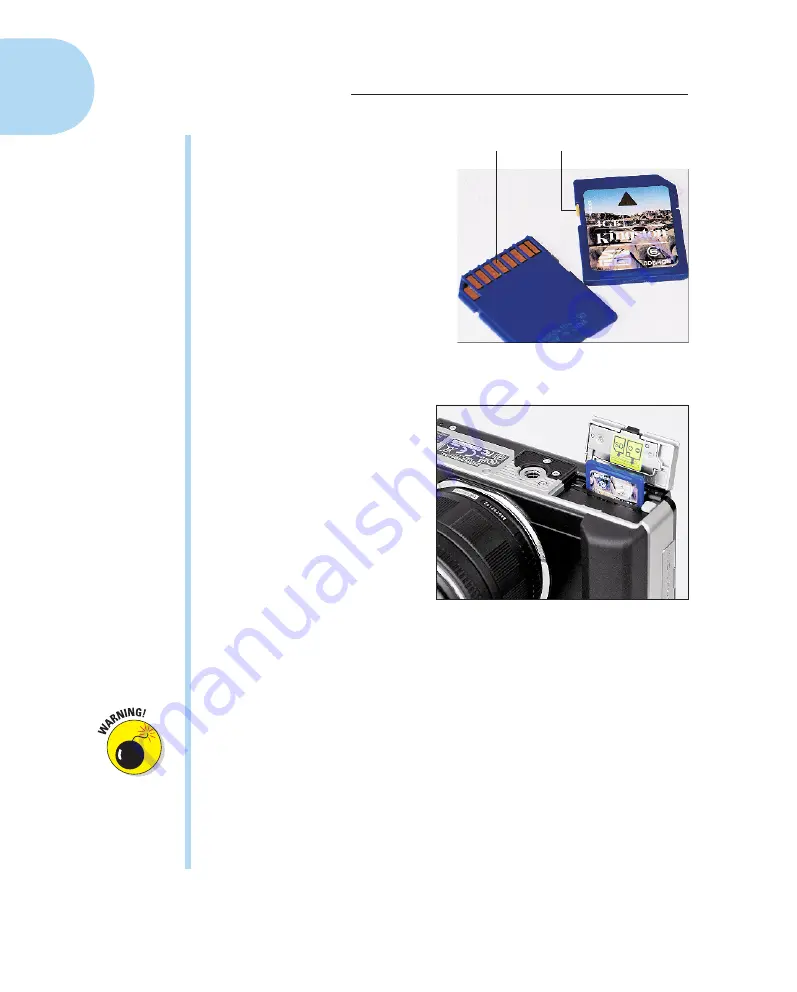
Locking cards:
The tiny switch on
the side of the card, labeled
lock
switch
in Figure 1-10, enables you
to lock your card, which prevents
any data from being erased or
recorded to the card. Press the
switch toward the bottom of the
card to lock the card contents;
press it toward the top of the card
to unlock the data.
Chapter 4 shows you how to pro-
tect individual images on a card
from accidental erasure by using
the camera’s picture-locking
feature.
✓
Inserting a card:
First, be sure
that the camera is turned off.
Then open the battery cover
on the bottom of the camera —
the card and the battery share
this compartment. Put the card
in the card slot with the label
facing the front of the camera,
as shown in Figure 1-11. Push
the card into the slot until it
clicks into place.
✓
Formatting a card:
The first
time you use a new memory
card or insert a card that’s
been used in other devices
(such as an MP3 player),
format
it. Formatting ensures that the card is properly prepared to record
your pictures.
Formatting
erases
everything
on your memory card. So before you
format, be sure that you copy any pictures or other data to your
computer.
To format a memory card, display Shooting Menu 1 and select Card
Setup, as shown on the left in Figure 1-12. Press OK to display the
second screen in the figure. Then select Format and press OK again.
On the confirmation screen that appears next, select Yes and press OK.
(If you need help using menus, the upcoming section “Ordering from
Camera Menus” explains all.)
Don’t touch
Lock switch
Figure 1-10:
Avoid touching the gold
contacts on the card.
Figure 1-11:
Insert the card with the label
facing the front of the camera.
05_879504-ch01.indd 18
05_879504-ch01.indd 18
6/28/10 1:31 PM
6/28/10 1:31 PM
Содержание PEN E-PL1
Страница 36: ...42 Part I Fast Track to Super Snaps ...


