Op
er
at
ion
4
4.2
Control From the Front Panel
32
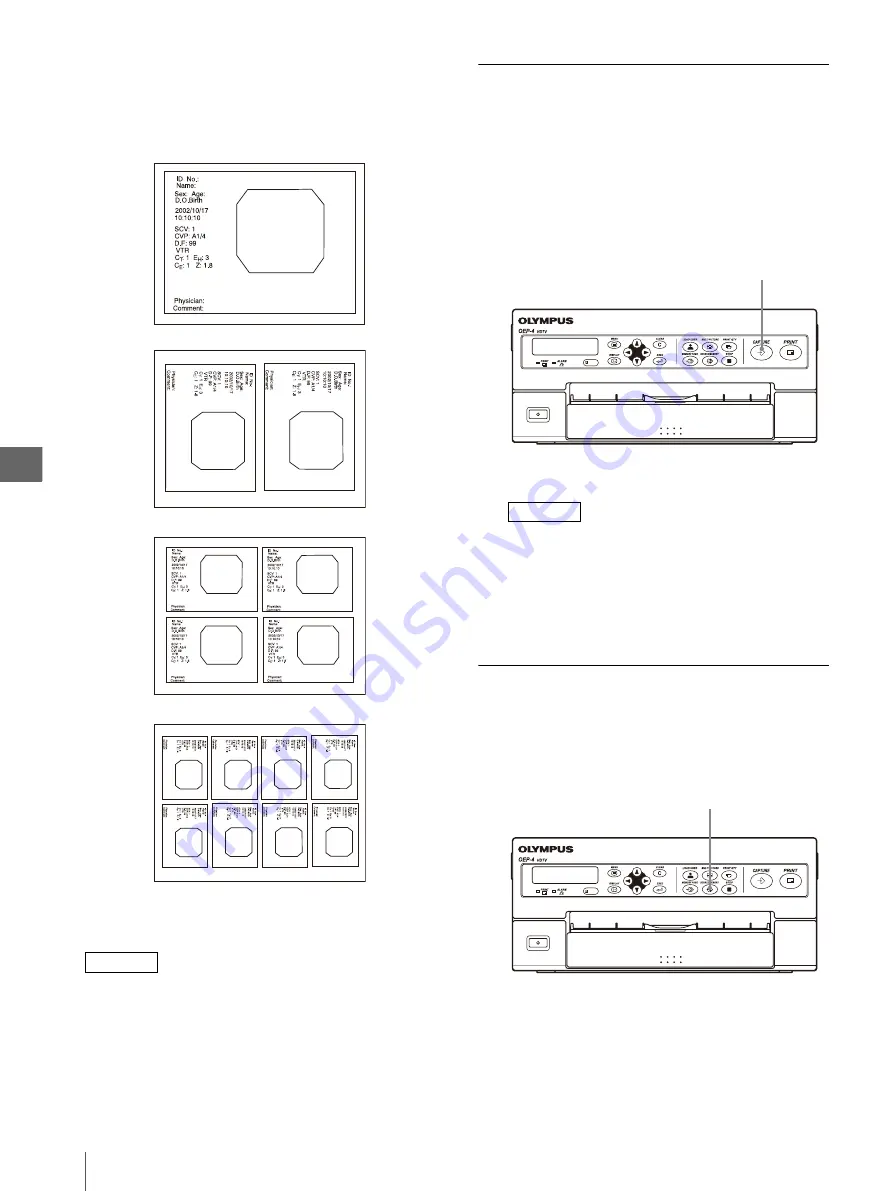
The monitor and LCD panel display correspond the
number of multi-picture as shown in Figure 4.7 and
Table 4.2. Printed picture becomes as shown in
Figure 4.8. Also memory mode image is displayed
similarly on the monitor.
Figure 4.8
NOTE
The multi-picture printing also be controlled in a menu.
The setup made using the above procedure is also
applied to the setup using the menu. For details on
menus, see “Setting “MULTI PIX”” on page 46.
Capturing the Image
The images to be printed on the print sheets can be
captured in this instrument as described below.
1
Display the image from the input source on the
monitor.
2
When the desired image is displayed, press the
CAPTURE button (see Figure 4.9).
Figure 4.9
NOTE
When the desired image is displayed, it is
recommended to turn it into a still image using the
freeze function to capture and print the image
without blur. For how to freeze an image, refer to
the instruction manual for the connected
equipment.
Checking the Captured Image
You can check the captured image on the monitor.
1
Press the SOURCE/MEMORY button (see Figure
4.10).
Figure 4.10
Single picture without screen splitting
Screen split into 2
Screen split into 4
Screen split into 8
CAPTURE button
SOURCE/MEMORY button
Содержание oep-4
Страница 2: ...2 ...
Страница 76: ...Index 76 Appendix ...
Страница 77: ...Index 77 Appendix ...
Страница 78: ...Index 78 Appendix ...
Страница 80: ...2 667 561 13 2 Printed in Japan GT2251 04 ...


