background image

Copying  

25 

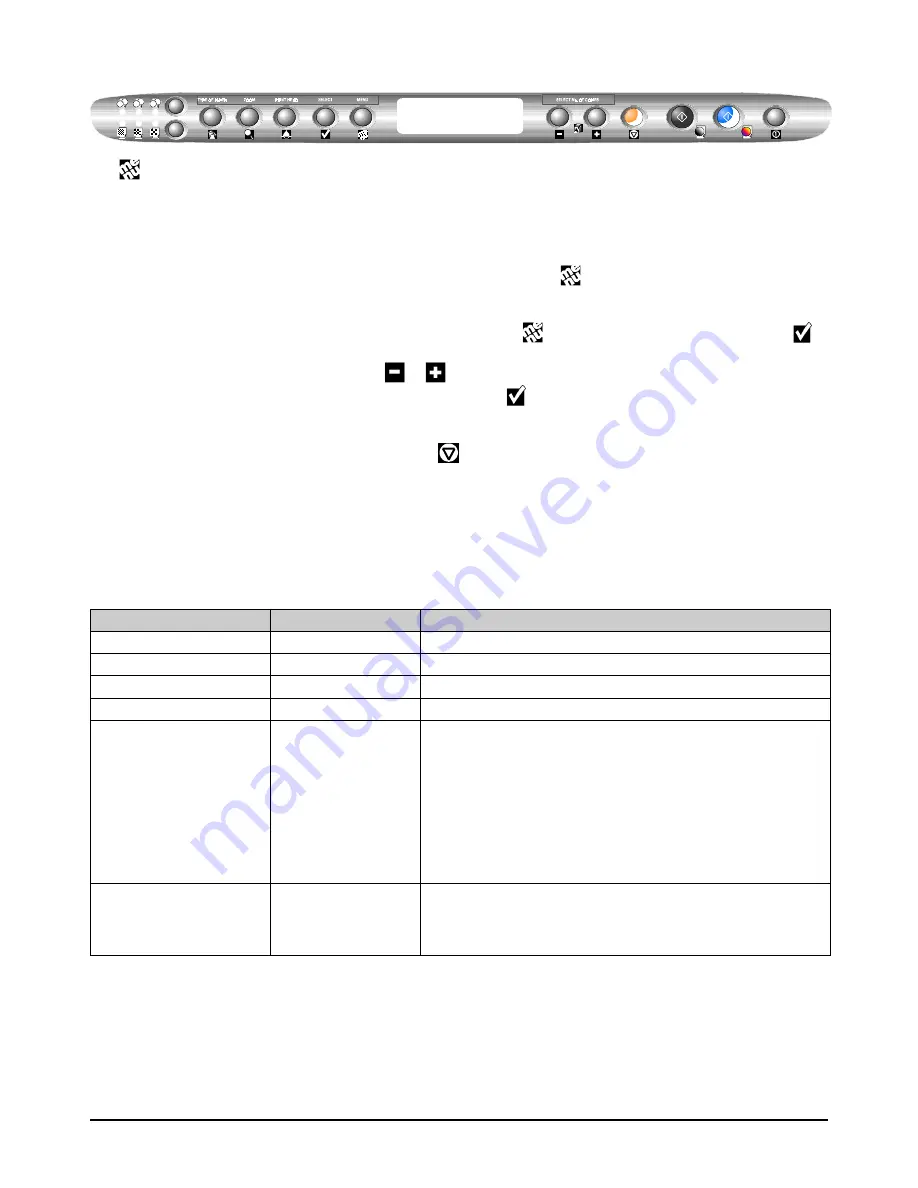
Using the Menu 


The 

 key gives access to a submenu of settings to help you to define how you want your copies.  Once selected 

and confirmed, the settings may be saved as default values and will be restored when the machine is turned on or 
reset. This menu also contains a set of maintenance functions that are described in the 

Preventive Maintenance


section. 
 

• 

How to access the menu 

With the machine in stand-by (COPIES:.....1….100%.....PLAIN), press 

 on the operator panel. 


• 

How to move on the menu


1. 

To move from one parameter to another on the menu, use 

 on the operator panel, and then press 

 to 

select the function displayed and/or access the values of the parameter displayed. 

2. 

To select a value for a parameter, use 


 or 

 on the operator panel. 

3. 

To confirm selection of the value for the parameter, press 

 on the operator panel. 


• 

How to exit from the menu 

To exit from any function or the entire menu, press 

 on the operator panel. 


• 

How to restore the factory settings 

You can restore the factory settings at any time, by selecting the 

RESTORE FACTORY SETTINGS

 function from 

the Menu

.


Menu Items 


Parameter/Function 

Default setting 

Other values/Submenu items 

PAPER SIZE 

A4 

LETTER, LEGAL 

BACKGRND REMOVAL * 

YES (ACTIVE) 

NO (INACTIVE) 

OPTIMIZATION SPEED 

QUALITY 

COLOUR ADJUST. ** 

NORMAL 

PALE, SATURATED 

FACTORY SETTINGS MENU 


LANGUAGE: 

ENGLISH 

FRANCAIS; DEUTSCH; ITALIANO; PORTOGUES; ESPANOL; SVENSKA; SUOMI;  
NORSK; DANSK; NEDERLANDS;  

COPY QUALITY 

DRAFT NORMAL; 

BEST 

COPY BRIGHTNESS 

NORMAL 

DARK;  LIGHT 

AUTO CLEAR TIMER 

120 SEC 

NO; 30 SEC; 60 SEC; 90 SEC 

AUTO OFF MODE 

30 MIN 

4 HOURS; 8 HOURS; NEVER; 12 MIN 

RESTORE FACTORY SETTINGS 


PRINT CARE MENU 


INK LEVEL: COLOUR:nnn%; B/W:nnn% 
PRINT HEAD ALIGNMENT 
PRINT HEAD CLEANING 
PRINT TEST PAGE 


* BACKGRND REMOVAL: we recommend you leave the default value (SI) for documents of texts only, and select 
NO for photographs and graphics. 
 
** COLOUR ADJUST : this parameter controls the intensity of the colour selected using the corresponding key on the 
operator panel. The default value (NORMAL) gives the standard range of colour; the value PALE, a lower range of 
intensity; and the value SATURATED, a higher range of intensity. 


Содержание CopyLab 200

Страница 1: ...User s guide...

Страница 2: ......

Страница 3: ...are of the Print Head 14 Print Test 15 Print Test Using the Test Function 15 Print Test Using the Print Care Menu 15 Demo Page 15 Printing Media 16 Loading Paper 16 Loading Paper into the Automatic Sh...

Страница 4: ...eventive Maintenance 35 General Care 35 Safety 35 Use 35 Printer Care Functions 37 Eliminating Paper Jams 38 If the sheet is already outside the printing area 38 If the sheet is jammed inside one of t...

Страница 5: ...automatically on receipt of a print or copy command 2 Side paper guide aligns the sheets according to their width 3 Copier scanner cover closed 4 Copier scanner module in which the document to be copi...

Страница 6: ...loaded into the automatic sheet feeder 10 Parallel port used for a parallel connection with the machine as an alternative to the USB cable connection 11 Bypass feeder used to load special printing me...

Страница 7: ...ts a percentage value for the scale in which the image is to be represented max 400 min 25 Print head Moves the print carriage to and from the insertion removal position If pressed after inserting rep...

Страница 8: ...operation Colour copy purple key Starts a colour copying operation Power button Turns the machine on off Liquid Crystal Display LCD The liquid crystal display with 2 lines and 16 characters constantl...

Страница 9: ...s front cover by pushing it to the left to gain access to the print carriage compartment 3 By pushing the tab on the rear part of the print head seat backwards 1 release 2 and remove the worn print he...

Страница 10: ...print head the LCD shows the message ALIGNMENT PLEASE WAIT and the machine prints a test page with the header Test 1 Two way alignment 2 The LCD shows CHOOSE VALUE x default value If the alignment th...

Страница 11: ...the Print Head section If You Have Trouble Installing the Print Head Make sure that the print carriage is in the print head loading position on the right hand side of the machine with the possibility...

Страница 12: ...contacts of the print head Clean the electrical contacts of the print carriage Clean the print head nozzles manually Cleaning the Print Head Using the Clean Function 1 Click on the Printer Monitor Pri...

Страница 13: ...machine and disconnect it from the power socket 3 Using a clean dry cloth clean the print carriage contacts 4 Reinsert the print head in the machine and close the front cover 5 Carry out the print hea...

Страница 14: ...ge contacts Take care not to stain yourself as the ink is resistant to detergents DO NOT try to fill the print head with ink as this will damage the print head and the printer itself DO NOT shake the...

Страница 15: ...message will appear on the PC screen Click on OK Print Test Using the Print Care Menu 1 Press on the operator panel until PRINT CARE MENU appears on the LCD 2 Press 3 Press until the display shows PRI...

Страница 16: ...with a unit weight of 80 g m 2 1 Pull the paper support on the rear of the machine casing to the far right and set it in a vertical position The paper support is best suited to the use of A4 and Lette...

Страница 17: ...to select the A4 LETTER and LEGAL formats only the other formats may be selected from the Print Driver Settings card Check the printer s Settings card 1 Open Printer Properties by following the instru...

Страница 18: ...art printing your document 3 A message on the Printer Monitor Status card and the LCD will signal when the paper runs out Load the sheet and check that it is perfectly aligned between the side guide a...

Страница 19: ...inches 127 x 203 mm 0 04 inches 1 00 mm 0 71 inches 18 00 mm 0 13 inches 3 30 mm 0 13 inches 3 30 mm A6 postcards 4 135 x 5 85 inches 105 x 148 5 mm 0 04 inches 1 00 mm 0 71 inches 18 00 mm 0 13 inche...

Страница 20: ...ty computer art You can load up to 10 sheets at a time in the automatic sheet feeder T shirt transfers Only the T shirts specifically recommended for ink jet printers are capable of absorbing the ink...

Страница 21: ...se irregularities could cause a jam or obstruct their insertion Use exclusively paper in perfect condition that satisfies the requirements indicated in the printer s technical characteristics Only loa...

Страница 22: ...1 Open the document glass cover 2 Place your original on the document glass aligning it with the scale on the left 3 Close the document glass cover 4 Using the operator panel select the desired number...

Страница 23: ...HIRTS Setting the PAPER TYPE Set PLAIN paper for simple documents letters and marketing graphics Set GLOSSY or PHOTO paper for the final version of photographs Set COATED for computer drawings and qua...

Страница 24: ...cument glass aligning it with the scale on the left edge 3 Press or 4 Set the original paper size using the or key and press 5 Set the number of CLONES per page using the or key 6 Press or The default...

Страница 25: ...ngs You can restore the factory settings at any time by selecting the RESTORE FACTORY SETTINGS function from the Menu Menu Items Parameter Function Default setting Other values Submenu items PAPER SIZ...

Страница 26: ...ning it with the scale on the left edge 3 Using the operator panel select the number and type of copies you require for further details see the following section 4 Press or according to your original...

Страница 27: ...Printer Care The Printer Monitor is displayed or run minimized when a printing process is sent to the machine The Printer Monitor is made up of two cards 1 The Status card 2 The Printer Care card The...

Страница 28: ...Then follow the instructions that appear on the operator panel using the keys on the panel to select confirm the alignment values this function requires at least two sheets of paper Clean Click on Cl...

Страница 29: ...operties by carrying out the following procedure 1 From the File menu of the application select Set Printer or Printer 2 In the dialog box that appears click on the Properties Set Options button accor...

Страница 30: ...lick on in the top right hand corner of the card drag the onto the parameter selected and click Contextual access from the Printer Monitor card 1 Open the Printer Monitor see How to Access the Printer...

Страница 31: ...cedures it may be necessary to reinstall the drivers To do this click on the Uninstall icon s created during the initial software installation procedure This procedure will enable you to remove all th...

Страница 32: ...application s Print command 4 A window containing the printer settings will appear on your PC screen 5 Select the paper type size and source as well as the number of copies you want to print for furth...

Страница 33: ...he parameter settings require confirmation before being saved To confirm the new settings click on the Apply button at the bottom of the screen 4 Click on OK to exit from the Properties card and save...

Страница 34: ...PC are turned on then place the document you want to send as an attachment on the machine s glass exposure surface 2 To activate the Scan to mail function click on the machine icon on the right side...

Страница 35: ...gged to ensure that no power is present inside the machine The use of extensions and adapters is not recommended and should therefore be avoided Use Location To ensure that the machine operates reliab...

Страница 36: ...ng to clean it Clean the document glass every day and whenever the need arises Clean the machine casing regularly to prevent dust accumulating on it Wipe with a soft slightly damp lint free cloth Neve...

Страница 37: ...ADS When the LCD shows this function by pressing on the operator panel you can execute a print head cleaning cycle During the operation the LCD shows CLEANING Once the cleaning function has been compl...

Страница 38: ...ting operation on the Printer Monitor Status card and suspend the ones present in the printing queue 2 Turn off the printer and unplug it from the power socket 3 Remove the jammed sheet by pulling it...

Страница 39: ...print carriage is in its rest position To ensure that this is the case always turn the machine off BEFORE the PC Unplug all cables If possible pack the machine in its original packaging Take care not...

Страница 40: ...erly Check that the interface cable between the multifunctional copier and the computer is connected correctly to both ports Check that there are no error messages indicated on the LCD PC screen or by...

Страница 41: ...using 2 Fan it thoroughly before reloading it in the input tray 3 Reload it in the input tray and close the margin guides so that it feeds without being held too tight or too loose Copy print media r...

Страница 42: ...int a test page If one or more of the colours do es not print replace the print head Remember to align the print head whenever you replace it Settings made on operator panel are not retained Settings...

Страница 43: ...aper Type is Transparent but Plain paper is loaded in the input tray Change the Paper Type setting OR load the input tray with paper indicated by the current setting Page has very dark colours Press t...

Страница 44: ...rting the head in the multifunctional copier Failure to do so may render the print head unusable and or cause damage to your multifunctional copier Print head out of ink or print jets on head require...

Страница 45: ...ment time to dry If necessary remove it from the output tray as soon as it exits from the multifunctional copier and leave it to dry elsewhere before handling it Printing on wrong side of media Make s...

Страница 46: ...the font size you want do not enlarge them by dragging and sizing Colours not reproduced correctly Low ink level Check the ink level in the colour print head If one or more of the colours have run out...

Страница 47: ...tified as a drawing select Photograph as its picture type and then print the picture to see if this setting improves the quality Note More memory is needed for a photograph than a drawing and the phot...

Страница 48: ...inal document Documents with grey text or black text on a grey background may not scan very well because of poor contrast Try lightening the document by using the Copy Intensity button on the operator...

Страница 49: ...the original document is the longer it will take to scan In this case the file will be bigger and will occupy more space on the PC s hard disk for example A 1 x1 colour picture at 300 dpi occupies abo...

Страница 50: ...t job is paused NOT ALLOWED COPY button pressing during a print job NOT ALLOWED Scan mode PC connected PC SCANNING SCANNING PC SCANNING Error messages Multifunctional copier status Message on LCD Stan...

Страница 51: ...ight Single sheets 60 to 135 g m 2 16 36 lbs Envelopes 75 to 90 g m 2 20 24 lb Note cards 110 to 200 g m 2 29 53 lbs Special printing media Coated Glossy up to 150 g m 2 40 lb Transparencies 90 125 m...

Страница 52: ...s 5 5 kg Copier module Copying Speed Black Up to 7 copies per minute Colour Up to 3 copies per minute Counter Total number of pages printed Multicopies up to 50 Printer module Throughput N B this valu...

Страница 53: ...vailable for users who wish to use a black print head as well as the colour print head provided Print Supports In order to obtain the best printing quality both colour and black and white use the prin...

Отзывы: