Loading Paper
•
18
Loading Paper
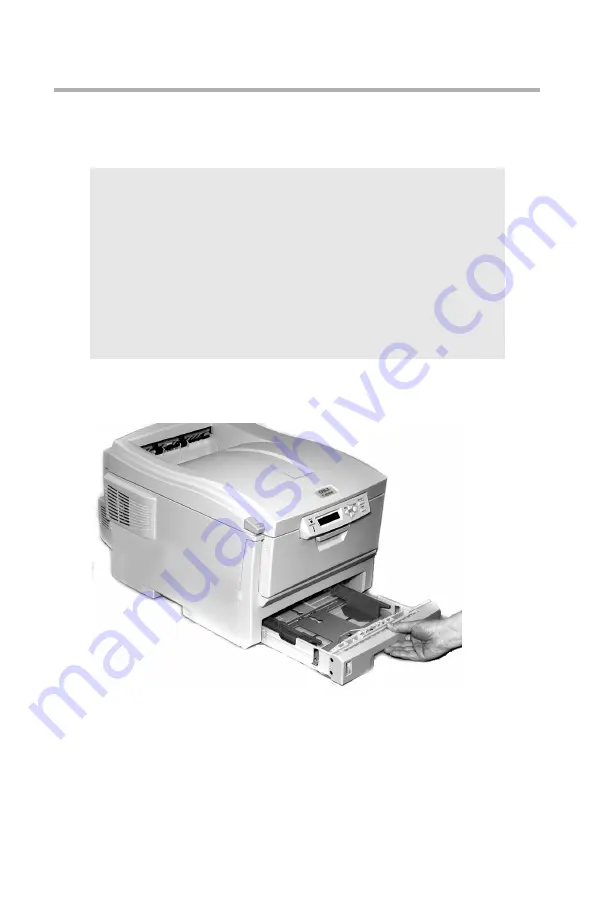
Trays 1 and 2
1.
Remove the paper tray from the printer.
NOTE
If you have the optional second paper tray installed:
• If you are printing from the 1st (upper) tray, you can
pull out the 2nd (lower) tray and reload it while the
printer is printing.
• If you are printing from the 2nd (lower) tray,
do not
pull out the 1st (upper) tray while printing
. This will
cause a paper jam.
Содержание ES 1624n MFP
Страница 1: ......
Страница 76: ...Replacing Consumables 76 6 Remove the adhesive tape from the underside of the cartridge...
Страница 86: ...Replacing Consumables 86 11 If present remove the silica gel pack 12 Place the image drum in the printer...
Страница 87: ...Replacing Consumables 87 13 Remove the orange drum seal 14 Install the toner cartridge in the image drum...
Страница 89: ...Replacing Consumables 89 17 Close and latch the top cover...
Страница 99: ...Replacing Consumables 99 8 Close and latch the top cover...
Страница 103: ...Clearing Paper Jams 103 5 Close the rear exit 6 Close the top cover...
Страница 111: ...Clearing Paper Jams 111 3 Close the front cover...
Страница 113: ...Clearing Paper Jams 113 2 Remove any jammed sheets...
Страница 115: ...Clearing Paper Jams 115 3 Pull the duplexer lid to unlock it 4 Open the lid and remove the jammed sheet...
Страница 118: ...Clearing Paper Jams 118 2 Open the front cover 3 Remove any jammed sheets 4 Close the front cover...
Страница 120: ...Clearing Paper Jams 120 2 Remove any jammed sheets 3 Close the front cover...
Страница 201: ...Windows PCL Emulation Driver 201 3 On the Setup tab under 2 Sided Printing select Long Edge or Short Edge 4 Click Print...


