

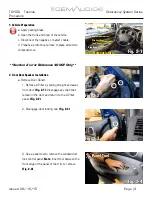


System/Reference Series
TOYOTA Tundra
Procedure
Issue B 04/26/19
Page | 24
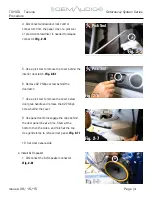
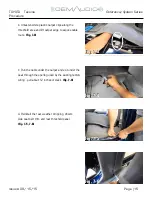
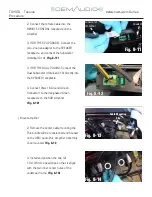
4. With the wire you intend on removing in your
grasp, use a precision tool to disengage the locking
tab within the connector housing securing the
terminal.
(Fig. 10-8)
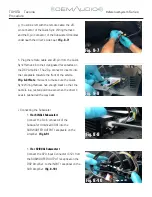
5. When locking tab is disengaged, terminal will pull
out with ease. Repeat these steps for all four (4)
wires.
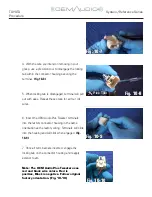
6. Insert the OEM Audio Plus Tweeter terminals
into the factory connector housing in the same
orientation as the factory wiring. Terminals will slide
into the housing and will click when engaged.
(Fig.
10-9)
7. Once all terminals are inserted, engage the
locking tab on the connector housing and reapply
exterior foam.
Note
: For the right tweeter, OEM Audio Plus uses
the yellow and blue wire colors. Yellow is positive,
blue is negative.
(Fig. 10-10)
Fig. 10-7
Fig. 10-8
Pick Tool
Fig. 10-9
Fig. 10-10
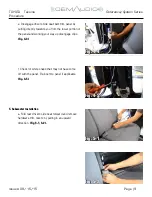
Note: The OEM Audio Plus Tweeter uses
red and black wire colors. Red is
positive, Black is negative. Follow original
factory orientation. (Fig. 10-10)
Note: The OEM Audio Plus Tweeter uses
red and black wire colors. Red is
positive, Black is negative. Follow original
factory orientation. (Fig. 10-10)


