Proofreading OCR Results
Processing Documents
29
Proofreading OCR Results
After performing OCR, recognized text appears in the text view where
you can proofread the results. Proofreading starts automatically if you
chose
OCR and Proof
as the OCR process command.
OmniPage Web marks suspected errors in green and inserts a red
“reject” character for any character it cannot recognize. To turn off these
color markers, choose
Show Markers
in the View menu so that it is
deselected.
To proofread OCR results and correct errors:
1
Click the Proofread OCR button or choose
Proofread OCR...
in
the Tools menu.
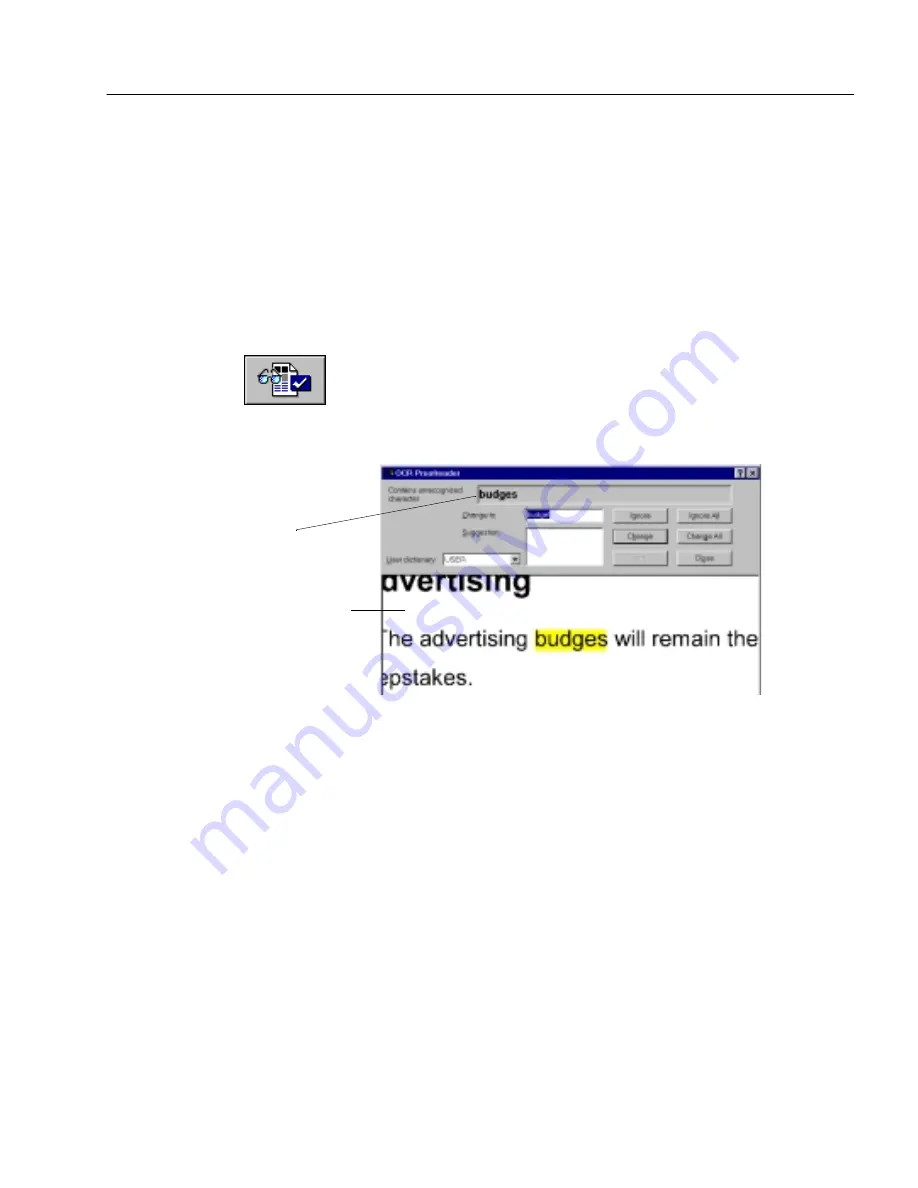
If a suspected error is detected, the OCR Proofreader dialog
box displays the error and a picture of how it originally looked
in the image.
2
Select one of these options for the word:
• Click
Ignore
to allow the word to remain as is.
• Click
Ignore All
to ignore all instances of the word in the
current document.
• Click
Change
to replace the word with the word in the
Change
to
edit box.
• Click
Change All
to replace all instances of the word with the
word in the
Change to
edit box.
• Click
Add
to add the word to the current user dictionary.
After you choose an option for the word, the OCR Proofreader
looks for the next possible error.
3
Click
Close
to stop proofreading OCR.
Color markers are removed from words that have been
proofread.
This window shows a picture of
the original image. Click inside it
to enlarge or reduce the picture.
You can also drag a corner of the
dialog box to see more areas of
the image.
This is what OmniPage
Web thought the word or
character was.
Содержание OMNIPAGE WEB
Страница 1: ...OmniPage Web User s Manual...
Страница 6: ...vi...
Страница 16: ...10 Chapter 1...
Страница 26: ...20 Chapter 2...
Страница 48: ...Testing Your HTML Document 42 Chapter 3...


