Creating Zones for OCR
Processing Documents
27
Creating Zones for OCR
Page images are displayed in OmniPage Web’s image view where
zones
are created before OCR. Zones are borders that identify areas of an
image that will be recognized as text or retained as graphics. Any part of
an image not enclosed by a zone is ignored during OCR and outlining.
The easiest way to create zones on a page is to let OmniPage Web do it
automatically for you. However, you may want to draw zones manually
if you want to customize the way your page will be processed. For
example, if you only want to process certain areas of a page, you would
manually draw zones around the desired areas. For information on
drawing zones manually, modifying zones, deleting unwanted zones,
and using zone templates, please see “Customizing Zones” on page 67.
Creating Zones Automatically
OmniPage Web can analyze a page and create zones automatically for
you. It uses the selected setting in the Zone button to determine the text
flow on a page and breaks it into ordered zones.
To create zones automatically:
1
Choose a setting in the Zone button’s drop-down list that most
closely matches the format of your document.
You can choose
Single-Column Pages
,
Multiple-Column Pages
,
Spreadsheet Pages
,
Mixed Pages
, or a template of your own. See
“Zone Button Commands” on page 47 for more information on
these settings.
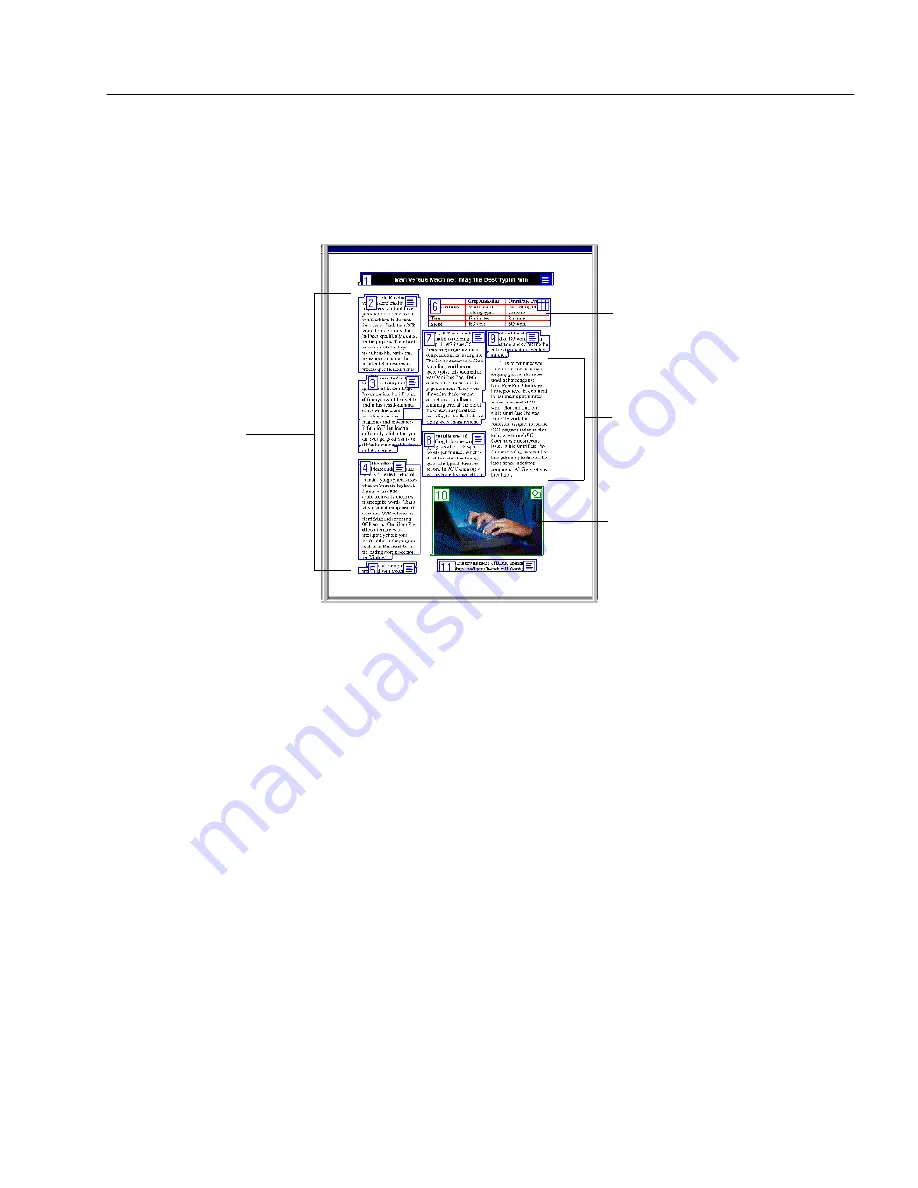
These are text
zones. They
will be
converted to
text during
OCR.
This is a graphic zone. It
will be kept as a graphic
image during OCR.
This is an unzoned
area. It will be ignored
during OCR.
This is a table zone. It will
be kept in a row-and-
column format during OCR.
Содержание OMNIPAGE WEB
Страница 1: ...OmniPage Web User s Manual...
Страница 6: ...vi...
Страница 16: ...10 Chapter 1...
Страница 26: ...20 Chapter 2...
Страница 48: ...Testing Your HTML Document 42 Chapter 3...


