background image

Novak Electronics, Inc.

 | 

Configure Device

2

2

2

2

www.teamnovak.com

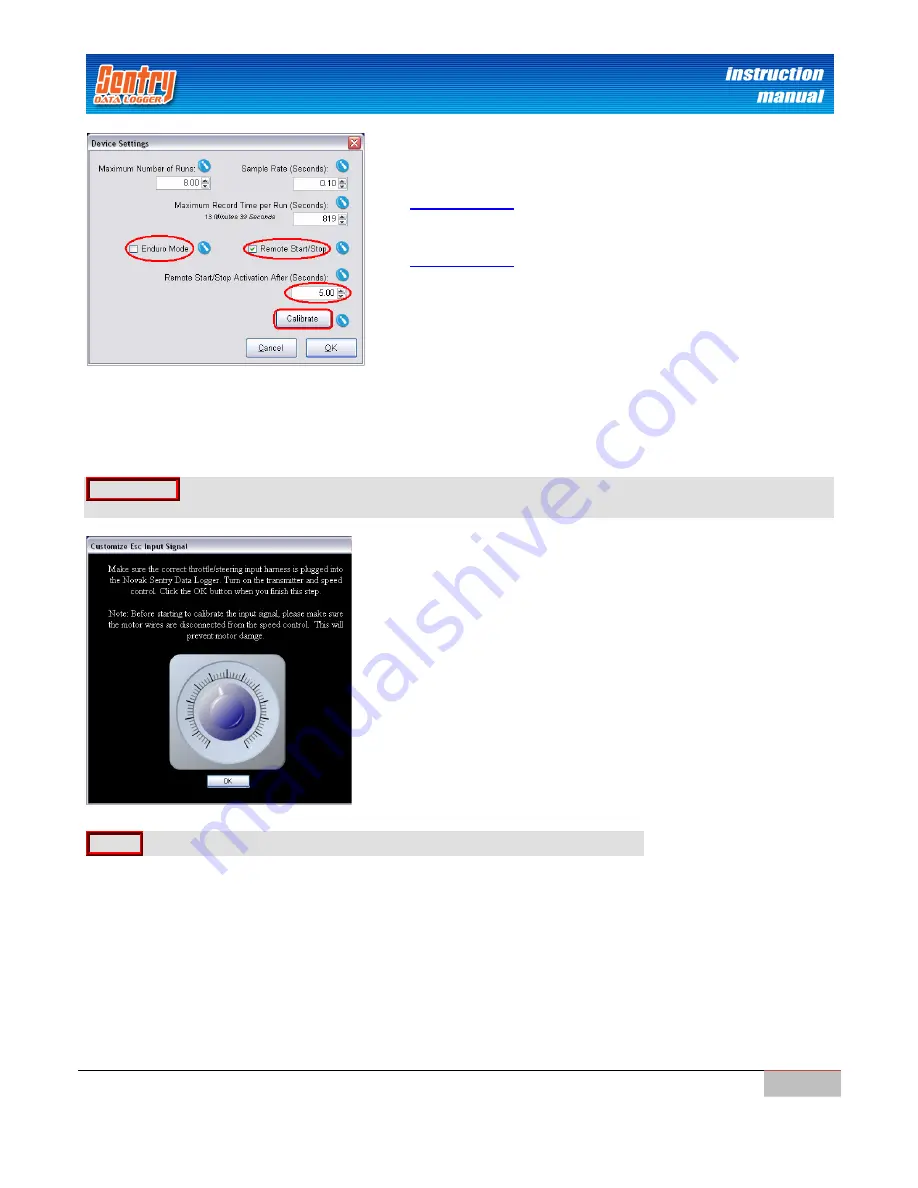
Shown are default Values

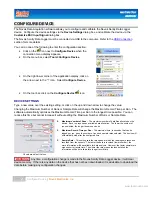
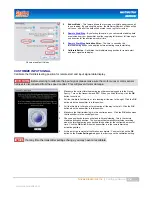
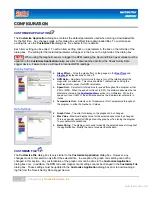
Enduro Mode

– This feature allows the recording of multiple battery packs all 

in one reading.  By selecting this option, the Maximum Number of Runs will be 
set to one, and all of the data will be stored in one log file for review.

Remote Start/Stop

– By selecting this option, you can remote start/stop data 

acquisition from your transmitter by either applying full brake or full steering in 
one direction for the allotted amount of time. 

Remote Start/Stop

 Activation After

– The time, in seconds, the 

throttle/steering needs to be applied before activating remote start/stop.

Calibrate Button 

– Calibrates the throttle/steering position for remote start 

and input signal data display.

CUSTOMIZE INPUT SIGNAL

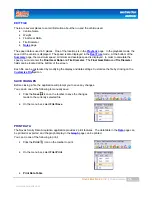
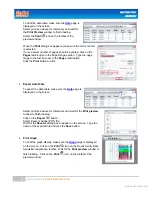
Calibrate the throttle/steering position for remote start and input signal data display. 

WARNING!

  Before starting to calibrate the input signal, please make sure the motor wires or motor sensor 

harness is disconnected from the speed control.  This will prevent motor damage.

1.

Make sure the correct throttle/steering input harness is plugged into the Novak 
Sentry.  Turn on the transmitter and ESC. When you finish this step, click the 

OK

button to continue.

2.

Pull the throttle to full throttle, or turn steering all the way to the right.  Click the 

OK

button when the transmitter is in this position.

3.

Pull the throttle to full brake, or turn steering all the way to the left.  Click the 

OK

button when the transmitter is in this position.

4.

Make sure the throttle/steering is in the neutral position.  Click the 

OK 

button when 

the transmitter is in the neutral position.

5.

Choose a position between neutral and full brake/steering. This is the remote 
start/stop activation position.  The system will automatically start/stop recording 
when the throttle/steering goes beyond this position for the configured amount of 
time.  Click the 

OK

 button when the transmitter is in the remote start/stop 

activation position.

6.

At this point, the remote start calibration is complete.  You must click on the 

OK

button on the 

Device Settings

 dialog box in order to save the calibration setting.

NOTE

If at any time the transmitter settings change, you may have to recalibrate.

Содержание DATA LOGGER

Страница 1: ...Instruction Manual...

Страница 2: ...CORD DATA __________________________________________________________________________ 16 DELETE DATA ___________________________________________________________________________ 16 USB CONNECTION_______...

Страница 3: ...__________________________ 33 CUSTOMIZE APPLICATION __________________________________________________________________ 33 CUSTOMIZE FILE _______________________________________________________________...

Страница 4: ...Motors Brushless RPM Sensor Input Harness Sensor Current Sensor included in Model 2010 only Digital Temperature Sensor 2 included in Model 2000 and 6 included in Model 2010 WARNING The Sentry Data Lo...

Страница 5: ...cle when you turn it on Insulate Wires Always insulate exposed wiring with heat shrink tubing or electrical tape to prevent a short circuit which can damage the data logger and any other connected ele...

Страница 6: ...erating system will automatically detect the new Novak Sentry Data Logger device and will install the hardware drivers required to operate the device When Windows is finished it may prompt you to rest...

Страница 7: ...nput harness or the servo input harness must be plugged into the device WARNING The maximum input voltage is 7 volts Using more than 7 volts will damage the Sentry Data Logger and void the product war...

Страница 8: ...r Max Value Gauge display only NA Name String X Axis Y Axis Graph Color Max Value Gauge display only NA Name String Y Axis Installation Instructions refer to image shown right Mount the Sentry Data Lo...

Страница 9: ...configurable setting Graph Color Max Value Gauge Display Only 20 volts Name String Battery Voltage Installation Instructions refer to images shown right The RED wire should be soldered or connected to...

Страница 10: ...he 2 pin connector plugs into the Engine Temperature Slot ENG T in the Novak Sentry Data Logger unit There is no polarity for this sensor connector Default Settings configurable setting Graph Color Ma...

Страница 11: ...display only 250 F Temperature 1 Graph Color Name String Temp 1 Temperature 2 Graph Color Name String Temp 2 Temperature 3 Graph Color Name String Temp 3 Temperature 4 Graph Color Name String Temp 4...

Страница 12: ...he case Default Settings configurable setting Graph Color Max Value Gauge display only 90 000 RPM Name String RPM Installation Instructions refer to image shown right Place the Brushless RPM Sensor ha...

Страница 13: ...ed 2 magnets on the rotating part of the drive train 180 apart from each other Be sure that the 2 magnets have opposite polarities one facing north and the other facing south HINT Stick the magnets to...

Страница 14: ...ottle Installation Instructions refer to images shown right To measure throttle position Make sure one of the input harnesses is connected to the throttle channel of the receiver The other harness sho...

Страница 15: ...before you cut either the red or black power wires for installation NOTE For HV systems use the RED BAT1 wire to measure the motor current Use the BLACK BAT2 wire to measure total current of the syst...

Страница 16: ...ata Logger lights up the system is ready to record data The green LED will then begin to blink and the unit will start recording data from the connected sensors Stop Data Recording When you wish to fi...

Страница 17: ...ompt you to restart the computer before continuing Please restart the computer before using the Novak Sentry Data Acquisition software application To establish a connection to the Novak Sentry Data Lo...

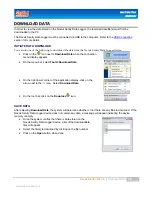
Страница 18: ...hen the connection menu display appears On the menu bar select Tools Download Data On the right lower corner of the application display click on the arrow next to the icon Select Download Data On the...

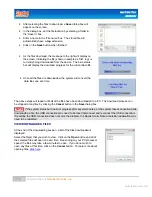
Страница 19: ...until all of the files have been downloaded to a PC The download process can be stopped at anytime by clicking the Cancel button in the Save dialog box NOTE If the system status bar does not progress...

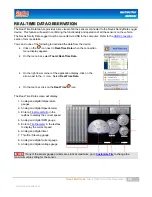
Страница 20: ...al Time Data when the connection menu display appears On the menu bar select Tools Real Time Data On the right lower corner of the application display click on the arrow next to the icon Select Real T...

Страница 21: ...The software automatically optimizes the Maximum Record Time per Run to the longest time possible You can reduce this time but cannot increase it without editing the Maximum Number of Runs or Sample...

Страница 22: ...ed control This will prevent motor damage 1 Make sure the correct throttle steering input harness is plugged into the Novak Sentry Turn on the transmitter and ESC When you finish this step click the O...

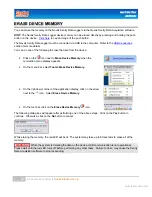
Страница 23: ...to Erase Device Memory when the connection menu display appears On the menu bar select Tools Erase Device Memory On the right lower corner of the application display click on the arrow next to the ico...

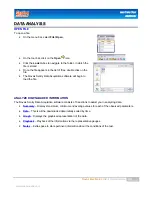
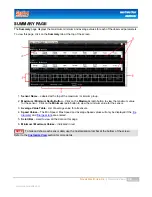
Страница 24: ...ak Sentry Data Acquisition software will begin to load the file ANALYZE DOWNLOADED INFORMATION The Novak Sentry Data Acquisition software consists of 5 sections to assist you in analyzing data Summary...

Страница 25: ...Depending on your monitor size and resolution you may need to perform this procedure to view all of the information on the screen 6 Downloaded information The top section of the screen displays the Da...

Страница 26: ...atio and Tire Diameter fields can be located at the bottom of the screen Each file can be customized by modifying the display and data settings Customize the file by clicking on the Customize File ico...

Страница 27: ...xt to the Pages radio button Click the Print button to print Export Data Table To export the data table make sure the Data page is displayed on the screen Select print see above for reference and wait...

Страница 28: ...m radio button to view the maximum value for the sensor Click on the Minimum radio button to view the minimum value for the sensor 3 Average Value Table List of average value for all sensors 4 Speed V...

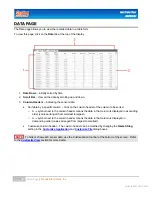
Страница 29: ...the column to be sorted o A symbol next to the column header means the data in that column is displayed in ascending order values arranged from smallest to largest o A symbol next to the column heade...

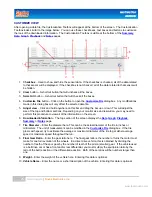
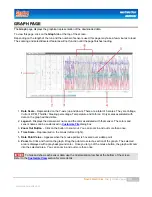
Страница 30: ...on the graph will be visible 2 Legend Displays the data sensor name and the color associated with that sensor The colors and sensor names can be customized in Customize File dialog box 3 Zoom Out Butt...

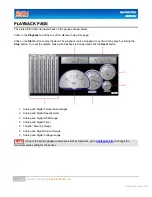
Страница 31: ...pped at any time during play by clicking the Stop button To reset the display make sure playback is stopped and click the Reset button 1 Analog and Digital Temperature Gauges 2 Analog and Digital Spee...

Страница 32: ...he Notes tab at the top of the screen 1 Date of run The date of the download will automatically be stored after the file is initially saved To change the date delete the old date and enter a new date...

Страница 33: ...n Speed Unit Selects Unit of measure for speed throughout the program either KPH or MPH When the speed unit is set to KPH the software assumes the tire diameter entered in the Customize View section i...

Страница 34: ...ires service please obtain the most current product service options and pricing by the following ways W WE EB B S SI IT TE E Print a copy of the PRODUCT SERVICE FORM from the CUSTOMER SERVICE section...

Страница 35: ...or other natural disaster Because Novak Electronics Inc has no control over the connection and use of the Sentry Data Logger or any other related electronics no liability may be assumed nor will be a...

Отзывы: