background image

53

52

Setting Up Your Camera

5

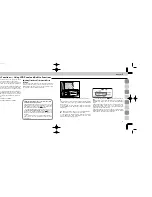
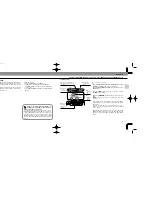
To perform Matrix Balanced, Center-Weighted or
Spot Fill-Flash,

use the MODE/

J

button, and confirm

the 

J

mark in the LCD panel.

To perform Standard TTL Flash,

use the MODE/

J

but-

ton, and confirm the 

J

mark disappears from the LCD

panel.

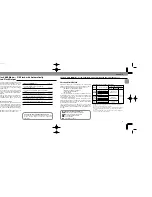
Select one of the following exposure modes:

a. Programmed auto (either P

M

or P)

b. Shutter-priority auto (S)
c. Aperture-priority auto (A)
d. Manual exposure mode (M)

Select a metering system:

a. Matrix metering system to perform 

Matrix Balanced

Fill-Flash.

b. Center-Weighted metering system to perform

Center-Weighted Fill-Flash.

c. With the F-601/N6006, Spot metering system to per-

form 

Spot Fill Flash.

d. Any metering system can be chosen to perform

Standard TTL Flash

.

Perform other settings:

a. For 

programmed auto

, set lens to minimum aperture

(highest f-number).

b. For 

shutter-priority auto

, set lens to minimum aper-

ture (highest f-number), then set desired shutter
speed*.

c. For 

aperture-priority auto

, set desired aperture.

d. For 

manual exposure mode

, set desired shutter

speed* and aperture.

* Camera automatically shifts to the fastest synchronization speed if you choose

a speed that is not within the synchronization range.

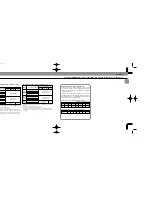
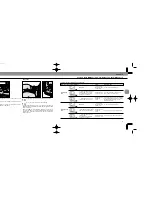
Quick reference on the relationship between
usable apertures and flash shooting distance

Use table on page 146 in this instruction manual.

Chapter 

3

TTL Auto Flash 

H

Mode: 

For F-601/N6006 and F-601

M

/N6000 Users

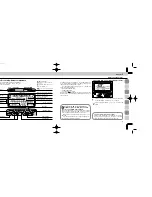
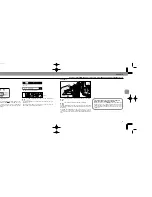
Setting Up SB-26

Choose 

p

position (flash mode selector). Confirm

H

in the LCD panel.

Choose 

W

position* (flash sync mode selector).

* For SLOW SYNC FLASH or REAR-CURTAIN SYNC FLASH, perform the set-

tings on the camera; setting priorities are determined by the camera and flash
sync mode selections on the SB-26 will be ignored.

Set ISO speed of the film in use. Usable film speeds
are ISO 25 to ISO 1000.

For instruction, see “Setting ISO Film Speed (Manual
Adjustment),” pages 27 to 28.

Set the built-in zoom head position.

For instruction, see “Setting Zoom-Head Position (Manual
Adjustment),” pages 29 to 30.

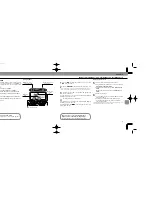
1

Flash mode selec-
tor at TTL Auto

2

Flash sync mode selector at
NORMAL

3

ISO speed
of film in
use

4

Zoom-head position

10

Aperture
value

SB-26 (E)  03.1.14 7:16 PM  Page 52

Содержание SB-26 - Speedlight

Страница 1: ...E Page 1 ...

Страница 2: ...ay seem a little intimidating We urge you however to thoroughly read the manuals before you begin using the SB 26 That way you will be fully familiar with the features and the way they work For the convenience of latest Nikon SLR users the SB 26 offers automatic adjustment functions when used with cer tain lenses Automatic operations is detailed beside manual operation in shaded boxes with mark By...

Страница 3: ...tes on Speedlight Red Eye 138 Flash Sync Mode Selector W vs q Position 139 Tips on Speedlight Care 140 141 About Batteries 142 Specifications 143 145 Usable Aperture Flash Shooting Distance Ranges In TTL Auto H And Non TTL A Flash Modes 146 ontents Use of This Manual 2 ts 4 5 oducing the SB 26 Autofocus 8 9 Functions Capabilities 10 17 ic Fill Flash 10 13 c Balanced Fill Flash 11 i Sensor Automati...

Страница 4: ...Chapter 1 S D OFF SB 26 Introducing the SB 26 Autofocus Speedlight Page 6 ...

Страница 5: ... front position and the 90 position tilts up to 90 and down to 7 rotates 90 to the right and 180 to the left k ver ber type penlight batteries either ese or 1 2V NiCd batteries eries varies depending on um permitted is 1 5V Autofocus assist illuminator LED Enables autofocus operation in dim light or total darkness Light sensor for Non TTL Auto Flash operation In Non TTL Auto Flash operation be car...

Страница 6: ...e cen ter bottom weighted TTL sensor which monitors light reflection from the film surface and regulates timing to ter minate output in realtime with flash illumination This way flash illumination brightens the scene mainly foreground subject but does not overpower the ambient light exposure background Chapter 1 ures Functions SB 26 s Flash Capabilities Fully Automatic Fill Flash Generally perform...

Страница 7: ...nd The SB 26 is capable of flash synchronization at shutter speeds of 1 250 sec or faster when used with the F5 F90X N90s and F90 Series N90 Unlike other flash synchro nization methods the flash consecutively emits light at an extremely rapid cycle and exposure begins with the opening of the front first curtain and ends with the closing of the rear second curtain Chapter 1 Main Features Functions ...

Страница 8: ...w shutter speed could create light flow from a moving subject Rear Curtain Sync Flash catches him her with natural looking light stream R F R X Y F R X Y X 2 2 Chapter 1 Main Features Functions n of high shutter speed range and flash ovides you with more options for flash light conditions It enables you to use a blur the subject s background create a eld light up shadowed areas in outdoor en creat...

Страница 9: ... use in xcept Repeating Flash mode For more operation see page 104 and the cam anual can also be controlled by the angle at the subject and is reflected back to the further details see Red Eye page 138 Repeating flash mode offers strobo effect multiple exposure on a single frame See pages F5 F90X N 90s F90 Series N 90 F70 Series N 70 F4 Series F 801 N 8008 F 801s N 8008s F 601 N 6006 F 601M N 6000...

Страница 10: ...Chapter 2 Before Flash Shooting Page 18 ...

Страница 11: ...ning the unit on Follow these steps in order especially when using for the first time This section should serve as a practical guide for later reference TO AVOID INJURY LASH NEAR THE EYES Firing the flash any person s eyes can injure the retina g eyesight or causing blindness THE FLASH HEAD WHEN FIRING THE head generates significant heat during n which may cause burns Also when keep delicate mater...

Страница 12: ...tion for Nikon F5 F90X N90s F90 Series N90 and F70 Series N70 users As the locking wheel is tightened the SB 26 is firmly attached to the accessory shoe with the mount pin Be extra careful that the locking wheel is completely loos ened before removing the flash unit from the camera or it may cause damage to both units Chapter 2 ttery chamber lid er to close Attaching Flash Unit to Camera Accessory...

Страница 13: ...Using LCD Panel and Built in Functions h head built in zoom head LCD panel for aperture distance computation res many convenient functions Proper perform successful flash photography in you should understand the adjustments d them Once you have learned them most of the SB 26 for all kinds of flash e controlled manually or automatically ch Nikon SLR model is used Manual ibed for each feature then a...

Страница 14: ... Shooting Distance Computation Confirming flash shooting distance is an indispensable step for successful flash photography The SB 26 can be used to compute the appropriate distance range An appropriate flash shooting distance is determined using the following variables ISO FILM SPEED IN USE APERTURE VALUE ZOOM HEAD POSITION Indicator bars will appear to show a proper shooting distance range only ...

Страница 15: ...ndication will icator blinks during tops blinking after ss an adjustment is stment button The er is automatically Setting Aperture Value Manual Adjustment 1 Push button so an aperture value number starts blinking beside the ƒ indication in the LCD panel 2 Press adjustment button or Ç to set the aperture value When camera is in programmed auto or shutter priority exposure mode be sure to use an ape...

Страница 16: ...r lens of fixed focal length including e the zoom head automatically adjusts ailable wider focal length setting ens the zoom head automatically adjusts of the available coverage from 24mm to t zoom head position manually when ra with other lenses or to select a specif sition For manual adjustment with same camera lens com binations as above Press button until your desired zoom head position appear...

Страница 17: ...3 Manual M Camera s Metering System 3D Color Matrix 3D Multi Sensor Balanced Fill Flash Multi Sensor Balanced Fill Flash Center Weighted Fill Flash 4 Standard TTL Flash Center Weighted Spot Flash Methods in TTL Auto Flash Mode HK 3D Multi Sensor Balanced Fill Flash HK Multi Sensor Balanced Fill Flash HJ Center Weighted Fill Flash HJ Spot Fill Flash H Standard TTL Flash Flash H Mode Fill Flash with...

Страница 18: ... the camera s LCD panel set desired aperture manually Lens in Use 1 D Type AF Nikkor Lenses AF Nikkor lenses 2 AI P lens es Other lenses 3 Camera s Exposure Mode Programmed auto P Ps Programmed auto P Ps Shutter priority auto S Shutter priority auto S Aperture priority auto A Aperture priority auto A Manual M Manual M Aperture Priority auto A 4 Manual M Camera s Metering System Matrix 3D Multi Sen...

Страница 19: ...hapter 3 TTL Auto Flash H Mode For F5 F90X N90s F90 Series N90 and F70 Series N70 Users ctice an be controlled automatically when the h an AF Nikkor lens including the latest ens having a built in CPU In other cases tructions describe a situation where you D type Nikkor to operate 3D Multi Sensor or an AF Nikkor except for F3AF or AI Multi Sensor Balanced Fill Flash With r Weighted or Spot Fill Fl...

Страница 20: ...he SB 26 is turned on In this case blinks in the LCD panel and appears inside the viewfinder amera he following exposure modes d auto P or Ps rity auto S ority auto A osure mode M ng system ring system ghted metering system ng system 8 Perform other settings a For programmed auto set lens to minimum aperture highest f number b For shutter priority auto set lens to minimum aper ture highest f numbe...

Страница 21: ...fter firing To compensate underexposure in the above exam ple you might consider using an aperture at least 2 f stops wider or move closer to subject button to resume indication The underexposure indication lasts only three seconds Use the button to recall the indication last shown in the LCD panel Chapter 3 TTL Auto Flash H Mode For F5 F90X N90s F90 Series N90 and F70 Series N70 Users 11 Confirm ...

Страница 22: ...1 AF Nikkor lenses 3 AI P lenses Other lenses Camera s Exposure Mode Programmed auto PD P PH Shutter priority auto S Aperture priority auto A Manual M Manual M Camera s Metering System Matrix Matrix Balanced Fill Flash Center Weighted Fill Flash Center Weighted Fill Flash 6 Center Weighted Aperture priority auto A 5 Chapter 3 ash Method you to perform the following flash meth ribed in detail on pa...

Страница 23: ... 1 For selecting flash method 2 Flash mode selector at TTL Auto 3 Flash sync mode selector at NORMAL 4 ISO speed of film in use 5 Aperture value and zoom head position Appears for fully automatic fill flash disappears for Standard TTL Flash Automatic zoom head aperture adjustment AF Nikkor lens including the latest D Type or Nikkor lens having a built in CPU The aperture and zoom head position in ...

Страница 24: ... F 801 N8008 and F 801s N8008s in the position that indicates the camera s shutter speed Chapter 3 TTL Auto Flash H Mode For F4 Series F 801 N8008 and F 801s N8008s Users amera he following exposure modes d auto either P PH PH or PD rity auto S ority auto A ng system ring system to perform Matrix Balanced ghted metering system to perform ghted Fill Flash 01s N8008s Spot metering system to ot Fill ...

Страница 25: ...is set at q position for flash sync mode selector the camera automatically controls the shutter speed and aperture between 30 1 250 sec in programmed auto and aperture priority auto expo sure mode Chapter 3 TTL Auto Flash H Mode For F4 Series F 801 N8008 and F 801s N8008s Users 11 Confirm ready light has come on and subject is in focus Confirm ready light is on in the camera s viewfinder g or on t...

Страница 26: ...601 N6006 and F 601M N6000 Users ash Method Automatic Balanced Fill Flash J button he following fully automatic fill flash func Standard TTL Flash Functions are on pages 10 to 13 nced Fill Flash ghted Fill Flash sh not available with the F 601M N6000 elow to confirm which flash method you your camera the lens in use and the set on the camera In most cases the depend on the camera see instruction m...

Страница 27: ...r aperture priority auto set desired aperture d For manual exposure mode set desired shutter speed and aperture Camera automatically shifts to the fastest synchronization speed if you choose a speed that is not within the synchronization range Quick reference on the relationship between usable apertures and flash shooting distance Use table on page 146 in this instruction manual Chapter 3 TTL Auto...

Страница 28: ...oser to subject or select a wide aperture when aperture priority auto or manual exposure mode then repeat steps 10 and 11 Chapter 3 TTL Auto Flash H Mode For F 601 N6006 and F 601M N6000 Users gs mera viewfinder compose and lightly er release button nd shutter speed These also appear in panel Controlled shutter speed and aperture in programmed aperture priority auto Aperture and shutter speed are ...

Страница 29: ...st aperture Lens maximum aperture appears with electronic analog display Background may be underex posed If necessary select slower shutter speed value appears in electronic analog display HI appears in shutter speed position F 601M N6000 Background may be overexposed If necessary select faster shutter speed Chapter 3 TTL Auto Flash H Mode For F 601 N6006 and F 601M N6000 Users Firing Flash 13 Ful...

Страница 30: ...M TTL Auto Flash H Mode For F50 Series N50 and F 401x N5005 Users Chapter 3 Set Up and Practice Check the chart on this page to determine which flash is available and suitable for your shooting situation before actual shooting Before proceeding E ATTACH SPEEDLIGHT TO CAMERA E TURN ON BOTH SPEEDLIGHT AND CAMERA E SET LENS TO MINIMUM APERTURE HIGHEST F NUMBER E USE A FILM BETWEEN ISO 25 AND ISO 1000...

Страница 31: ...press the shutter release button Confirm exposure indicator LEDs in the viewfinder appear and make adjustments if necessary Use the following chart to read LEDs Quick reference on the relationship between usable apertures and flash shooting distance Use table on page 146 in this instruction manual 1 Flash mode selector at TTL Auto 3 ISO speed of film in use ad position 1 Choose p position flash mo...

Страница 32: ...y exposed Background is underexposed Background is overexposed OK Background is correctly exposed Troubleshooting Select faster shut ter speed until only appears Select slower shutter speed until only appears Select smaller aperture until only appears or or Background is underexposed Background is overexposed OK Background is correctly exposed Background is underexposed Select larger aper ture unt...

Страница 33: ...he subject Shutter speed and or aperture setting s can be selected by the user 1 Suitable lenses and use depend on the camera see instruction manual for information 2 Except AF lenses for F3AF cameras For Programmed TTL Auto Flash use only AI S lenses which include AF Nikkor Nikkor lenses with a built in CPU and Series E lenses TTL Auto flash mode H with F 501 N2020 and F 301 N2000 Lens in Use 1 A...

Страница 34: ...TTL Flash 6 Perform other settings a For programmed auto set lens to minimum aperture highest f number b For aperture priority auto set desired aperture c For manual exposure mode set desired shutter speed and aperture Camera automatically shifts to the fastest synchronization speed if you choose a speed that is not within the synchronization range Quick reference on the relationship between usabl...

Страница 35: ... Â Check whether subject is in focus the SB 26 s LCD panel Setting Aperture Value Manual Adjustment pages 28 to 29 o exposure mode aperture is automatically controlled by the value using Shutter speed aperture settings in Programmed the following page auto or manual exposure mode set the aperture value that you mera from step 6 t indicator bars show the shooting distance range ant for reading the ...

Страница 36: ... camera but turned off the camera s viewfinder ready light g blinks to sug gest you use a flash You can reject or ignore the prompt simply by leaving the SB 26 s power off g continues blinking Programmed TTL Auto Flash When light is low and the flash is needed the camera asks you to confirm whether you wish to use the flash If you decide to use it in programmed auto or shutter priority exposure mo...

Страница 37: ...lector at TTL Auto 2 Flash sync mode selector at NORMAL 3 ISO speed of film in use 4 Zoom head position 7 Aperture value Set Up and Practice When camera is set at programmed auto A S or shutter priority auto S exposure mode it automatically switches into Programmed TTL Auto Flash Before proceeding be sure to E ATTACH SPEEDLIGHT TO CAMERA E TURN ON BOTH SPEEDLIGHT AND CAMERA E SET LENS TO MINIMUM A...

Страница 38: ...Value Manual Adjustment pages 28 to 29 In programmed auto and shutter priority auto exposure mode set an aperture using the Guide to determine aper ture in the following page In aperture priority auto or manual exposure mode set the aperture value that you have set on the camera from step 6 Once aperture is set indicator bars show the shooting distance range for that setting This operation is impo...

Страница 39: ...om head position 7 Aperture value Caution Use the SB 26 exclusively for on land condi tions it cannot be used in underwater conditions Always keep the unit away from salt water rain or water splashes 10 Fully depress the shutter release button to fire flash 11 Recheck ready light to see if it is blinking If ready light blinks for a few seconds after shooting the flash has fired at its maximum outp...

Страница 40: ...se button Confirm ready light has come on and subject is in focus Check if ready light is on in camera s viewfinder g or on the SB 26 Â position flash mode selector Confirm panel W position flash sync mode selector eration can be performed regardless of the flash sync or simplicity always leave the switch at this position d of the film in use Usable film speeds 5 to ISO 400 ee Setting ISO Film Spe...

Страница 41: ...he light sensor on the front of the SB 26 The SB 26 can be used in Non TTL Auto Flash mode with any Nikon camera lens combination Before proceeding E ATTACH SPEEDLIGHT TO CAMERA E TURN ON BOTH SPEEDLIGHT AND CAMERA E USE APERTURE PRIORITY AUTO OR MANUAL EXPO SURE MODE E USE SINGLE SERVO AUTOFOCUS S or A OR MAN UAL FOCUS M 1 Flash mode selector at Non TTL Auto 2 Flash sync mode selector at NORMAL 3...

Страница 42: ...n to confirm that subject is in focus Check that ready light is on in the camera s viewfinder g or on the SB 26 Â F90X N90s viewfinder Non TTL Auto Flash A Mode osition flash mode firm A appears in W position flash ector or Rear Curtain Sync F5 F90X N90s F90 N70 F4 Series 1s N8008s For details speed and position m head e Setting ISO Film djustment pages etting Zoom Head djustment pages 4 Set desir...

Страница 43: ...ries N90 E F 401x N5005 E Nikonos V E F70 Series N70 E F 501 N2020 E F3 Series E F4 Series E F 301 N2000 E F2 Series E F 801 N8008 E F 401 N4004 E FM2 E F 801s N8008s E F 401s N4004s E FG 20 E F 601 N6006 E FA E APPLICABLE NIKON SLR MODELS Non TTL Auto Flash A Mode shutter release button to fire flash light to see if it is blinking blinks for a few seconds after shooting maximum output but the lig...

Страница 44: ...eed Sync Flash and is discussed in the following pages see pages 98 to 103 ce 1 Choose i position flash mode selector Confirm D appears in the LCD panel 2 Choose W position flash sync mode selector q position is used for Rear Curtain Sync Flash and only with the F5 F90X N90s F90 Series N90 F70 Series N70 F4 Series F 801 N8008 and F 801s N8008s For details see page105 3 Set ISO film speed and the b...

Страница 45: ...ame aperture value in the SB 26 s LCD panel For instruction see Setting Aperture Values Manual Adjustment pages 28 to 29 An indicator bar appears to show appropriate shoot ing distance for the selected aperture riority auto set desired aperture on the re mode set desired aperture and shut amera hifts to the fastest synchronization speed if you choose n the synchronization range mber helpful to cal...

Страница 46: ...onos V E F70 Series N70 E F 501 N2020 E F3 Series E F4 Series E F 301 N2000 E F2 Series E F 801 N8008 E F 401 N4004 E FM2 E F 801s N8008s E F 401s N4004s E FG 20 E F 601 N6006 E FA E APPLICABLE NIKON SLR MODELS Manual Flash i Mode on in Continuous Shooting to recycle fast enough to synchronize n camera firing continuously at up to six 1 64 light output This means you can h pictures in rapid succes...

Страница 47: ...80 8 16 20 40 8 10 Hz 20 50 Hz Light output amount j k l sition flash mode selector Confirm D in the LCD panel W position flash sync mode selector sed for Rear Curtain Sync Flash in TTL Auto H Non D Flash and only with the F5 F90X N90s F90 N70 F4 Series F 801 N8008 and F 801s N8008s 5 zoom head position e Setting Zoom Head Position Manual s 29 to 30 ton to choose desired light output n amount rang...

Страница 48: ...ng 8 Set the same aperture value in the SB 26 s LCD Panel that you set on the camera step 7 For instruction see Setting Aperture Values Manual Adjustment pages 28 to 29 An indicator bar appears to show appropriate shoot ing distance for the selected aperture Determining shutter speed with number speed of flash Frequency Hz represents the number of flash fired per second For example 10Hz will fire ...

Страница 49: ...unless sure compensation as indicated in steps 9 and 10 We ew additional shots at different apertures exposure Background brightness and subject overlap Use as dark a background material as possible e g black curtain or cloth If the overlapping exposed images are too weak or too strong try repositioning subject at the location suggested by the indicator bar or adjust indicator bar Conditions vary ...

Страница 50: ...and either 1 or 2 4 Zoom head position 10 Aperture value peed Sync Flash Flash Photography At Higher Shutter Speeds SLR models the F5 F90X N90s or F90 and the SB 26 allow you to use faster o 1 4000 sec for flash synchronization sh fires only when the curtains are fully flash syncs With FP High Speed Sync nsecutively emits light at an extremely he shutter curtains travel to expose the but the curta...

Страница 51: ...nipulate shutter speed and aperture on the camera Chapter 4 6 Choose a shutter speed from 1 250 to 1 4000 sec on the camera Although any shutter speed can be used an uneven exposure may result with speeds outside this range 7 Set your desired aperture on the camera 8 Focus on the subject Look into camera viewfinder and compose shot while lightly pressing the shutter release button 9 Confirm apertu...

Страница 52: ...matches the subject to camera distance 11 the subject will be correctly exposed aperture shutter speed and light output mera distance does not match the appro ance readjust the indicator bars by ı button to switch from FP1 F with 1 ce versa The bar location then ow an alternate shooting distance er to or further from the subject fferent number for the zoom head posi guide number amera s viewfinder...

Страница 53: ...rns available light into a stream of light that follows the moving flash illuminated subject Rear curtain sync flash photography is most effective with slower shutter speeds You can slow the shutter down to 30 sec depending on the background situation Before proceeding E ATTACH SPEEDLIGHT TO CAMERA E TURN ON BOTH SPEEDLIGHT AND CAMERA E USE SHUTTER PRIORITY AUTO OR MANUAL EXPO SURE MODE E USE SING...

Страница 54: ...9 Chapter 4 osure Compensation To Make Flash Illuminated Subject Lighter or Darker you to manually adjust the amount of e from 3 to 1 EV This feature is partic alanced fill flash where flash illumination hten the subject to almost the brightness may want to use a little more or less subject a little brighter or not quite so e may be based on desired aesthetic forced by extremes in lighting ng you ...

Страница 55: ...he exposure to make or darker ture lighter use compensation For compensation How much compen depends on how much you want to mod ure ing distance range for TTL Auto Flash ount of exposure compensation make alls within the range before shooting LCD panel for confirmation by altering value and observing changes of distance Hints and Notes First make necessary exposure compensation on the camera Then...

Страница 56: ...ncover the adapter and slide back to its origi nal position Chapter 4 h Button  ring on for a test firing when you are not sure t is within the flash shooting range Non TTL Auto Flash A mode is used flash light from subject is measured by on the front of the SB 26 rather than TL on the camera The results however L auto flash Hints and Notes Set the SB 26 and your camera in the same manner indi ca...

Страница 57: ...an AF Nikkor lens including the latest D Type or Nikkor lens having a built in CPU The SB 26 automatically adjusts the zoom head position to provide an angle of coverage that matches the focal length of the lens in use For details see page 30 Chapter 4 k Capability To Fix Zoom Head Position oom head position is useful when you Nikkor lens or a Nikkor lens having a hangeably with another type It al...

Страница 58: ... sist LED enables you to perform autofo phy in dim light or even total darkness F cameras ght is insufficient for autofocus operation automatically turns on to start operation o a dark subject allowing the camera s o function as though it were daytime s sufficient the AF illuminator does not ng EDLIGHT TO CAMERA TH SPEEDLIGHT AND CAMERA SERVO AUTOFOCUS S or A FRAME SHOOTING S FILM ADVANCE CT CENTE...

Страница 59: ...osition To Conserve Energy and Shorten Recycling Time switch to STBY position turns on the 26 will also automatically shut off to con energy ot use the SB 26 for a long time howev ed to set the power switch to OFF Hints and Notes With the SB 26 s power switch on standby STBY posi tion the unit turns off to conserve energy approx 80 sec after the camera s meter has turned off To turn the SB 26 on a...

Страница 60: ...stance when shooting a subject located 9 m ay at 1 1 full light output in i Manual zoom head position of 35mm and a film you will obtain a guide number of 36 or chart on page 143 If the film speed in the above example was ISO 400 rather than ISO 100 f stop 36 x 2 4 x 2 8 9 Or if measuring in feet f stop 118 x 2 3 93 x 2 7 86 8 30 You should then choose f 8 as the proper aperture Adjustment factors...

Страница 61: ... shad ows created by top lighting or bounced flash from the ceiling Chapter 4 30 150 0 6 0 90 30 6 0 90 180 1 2 0 ash head head tilts and rotates as shown at right ocks at the front horizontal and vertical tions To release use the tilting or rotat ver annot be used to compute flash shooting e flash head is tilted upward or rotated rizontal front position In these cases the e indicator bars do not ...

Страница 62: ...ode For further instructions see the TTL Auto Flash Mode H section relating to your camera type Note that the LCD panel cannot be used to compute flash shooting distance in bounce photography To protect the diffuser from burning be sure it does not come in direct contact with the flash head Avoid reflection from the translucent material into the lens Chapter 4 Photography Select a ceiling or wall ...

Страница 63: ...u perform oting on a subject closer than 0 6m 2 ft Hints and Notes Connect the SB 26 to the camera using the SC 17 or SC 24 Used for F5 with the DW 30 DW 31 attached or for F4 series with the DW 20 DW 21 attached Position the SB 26 so light from the head covers the sub ject Mount the built in flash adapter The zoom head position is automatically adjusted Confirm the LCD panel shows z 20x with m in...

Страница 64: ...o remember that the effect produced by using more than one flash unit depends on the lighting ratio or balance of illumination between flash units In determining the role of each flash unit first decide which will be the main and which units will be secondary For example to eliminate shadows control lighting ratio so that the illumination from the main flash unit is a few times brighter than that ...

Страница 65: ... within the flash shooting dis tance range for TTL auto or non TTL auto flash mode or at the flash shooting distance for manual flash mode If camera Speedlight combination does not offer automatic aperture adjust ment on the Speedlight you must first set the aperture value same as set on the lens on the Speedlight For delay mode set the camera s shutter speed one step slower than the camera s sync...

Страница 66: ...ution for Rear Curtain Sync Flash Rear Curtain Sync Flash can be performed in multi ple flash photography only with the F 601 N6006 and F 601M N6000 cameras Rear Curtain Sync Flash cannot be performed in multiple flash shooting with F5 F90X N90s F90 Series N90 F70 Series N70 F4 Series F 801 N8008 and F 801s N8008s cameras Depending on which terminals are used to connect flash units TTL multiple fl...

Страница 67: ...Use optional Sync Cord SC 11 or SC 15 Set and use Manual i Flash mode on each Speedlight for correct exposure Photography tiple flash terminal for connecting other ptional sync cords Speedlight for the master flash unit and nits for slaves pages 134 to 135 to confirm available aster and slave use g when using an F90 Series N90 camera h operation with multiple Speedlights 26 as a slave flash unit w...

Страница 68: ...8 1 5m 4 9 ft SC 19 3m 9 8 ft Using SC 18 or SC 19 up to five flash units can be used for multiple flash pho tography at a total length of 10m 33 ft Slave flash unit Chapter 4 or TTL Multiple Flash SC 14 SC 24 SC 17 SB 21A SB 16A SB 17 SB 11 SB 14 140 SC 23 SB 21B SB 15 SB 16B SB 20 SB 22 SB 23 SB 25 SC 17 A A A A A A A A A A SB 24 SB 26 SB 27 4 SB 140 and SB 21B cannot F 401 N4004 or F 401s N4004...

Страница 69: ...5m 4 9 ft long SC 24 L Auto Flash operation when using the F5 or F4 Series camera fitted either with cation Finder DW 31 DW 21 or Waist 0 DW 20 es with two TTL multiple flash terminals ket It is approx 1 5m 4 9 ft long TTL Multi Flash Adapter AS 10 Use Multi Flash Adapter AS 10 when using more than three units for TTL multiple flash operation The AS 10 comes with three multiple flash terminals and...

Страница 70: ...s For F50 Series N50 F 401x N5005 F 501 N2020 F 301 N2000 F 401 N4004 F 401s N4004s FA FE2 FG Nikonos V F3 Series F2 Series FM2 and FG 20 Users Front curtain sync is performed at either W or q setting These models are not capable of rear cur tain sync Therefore regardless of circumstances we recommend you leave the selector switch on W position Chapter 5 mmon problem in flash photography tures are...

Страница 71: ...all batteries turn on the SB 26 2 Wait until the ready light comes on 3 Fire flash a few times to refresh the main capacitor and length en the unit s life 4 Turn off the SB 26 and remove the batteries peedlight Care ges wipe with a sili her soft dry cloth benzine or alcohol mage plastic parts S D OFF SB 26 Never disassemble or repair the Speedlight If the SB 26 malfunc tions take it immediately to...

Страница 72: ...ntinuous use than cool dry place below 20 C 68 F rands or models or new and old batteries batteries by burning and never disas ular batteries NiCd batteries offer a faster greater efficiency at low temperatures g NiCd batteries thoroughly read the batteries and battery charger terminal that exceeds 6mm 0 23 in used DC Units SD 8 SD 7 Nikon DC Unit SD 8 or SD 7 can be used as an optional external p...

Страница 73: ... 390g 13 8 oz Accessory provided Soft Case SS 24 Specifications and designs are subject to change without notice ntrol es are provided TTL A M and h TTL mode H Used with F5 F90X N90s F90 Series N90 F70 Series N70 F4 Series F 801 N8008 F 801s N8008s F 601 N6006 F 601M N6000 F50 Series N50 F 401x N5005 F 501 N2020 F 301 N2000 F 401 N4004 F 401s N4004s FA FE2 FG and Nikonos V Usable aperture range in...

Страница 74: ...eters 200 100 50 25 Zoom set Zoom set Zoom set Zoom set Zoom set Zoom set Zoom set Zoom set at 18mm at 20mm at 24mm at 28mm at 35mm at 50mm at 70mm at 85mm 2 5 20 2 8 20 3 8 20 4 0 20 4 5 20 5 3 20 6 0 20 6 3 20 1 4 1 8 20 2 0 20 2 7 20 2 9 20 3 2 20 3 8 20 4 3 20 4 5 20 2 1 4 1 3 14 1 4 15 1 9 20 2 0 20 2 3 20 2 7 20 3 0 20 3 2 20 2 8 2 1 4 0 9 10 0 9 11 1 4 15 1 5 16 1 6 18 1 9 20 2 2 20 2 2 20 ...

Страница 75: ... cept for brief quotation in views may be made without n from NIKON CORPORATION ORPORATION MARUNOUCHI 3 CHOME CHIYODA KU TOKYO 100 JAPAN 4 5311 TELEX NIKON J22601 FAX 81 3 3201 5856 fi Printed in Japan 9 126 AO11 S174 N Page 148 ...

Отзывы: