37
36
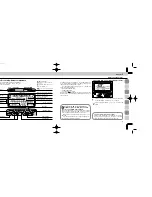
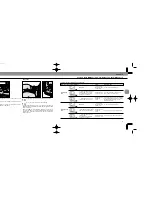
Setting Up SB-26
1
Press the
ı
button.
To perform 3D Multi-Sensor Balanced or Multi-Sensor
Balanced Fill-Flash,
confirm
K
appears in the LCD panel.
To perform Center-Weighted or Spot Fill-Flash,
confirm
J
appears.
To perform Standard TTL Flash,
press the
ı
button so
that both
K
and
J
disappears.
2
Choose
p
(flash mode selector). Confirm
H
in the
LCD panel.
3
Choose
W
position (flash sync mode selector).
q
position is used for Rear-Curtain Sync Flash (see
page 105).
4
Confirm the ISO film speed has been set and appears
in the SB-26’s LCD panel (automatic ISO film speed
adjustment).
If not shown in the LCD panel, lightly press the camera’s
shutter release button.
5
Confirm the aperture value chosen on the camera and
zoom-head position have been set and appear in the
SB-26’s LCD panel (automatic aperture/zoom-head adjust-
ment).
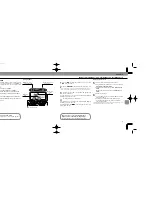
1
For
selecting
flash
method
2
Flash mode
selector at TTL
Auto
3
.
Flash sync
mode
selector at
NORMAL
4
ISO
speed of
film in
use
5
Aperture
value and
zoom-head
position
One of these marks appears for fully
automatic fill-flash; both disappear
for Standard TTL Flash
Chapter
3
TTL Auto Flash
H
Mode:
For F5, F90X/N90s, F90-Series/N90 and F70-Series/N70 Users
Set Up and Practice
Some operations can be controlled automatically when the
camera is used with an AF Nikkor lens (including the latest
D-Type) or Nikkor lens having a built-in CPU. In other cases,
operate manually.
The following instructions describe a situation where you
are using either a D-type Nikkor to operate 3D Multi-Sensor
Balanced Fill-Flash, or an AF Nikkor (except for F3AF) or AI-
P lens to operate Multi-Sensor Balanced Fill-Flash. With
other lenses, Center-Weighted or Spot Fill-Flash will be per-
formed.
Automatic aperture/zoom-head adjustment:
AF Nikkor lens (including the latest D-Type) or
Nikkor lens having a built-in CPU
The aperture and zoom-head position in use are auto-
matically set and indicated in the SB-26’s LCD panel.
For other lenses,
set manually according to the
shooting situation. See “Setting Aperture Value
(Manual Adjustment),” pages 28 and 29, and “Setting
Zoom-Head Position (Manual Adjustment),” pages 29
and 30.
Before proceeding:
E
ATTACH SPEEDLIGHT TO CAMERA.
E
TURN ON BOTH SPEEDLIGHT AND CAMERA.
E
USE SINGLE-SERVO AUTOFOCUS (S) OR MANUAL
FOCUS (M).
E
USE SINGLE-FRAME SHOOTING (S) FILM ADVANCE
MODE.
Remote TTL Auto Flash operation
The optional SC-17 cord enables you to use the SB-26
off-camera.
When performing 3D Multi-Sensor Balanced Fill-
Flash, remote operation of the SB-26 works properly
only if the SB-26 is placed at a distance and angle
similar to the camera-to-subject distance/angle.
For other situations, switch to a flash method other
than 3D Multi-Sensor Balanced Fill-Flash.
SB-26 (E) 03.1.14 7:16 PM Page 36
Содержание SB-26 - Speedlight
Страница 1: ...E Page 1 ...
Страница 4: ...Chapter 1 S D OFF SB 26 Introducing the SB 26 Autofocus Speedlight Page 6 ...
Страница 10: ...Chapter 2 Before Flash Shooting Page 18 ...


