


Chapter 5 Laser Unit
5.4 LU4A Four-laser Module A
1-180
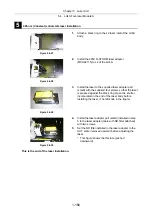
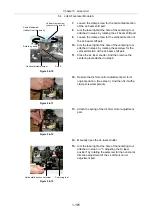
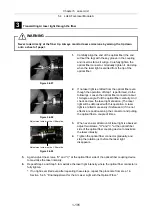
Figure 5.4-67
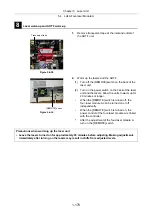
10.
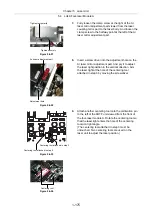
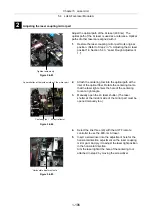
Attach the centering tool to position C and adjust the
laser coupling mirror part in both horizontal and
vertical directions so that the laser light enters the
hole L.
11.
Tighten the clamp screws on the laser coupling
mirror part to secure it.
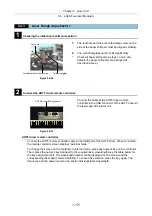
< for LU4 > (Do not use in this system.)
In this section, the green HeNe laser and the 561-nm solid-state laser are described as examples.
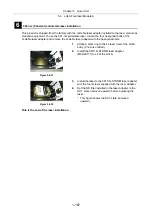
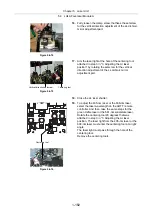
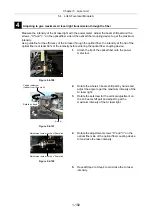
Figure 5.4-68
4.
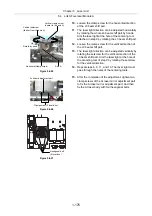
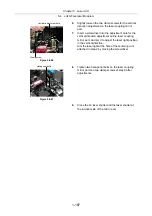
Attach the centering tool to the collimation pin of the
L4 dichroic mirror adjustment part. Rotate the
centering tool so that the laser light enters the hole of
the centering tool at a right angle.
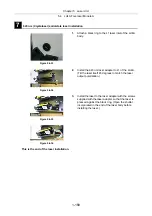
Figure 5.4-69
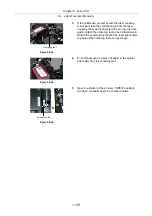
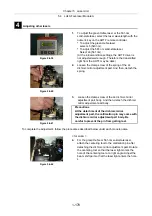
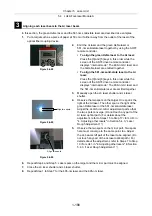
5.
Put a target such as a piece of paper in the optical
path away from the centering tool.
6.
Manually open the L4 laser shutter.
Position C
Centering tool Hole L
Laser coupling mirror part
Clamp screws
Centering tool
Содержание Eclipse Ti Series
Страница 2: ......
Страница 13: ...Part 1 For Setting Up TI TIRF TI TIRF E or TI PAU Series Setup Manual For Authorized Nikon Personnel ...
Страница 14: ......
Страница 256: ......
Страница 257: ...Part 2 For Setting Up TI TIRF PAU and LU4 B5 Series Setup Manual For Authorized Nikon Personnel ...
Страница 258: ......
Страница 260: ...Contents 2 2 8 2 Environmental Conditions 2 70 8 3 Safety Standards Compliance 2 71 ...


