026
www.ruggedaq.com
DATALOGGER
NI2400
NI2400
027
www.ruggedaq.com
DATALOGGER
NI2400
NI2400
CONNECTION THROUGH DHCP
Overview
Here you will learn how to connect the NI2400 through DHCP. This option will allow the user
to use either the NI2400 webserver and the usual Internet connection.
Note. The router must be connected to a DHCP server
Description
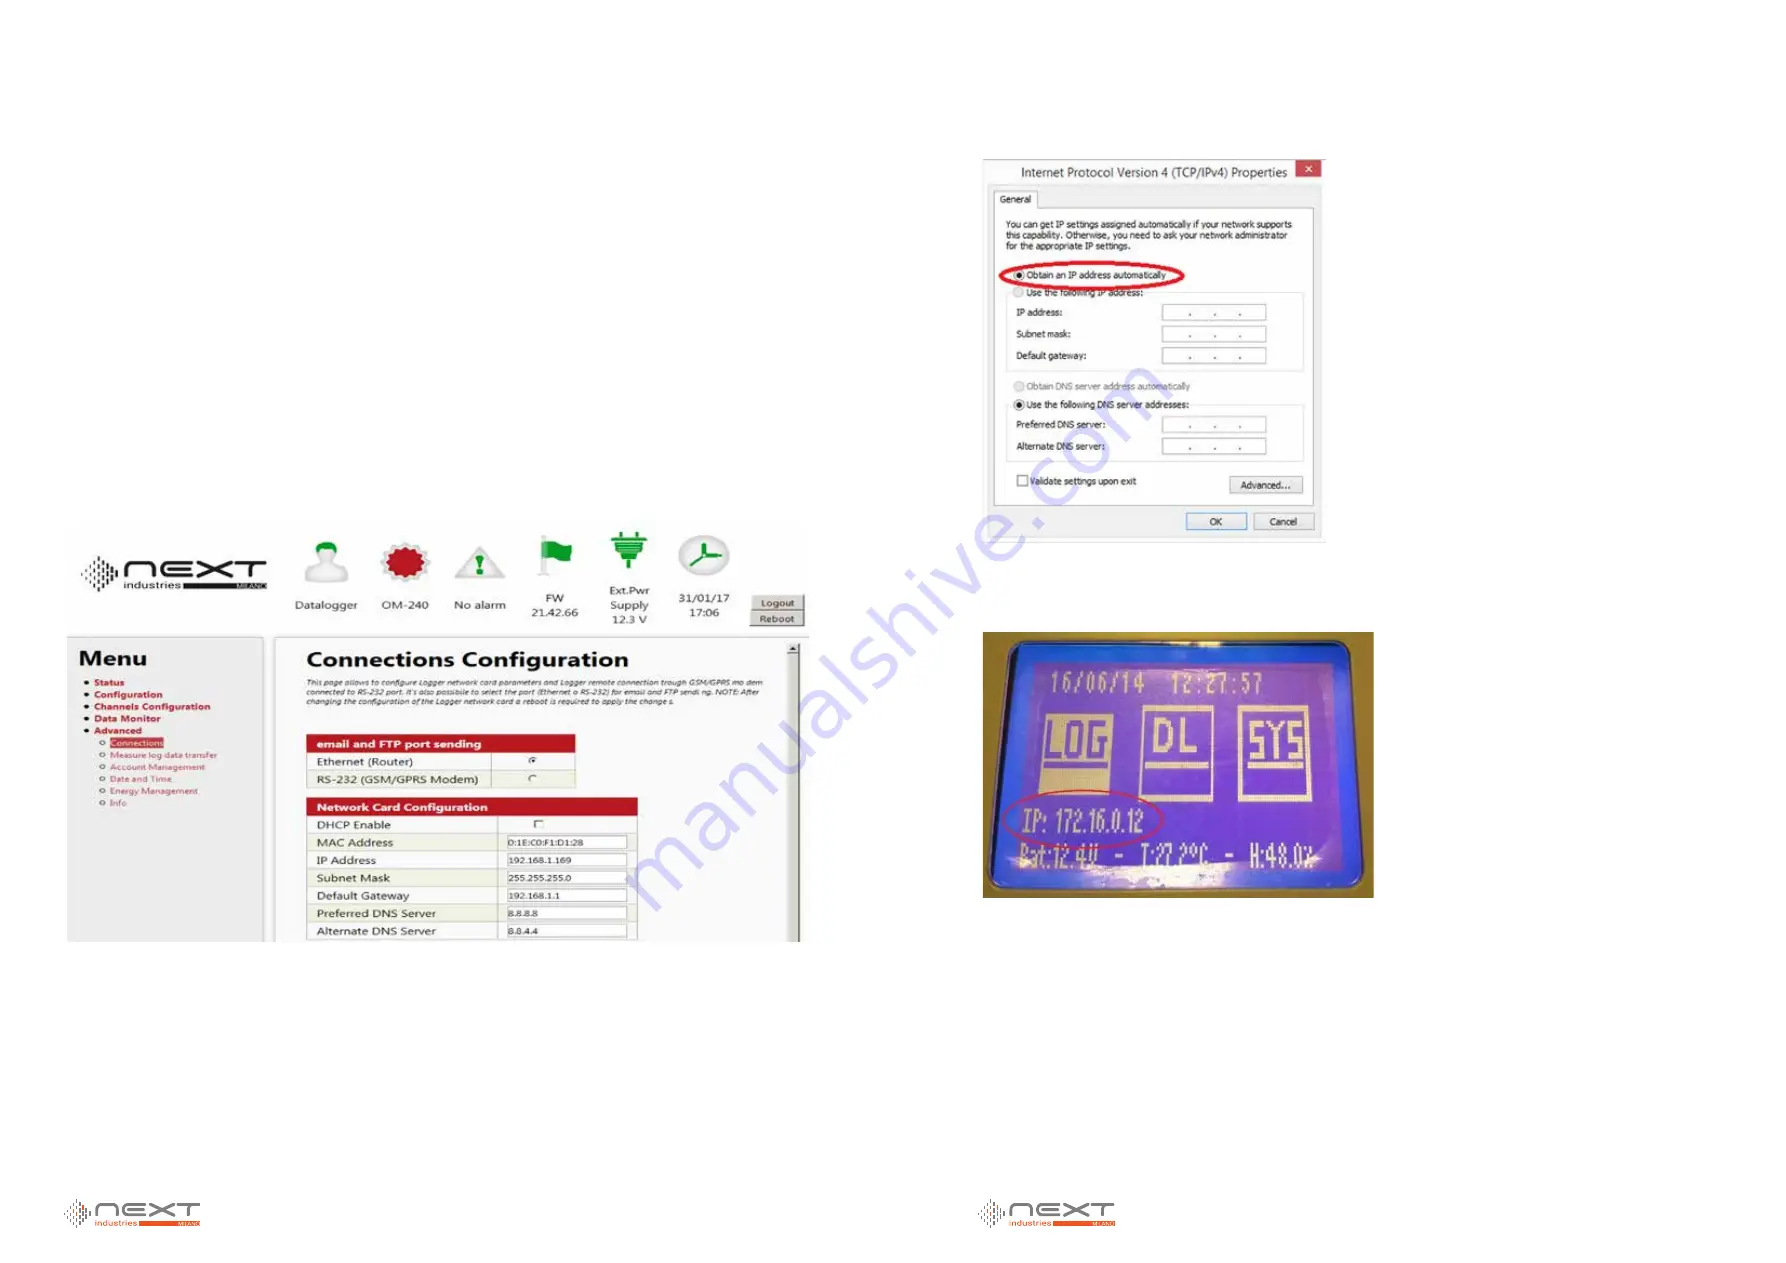
When you are connected to the NI2400 web server (192.168.1.100 IP address to be written
in the search bar), select “Advanced” from left menu and then “Connections”.
1. Flag “ DHCP Enable” and then start NI2400 reboot.
2. After Rebooting, IP address has to be setted up – look at chapter “Computer IP settings”
3. In few steps (summary):
4. Open Control Panel and then “Network Centre and Sharing” window
5. Enter “LAN Connection”and open Properties
6. Select: Internet protocol version 4 (TCP/IPv4) and then click on Properties
7. This time – unlike before - select “Obtain an IP address automatically”.
Click OK and close all windows.
Control from display the new IP address (see picture below).
NOTES
The IP address shown in the picture has been assigned by the router.
2
2


