Page | 143
Figure 157
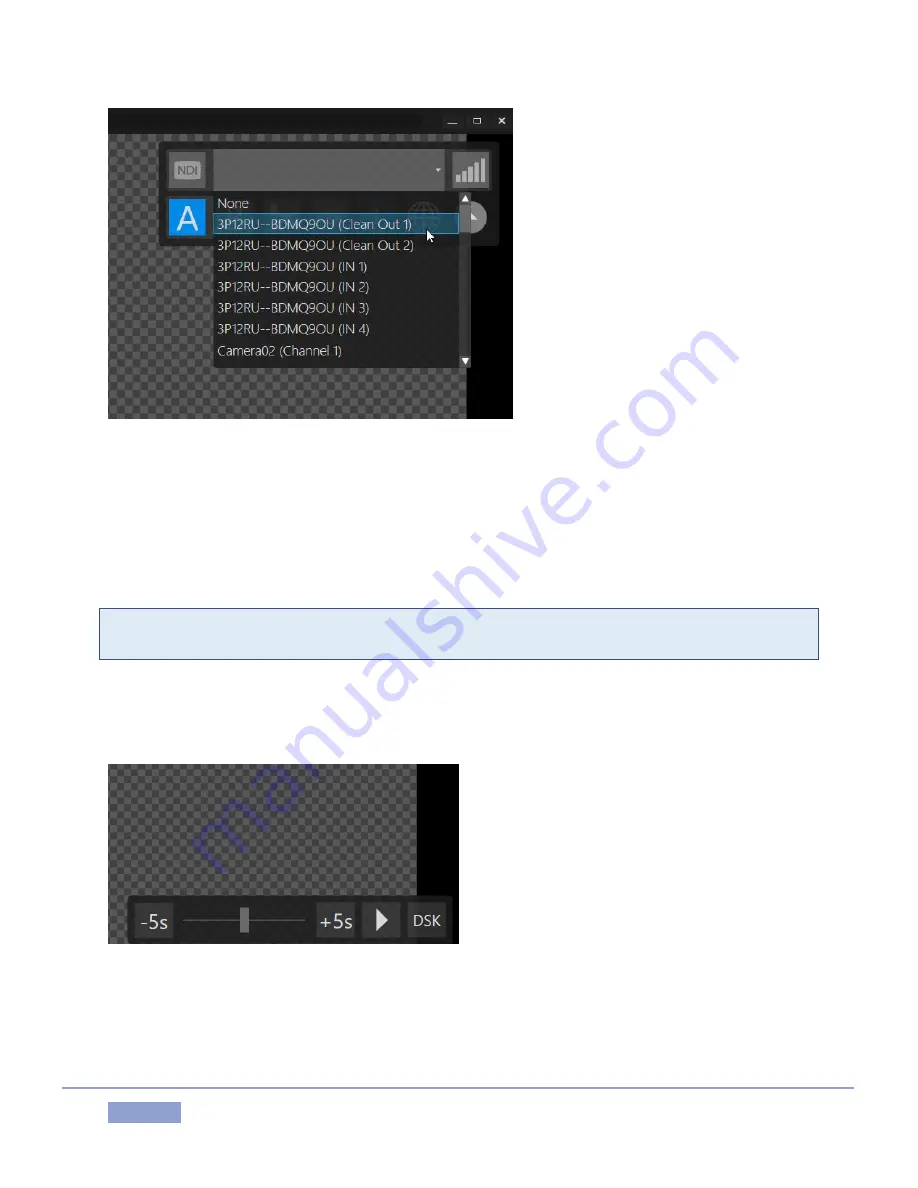
You will find the Telestrator application installer on your 3P1 in the folder at C:\\3Play\Etras. Having
installed NDI Telestrator Pro on a suitable external host, expand the video source control at upper-right
and choose one of the two ‘clean’ NDI output from a 3Play 3P1 system.
The application will automatically connect to the 3P1 system and assign the “Clean Out” 1 and 2 outputs
as background sources to Telestrator Pro’s A and B drawing canvasses.
Hint: The A and B buttons in this Telestrator control group allow you to switch from one drawing canvas
to the other. Click the (i) button in the Tools panel at the bottom of the Telestrator screen to show Help.
The next step is to assign Telestrator Pro’s output channel(s) – which consist of your drawing only, without
the background - as source for one or both of 3P1’s DSKs (assign the “Telestrator 1” channel as the source
for DSK A, and “Telestrator 2” to DSK B).
Figure 158
Note that, having connected the Telestrator and 3P1 in this fashion, using the controls at lower right you
can control Play, Stop, and playhead position for a clip shown on the 3P1 channel (A or B) associated with
the current canvas.
Содержание 3Play 3P1
Страница 1: ......
Страница 3: ...3Play ...
Страница 4: ......
Страница 14: ......
Страница 16: ......
Страница 18: ......
Страница 58: ......
Страница 70: ......
Страница 78: ......
Страница 90: ......
Страница 104: ......
Страница 144: ......
Страница 150: ......
Страница 182: ......
Страница 196: ......
Страница 200: ......
Страница 204: ......
Страница 206: ...Copyright 2018 NewTek Inc All rights reserved ...


