Scanner Appliance Tour
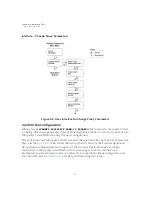
Proxy Configuration
35
2
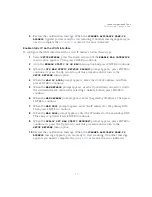
When the
PROXY PORT:
prompt appears, enter the port number assigned to the
Proxy server. Port “0443” appears in the screen by default. Confirm that the port
number shown is correct or enter a different one, if necessary. When the correct
port number appears, press ENTER
to continue.
Supported Characters: numbers only
3
When the
PROXY USER:
prompt appears, enter the user name for Proxy
authentication. If authentication is not enabled at the Proxy level, leave the entry
field blank. Press ENTER
to continue.
Supported Characters: Lower case letters, upper case letters, numbers, and these
special characters: _-\@. (including dot).
4
When the
PROXY PASSW
prompt appears, enter the password for Proxy
authentication. If authentication is not enabled at the Proxy level, leave the entry
field blank. Press ENTER
to continue.
Supported Characters: Lower case letters, upper case letters, numbers, and these
special characters: _-\/|~!?@#$%^&*+=(){}[]<>:;"`,. (including dot).
5
When the
REALLY ENABLE PROXY?
prompt appears, press ENTER
to continue. Or
press the Up arrow two times to quit this procedure and return to the
SETUP
NETWORK
menu option.
6
Review the confirmation messages. The
ENABLING PROXY SUPPORT
message
appears followed by other messages while the Scanner Appliance attempts to
make a connection to the Qualys Cloud Platform using the new configuration.
7
Upon success the
SCANNER APPLIANCE NAME–IP ADDRESS
message appears and
the configured proxy is now confirmed working and being used.
Содержание QGSA-5120-A1
Страница 1: ...Scanner Appliance User Guide December 20 2021 ...
Страница 4: ...Contents 4 Appendix A Product Specifications Appendix B Software Credits Appendix C Safety Notices ...
Страница 6: ...Preface 6 ...
Страница 58: ...Troubleshooting Where can I find the model number and serial number 58 ...
Страница 60: ...Appendix A Product Specifications 60 ...
Страница 62: ...Appendix B Software Credits 62 ...
Страница 64: ...Appendix C Safety Notices 64 ...


