49
Ness SmartBell IP Intercom Installation and Users Manual.(series 2)
Version 1.5.4
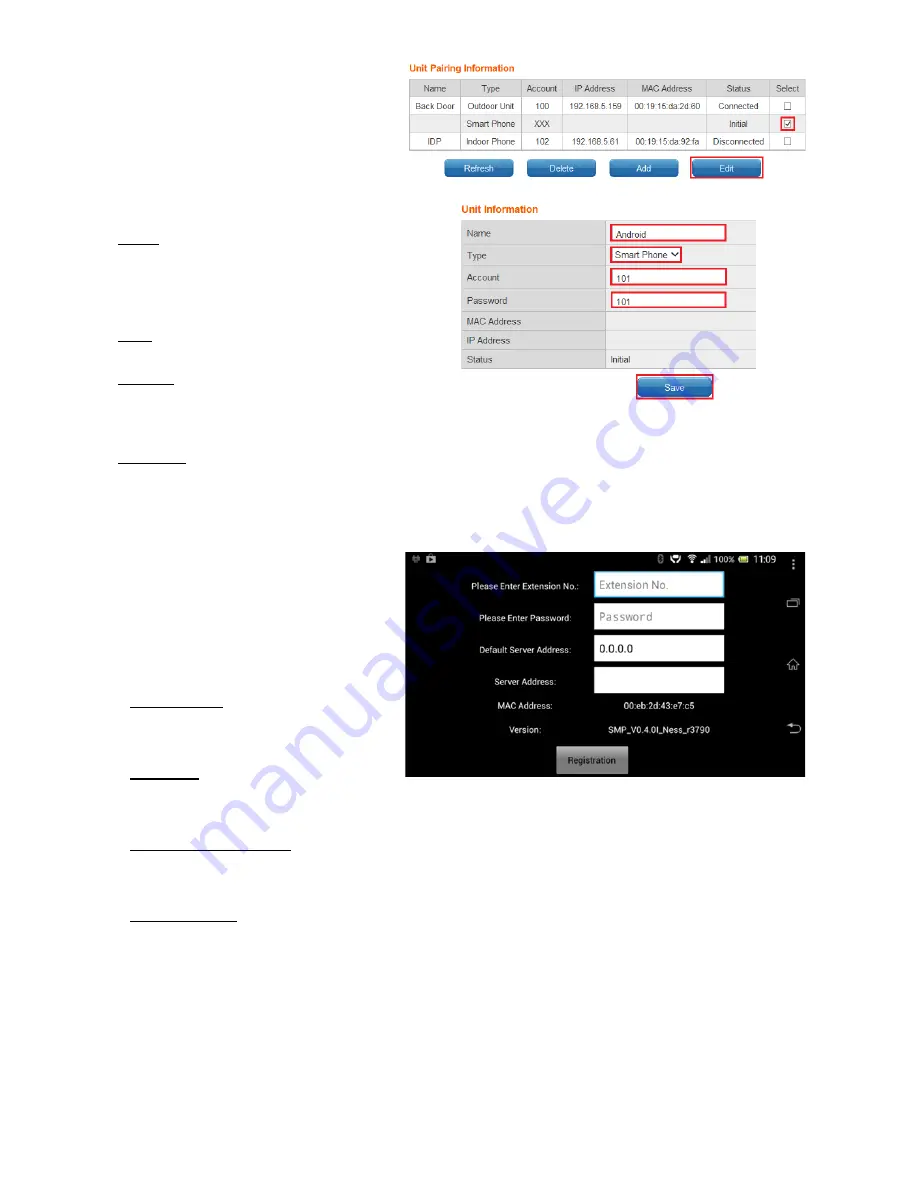
Edit
.
Edit Unit
Name
Enter the appropriate
name according to
personal needs. (e.g.
Fred’s Phone)
Type
Select
Smart Phone
Account
Please fill in the range of
100 to 109 ensuring this
number is not registered
Password
Enter in a password.
Press the
Save
button
Then click
Start Pairing
6. When the Smart phone has
not been
paired
with eGateway the following
registration screen will appear.
7. Fill out the following items
Extension No
Enter Account (100-109) as per the
pairing screen in the eGateway.
Password
Enter password as per the pairing
screen in the eGateway.
Default Server Address
Please enter the eGateway’s
WAN
IP
Address.
Server Address
Enter in your routers external IP
address. You can get this by typing in
‘What is my IP’ into Google.
8. Once the items have been filled in
press the
Registration
button.
9. Once the pairing is complete, press
the
save
button in the web GUI.
Содержание SmartBell
Страница 19: ...19 Ness SmartBell IP Intercom Installation and Users Manual series 2 Version 1 5 4 Background Settings ...
Страница 56: ...56 Ness SmartBell IP Intercom Installation and Users Manual series 2 Version 1 5 4 Function chart ...
Страница 63: ...63 Ness SmartBell IP Intercom Installation and Users Manual series 2 Version 1 5 4 Set the DDNS to WiFi router ...
Страница 73: ...73 Ness SmartBell IP Intercom Installation and Users Manual series 2 Version 1 5 4 NOTES ...


