45
Ness SmartBell IP Intercom Installation and Users Manual.(series 2)
Version 1.5.4
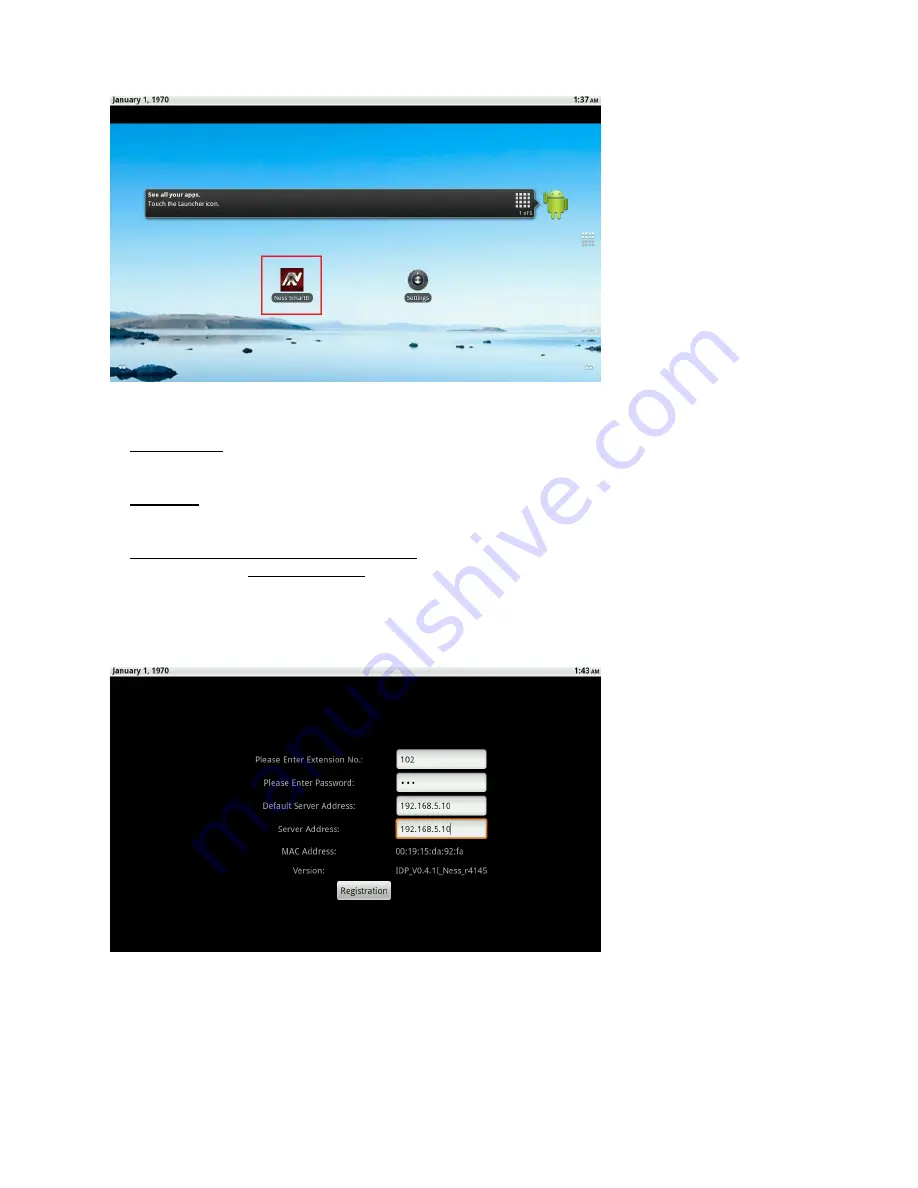
6. Open the App on the Master Room Station / 10” Indoor Phone, as per below:
7. On the Master Room Station / 10” Indoor Phone enter in the following settings:
Extension No
Enter extension No (100-109) as per the pairing screen in the eGateway.
Password
Enter password as per the pairing screen in the eGateway.
Default Server Address & Server Address
Please enter the
LAN IP Address of the eGateway
If you are not sure what the LAN IP is, then in the Web GUI of the eGateway, click on
Settings
>
LAN
and record the LAN IP (e.g. 192.168.5.10)
Do not use the WAN IP address
as you would
with Smartphone devices.
Once all details are entered, click on the
Registration
button.
To complete the ‘Pairing’ process, click on the
Save
button in the eGateway’s web GUI to finish
pairing.
Once successfully registered click “Homepage” on the Tablet and ‘Unit Pairing’ tab on the web GUI of
the eGateway which should now show ‘connected’.
Содержание SmartBell
Страница 19: ...19 Ness SmartBell IP Intercom Installation and Users Manual series 2 Version 1 5 4 Background Settings ...
Страница 56: ...56 Ness SmartBell IP Intercom Installation and Users Manual series 2 Version 1 5 4 Function chart ...
Страница 63: ...63 Ness SmartBell IP Intercom Installation and Users Manual series 2 Version 1 5 4 Set the DDNS to WiFi router ...
Страница 73: ...73 Ness SmartBell IP Intercom Installation and Users Manual series 2 Version 1 5 4 NOTES ...


