27
Ness SmartBell IP Intercom Installation and Users Manual.(series 2)
Version 1.5.4
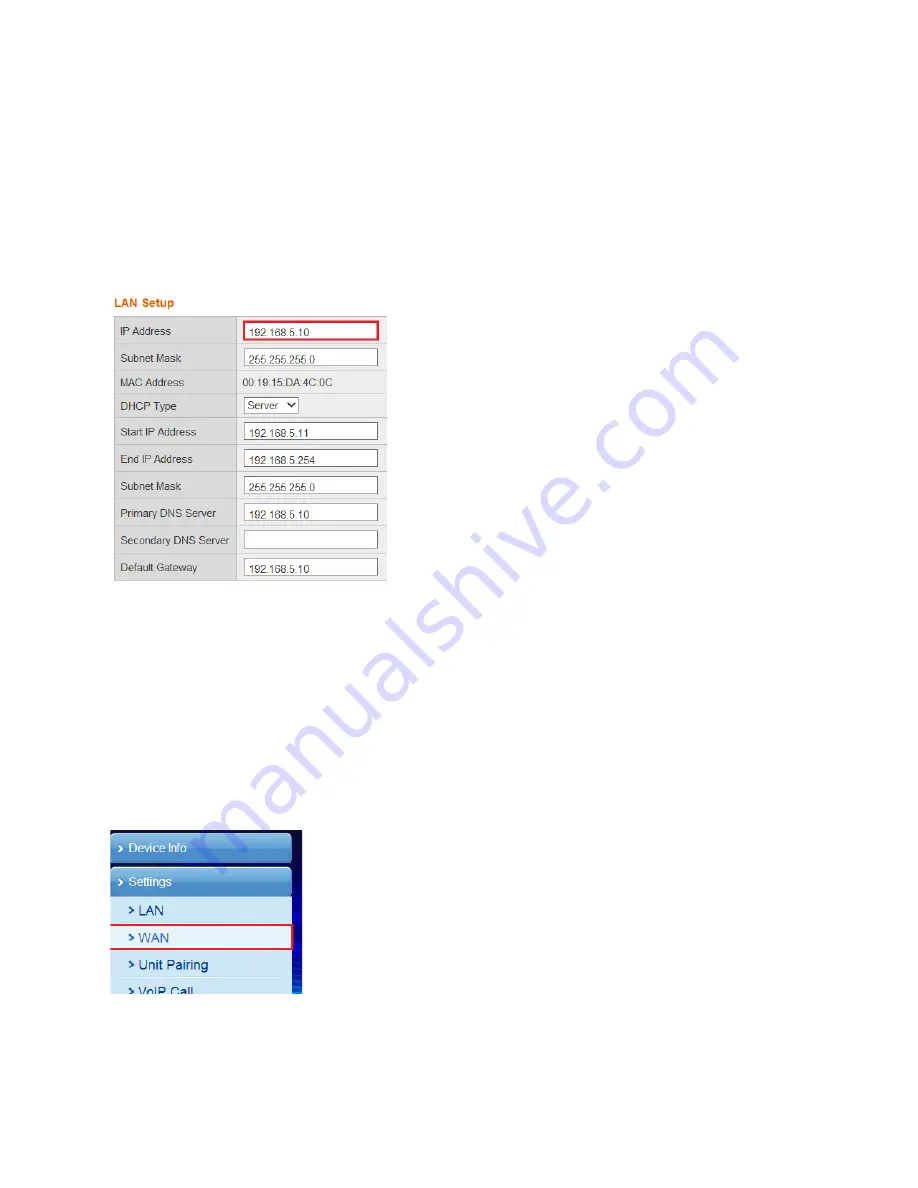
4. Enter in an IP address in the first field.
Note: This IP address needs to be a different IP address then the customer’s network.
For Example: If the customer’s network has the IP of 192.168.
0
.xx then you would need to enter in
something like 192.168.
5
.10 as this IP address.
The rest of the fields should automatically change based on the IP address you set.
Once this IP address has been set you need to click the
Apply
button at the bottom of the page.
Then close the browser after clicking apply.
5. Once the IP address has been set, you will need to change your computers IP address so it’s on
the same network range as what you put in step 4 above and you will need to close the web browser.
For Example: If your IP address you set in step 4 is 192.168.5.10 then you would change your
computers IP address as 192.168.5.xx (other than 192.168.5.10)
6. Re-open your web browser and enter in the IP address you set in step 4. (You should still have
the LAN cable plugged into LAN1 that is connected to your computer)
7. Once logged in, select
Settings
>
WAN
from the side menu.
Содержание SmartBell
Страница 19: ...19 Ness SmartBell IP Intercom Installation and Users Manual series 2 Version 1 5 4 Background Settings ...
Страница 56: ...56 Ness SmartBell IP Intercom Installation and Users Manual series 2 Version 1 5 4 Function chart ...
Страница 63: ...63 Ness SmartBell IP Intercom Installation and Users Manual series 2 Version 1 5 4 Set the DDNS to WiFi router ...
Страница 73: ...73 Ness SmartBell IP Intercom Installation and Users Manual series 2 Version 1 5 4 NOTES ...


