UNIVERGE SV8100
Issue 4.1
System Hardware Manual
6 - 35
11.3.2
Installing the ADA-L UNIT
Perform the following steps to connect the ADA-L UNIT to the
Bottom Option Interface located underneath the DTL/ITL multiline
terminal.
.
Only one ADA-L UNIT can be installed at a time.
1.
Unplug the line cord from the keyset.
2.
Turn the DTL/ITL multiline terminal upside down.
3.
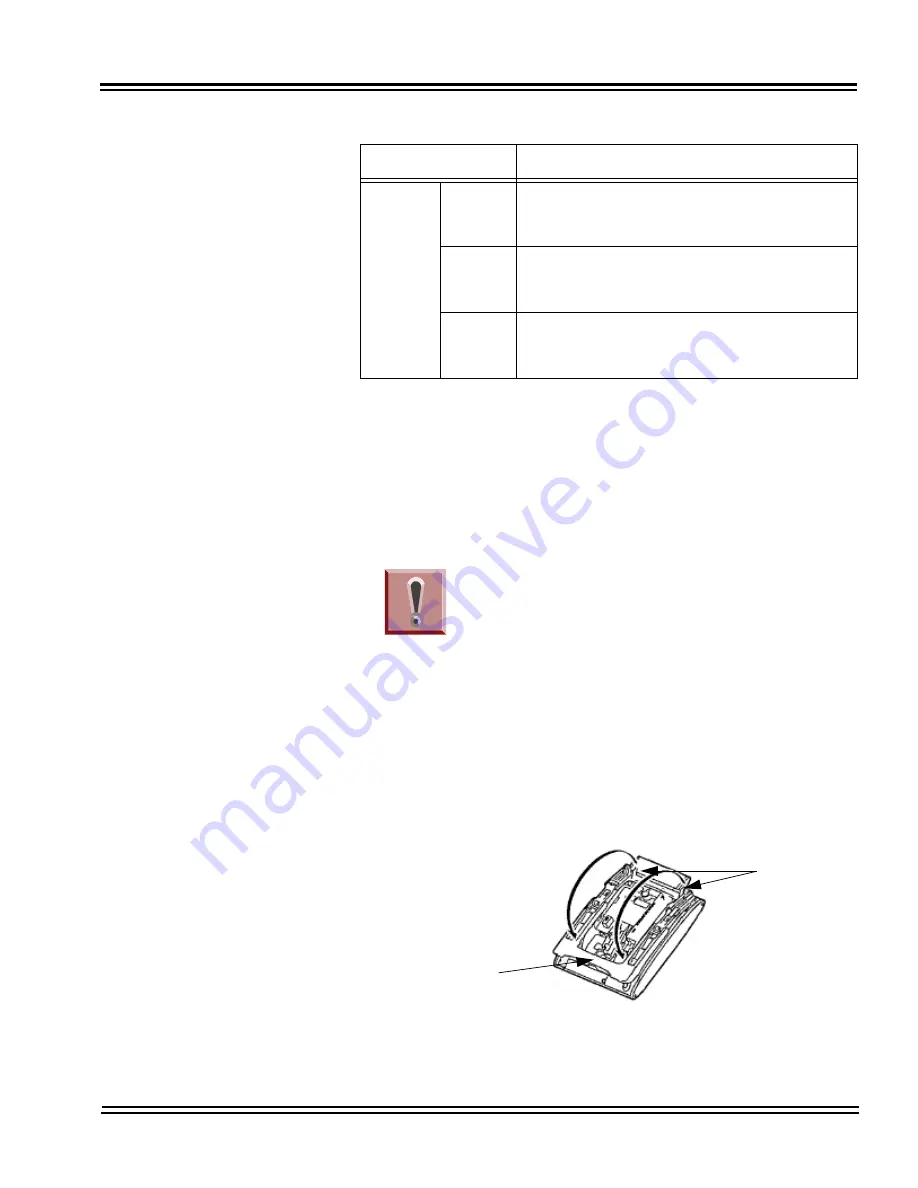
Lower the tilt leg to the first position (refer to
Figure 6-24
Separate Tilt Leg from Leg Support
).
Dip
Switches
(DSW)
DSW 1
Output Hook Signal to External Device
On = Output
Off = No Output (Default)
DSW 2
Record Confirmation Tone
On = Tone On
Off = Tone Off (Default)
DSW 3
and
DSW 4
Use T1/T2
On = Disable (Default)
Off = Enable
.
Do not connect T1 and T2 when DSW switches 3 and 4 are On.
Figure 6-24 Separate Tilt Leg from Leg Support
Table 6-3 ADA-L Unit Switch Settings (Continued)
Switch
Description/Settings
To prevent possible damage to the ADA-L
UNIT or the DTL/ITL multiline terminal
during installation or removal, disconnect
the line cord/LAN cable and the AC/DC
adapter from the DTL/ITL multiline terminal.
Stoppers
Tilt Leg
Содержание Univerge SV8100
Страница 1: ...System Hardware Manual Issue 4 1 February 2011...
Страница 2: ...THIS PAGE INTENTIONALLY LEFT BLANK...
Страница 36: ...Issue 4 1 UNIVERGE SV8100 1 14 Introduction to SV8100...
Страница 40: ...Issue 4 1 UNIVERGE SV8100 2 4 SV8100 System Specifications Figure 2 1 SV8100 System Block Diagram...
Страница 68: ...Issue 4 1 UNIVERGE SV8100 2 32 SV8100 System Specifications...
Страница 75: ...UNIVERGE SV8100 Issue 4 1 System Hardware Manual 3 7 Figure 3 7 Install Wall Mount Brackets with Screws...
Страница 99: ...UNIVERGE SV8100 Issue 4 1 System Hardware Manual 3 31 Figure 3 34 Install Screws Option 2...
Страница 148: ...Issue 4 1 UNIVERGE SV8100 3 80 Installing the SV8100 Chassis...
Страница 191: ...UNIVERGE SV8100 Issue 4 1 System Hardware Manual 4 43 Figure 4 15 Connecting a IPLA Daughter Board to a Network PC...
Страница 207: ...UNIVERGE SV8100 Issue 4 1 System Hardware Manual 4 59 Figure 4 22 Installing the PZ 8LCE Daughter Board...
Страница 247: ...UNIVERGE SV8100 Issue 4 1 System Hardware Manual 4 99 Figure 4 34 Control Signal Connection...
Страница 258: ...Issue 4 1 UNIVERGE SV8100 4 110 Installing the SV8100 Blades NOTES...
Страница 335: ...UNIVERGE SV8100 Issue 4 1 System Hardware Manual 5 77 Figure 5 92 Bluetooth Handset Controls and Indicators...
Страница 354: ...Issue 4 1 UNIVERGE SV8100 5 96 Installing DT300 DT700 Series DTL ITL Digital and IP Multiline Terminals...
Страница 360: ...Issue 4 1 UNIVERGE SV8100 6 6 Installing SV8100 Optional Equipment Figure 6 5 PGD 2 U10 ADP Connection Diagram...
Страница 367: ...UNIVERGE SV8100 Issue 4 1 System Hardware Manual 6 13 Figure 6 11 Setting the PGD 2 U10 ADP for a Door Box...
Страница 368: ...Issue 4 1 UNIVERGE SV8100 6 14 Installing SV8100 Optional Equipment Figure 6 12 Installing a Door Box...
Страница 380: ...Issue 4 1 UNIVERGE SV8100 6 26 Installing SV8100 Optional Equipment Figure 6 17 PGD 2 U10 ADP Connections...
Страница 417: ...UNIVERGE SV8100 Issue 4 1 System Hardware Manual 6 63 Figure 6 64 Power Failure Connector CN3 Shown on CD 4COTA Blade...
Страница 418: ...Issue 4 1 UNIVERGE SV8100 6 64 Installing SV8100 Optional Equipment...
Страница 419: ...THIS PAGE IS INTENTIONALLY LEFT BLANK...


