background image

20

BEFORE SET-UP

m

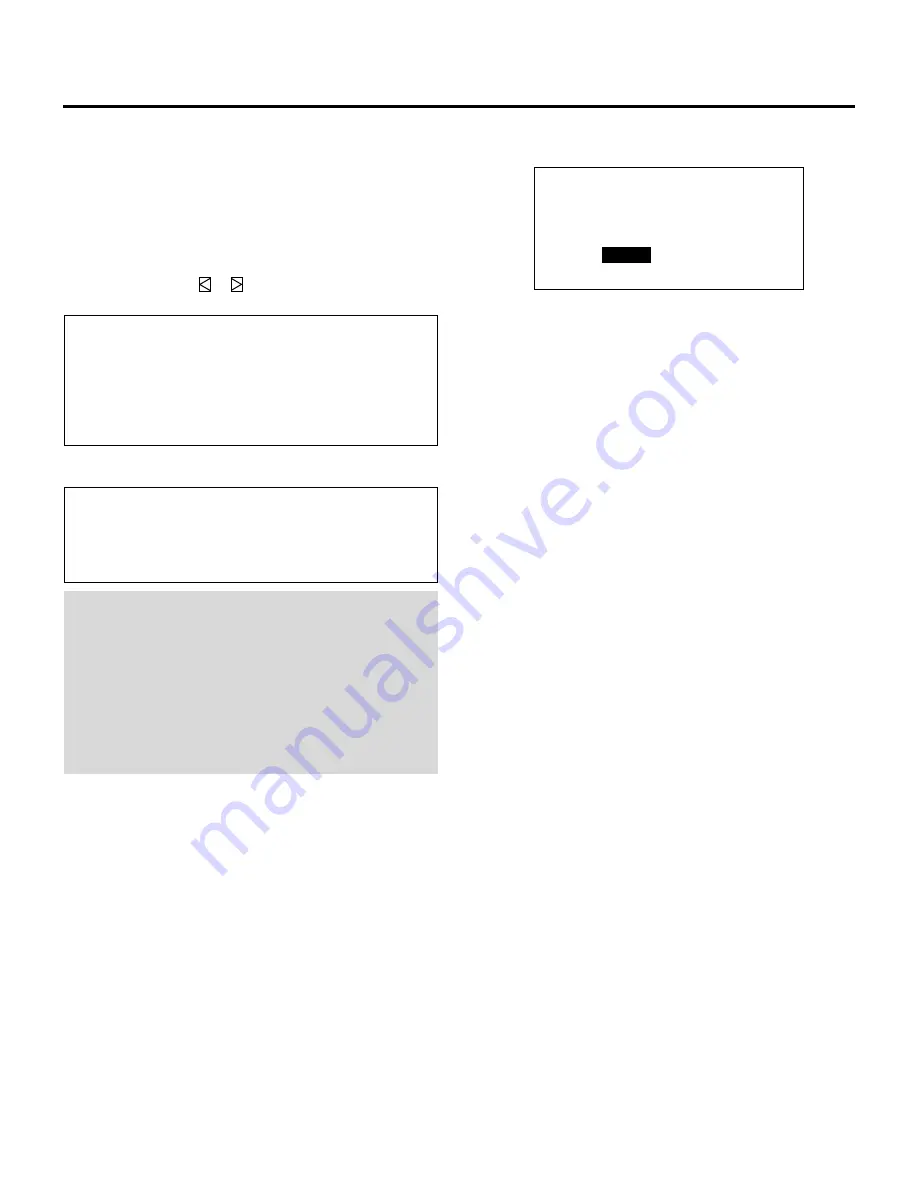
When selecting “NEW”

The current settings are registered as a new signal and are

saved to an unassigned line starting at memory location

No.51.

A registered name is automatically given.

The “NEW ENTRY?” menu will be displayed.

Use the CURSOR

or

 button to highlight “YES” or

“NO” and press ENTER.

Items to select

• YES ------------- Registers settings as a new signal and

saves the signal in an unassigned

location starting at memory location

No.51.

• NO -------------- Does not register settings.

A registered name is given as follows:

VIDEO/S-VIDEO ----- Video standard with a list number

e.g. NTSC51 or PAL52.

RGB --------------------- ”RGB” with a list number e.g.

RGB60.

NOTE:
• If the Input list does not have any unassigned memory

location starting at  No. 51 then, the “NEW” item will be
selectable. For signal registration see “SIGNAL ENTRY”
on page 23.

• The Automatic Save Feature is available only for signals

listed in the INPUT LIST.

NEW  ENTRY?

LIST  No.

**

NAME

********


  YES

NO

Содержание MultiSync XG-1352C

Страница 1: ...MultiSync XG85RP XG85RPW MultiSync XG135RP Large Screen MultiSync Rear Projection System Set Up Manual Model Number XG 852C XG 1352C The projector must be assembled by qualified installation technicians ...

Страница 2: ...2 ...

Страница 3: ... Adjustment 130 Bright Uniformity Adjustment 132 White Uniformity Adjustment 133 Rester Centering Adjustment 134 Appendix TIMING CHARTS 136 Pre set Signals 136 Input Signal Reference Chart 137 Input Signal Timing 138 MESSAGE LIST 139 INSTALLATION for qualified installation technicians 4 Assembly Instructions 4 PART NAMES AND FUNCTIONS 8 Front Terminal Panel 8 Rear Control Panel 8 Optional Boards 1...

Страница 4: ...ting the Upper Cabinet test the weight by lifting one side slightly off the floor With a minimum of two people four may be required and with one hand firmly in Hand Grip and the other under the rear side of cabinet lift and place upon lower cabinet NOTE Align plastic feet with the two round holes in top of lower cabinet STEP 3 Refer to Fig 2 For more structural security bolt the Upper Cabinet to t...

Страница 5: ...suitable blocks and roll cabinet forward until mounting holes on projector are in line with those of the Sliding Projector Mount Refer to Fig 5 Remove blocks so that projector rests on Sliding Projector Mount Then bolt projector to mounts with 1 4 bolts and washers provided Slide projector into cabinet and re fasten 1 4 Turn Wing Fasteners SLIDING PROJECTOR MOUNT 1 4 TURN WING FASTENER FRONT ACCES...

Страница 6: ...ut With the Mirror Shroud held at the maximum out position re latch the Lift Turn latches STEP 7 Refer to Fig 7 Attach auxiliary Electronic Equipment optional to the Rack Mount Rails located behind the Hinged Side Grills LIFT TURN MIRROR SHROUD LATCH FIG 6 ELECTRONIC EQUIPMENT rack mounted type FIG 7 HINGED SIDE GRILL open position ...

Страница 7: ...net Run system cables through cable Grommet located at the lower rear of the Projection Cabinet Note Computer cables can be connected directly to the front of the projector STEP10 Refer to Fig 6 Replace Front Access Cover by aligning with the Slide Grills and pushing with gentle pressure until catches engage LIFT TURN MIRROR SHROUD LATCH FIG 6 FIG 8 SPEAKERS MOUNTED TO SIDE GRILL HINGED SIDE GRILL...

Страница 8: ... front access cover grasp at top and bottom and pull with quick firm pressure 3 9 POWER STANDBY RC READY INDICATOR ON OFF INPUT SELECT ENTER POWER INPUT SELECT 5 6 4 8 7 I H 0 B C D E ACAT OUT R Cr G Y B Cb H HV V S VIDEO VIDEO OPTION REMOTE1 REMOTE2 OUT IN L MONO R L MONO R L MONO R RGB S VIDEO VIDEO AUDIO INPUT OFF POWER ON AC INPUT 2 1 F G J L K A Rear Terminal Panel ...

Страница 9: ...nal equipment such as a VCR with S video outputs L VIDEO Audio Input Terminals L R Connect to the audio outputs of the external equipment such as a VCR Rear Panel 1 Power Switch Main power To turn on the main power to the projector press the switch to the ON position I The STANDBY and the RC READY indicator will light In this condition you can start up the projector by pressing the POWER ON button...

Страница 10: ...d XG RGBINA Front view 1 Active Indicator green LED Lights up when this board is selected 2 R Input Terminal Connects a Red output signal 3 G Input Terminal Connects a Green output signal 4 B Input Terminal Connects a Blue output signal 5 H HV Input Terminal Connects horizontal sync or horizontal vertical sync output signals 6 V Input Terminal Connects a vertical sync output signal 7 AUDIO Input T...

Страница 11: ...ers Setting of Rotary switch indicates factory preset No 3 is factory preset Corresponding slot number You can also select the input signal directly by pressing the INPUT 1 through 10 button In this case INPUT buttons function as follows 1 Some settings allow you to retrieve a COMPONENT signal automatically See RGB COMPONENT Search Setting 2 When the optional RGB input board is installed and the R...

Страница 12: ... GHI 4 JKL 5 MNO 6 PQR 7 STU 8 VWX 9 YZ 10 R B END CTL DISPLAY STATIC NORMAL ENTER 1 ABC 2 DEF 3 GHI OFF ON 4 JKL 5 MNO 6 PQR TEST 7 STU 8 VWX 9 YZ ADJUST OPERATE 10 SOUNDFUNC PIC FUNC HELP INFO INPUT LIST SOUNDMUTE PIC MUTE POSITION KELVIN FOCUS DISPLAY R G B POINT STATIC PHASE TILT BOW AMPLIT LINEAR STORE KEYSTN CTL ENTER END NORMAL PINCUS POWER INPUT CURSOR ON OFF 1 K R U V S W Q B 0 9 8 4 X K ...

Страница 13: ...PLAY Button Press to turn on or off the on screen display Pressing with CTL eliminates the on screen display pressing with CTL will restore display NOTE Even if the on screen display may be turned off with pressing CTL and DISPLAY any adjustment will still change the projector s memory settings This mode is available even when an input is switched to another or the power is turned off using the PO...

Страница 14: ...justments Note that the G button is only on the full function remote control R CURSOR Buttons Used for increasing and decreasing control levels cursor movement and convergence adjustments S NORMAL Button Returns the standard level for each signal When pressed once the confirmation message will be displayed When YES is selected and ENTER is pressed the data will be returned to the standard level Wh...

Страница 15: ...the unit 2 Install the two new batteries making sure that their polarity matches the diagrams inside the battery compartment Incorrect polarity could damage the unit Remote control cautions Use the remote control within a distance of about 7m 23 ft and at 30 degrees angle left and right Handling remote control and batteries Do not drop or mishandle the remote Do not get the remote wet If the remot...

Страница 16: ...16 ...

Страница 17: ...arious adjustment such as focus alignment conver gence This chapter also explains the passcode It is a convenient way to prevent any tampering of projector set up information by unauthorized individuals The Setting chapter gives you details on setting for various use CONTENTS Before Set Up 18 Signal Entry 23 Adjustment 44 Passcode 68 Setting 74 Reference Adjustment 129 Set Up for service personnel...

Страница 18: ...ITUDE 04 LINEARITY 05 KEY STONE 06 PIN CUSHION 07 LINEAR BAL 08 KEY BALANCE 09 PIN BALANCE 10 LINE DIST 11 R G B POINT CONVERGENCE menu CONVERGENCE 1 TILT SKEW 2 BOW 3 AMPLITUDE 4 LINEARITY 5 KEY STONE 6 PIN CUSHION 7 LINEAR BAL 8 LINE DIST 9 POINT 10 PHASE 1 COLOR TEMP 2 WHITE BAL Adjustment screen PASSCODE menu OPTION menu OPTION 1 SETTING MODE 2 MENU MODE 3 SEQUENCER 4 PJ ADDRESS 5 VERSION 6 HO...

Страница 19: ...d to another The projector is turned off After every 10 minutes of elapsed time mWhen the Automatic Save Feature mode is set to DISABLE projector settings can be stored in the projector s memory manually When you try to return the source screen by pressing END several times the STORE menu is displayed To manually save settings proceed as follows 1 Use the END button to display the STORE menu from ...

Страница 20: ...w signal and saves the signal in an unassigned location starting at memory location No 51 NO Does not register settings A registered name is given as follows VIDEO S VIDEO Video standard with a list number e g NTSC51 or PAL52 RGB RGB with a list number e g RGB60 NOTE If the Input list does not have any unassigned memory location starting at No 51 then the NEW item will be selectable For signal reg...

Страница 21: ...n the ADJUST menu See Entering Passcode Registering Passcode Changing Your Passcode and Canceling Your Passcode on pages 68 through 73 When your passcode has already been registered When finishing the ADJUST mode the RETURN USER MODE menu will be displayed If you select YES and press ENTER to end the ADJUST mode you will have to enter your passcode to re enter the ADJUST mode When finishing the AD...

Страница 22: ... have been turned off by the R G and B buttons on the remote control CROSS HAIR CROSS COARSE CROSS FINE DOT COARSE DOT FINE FOCUS WINDOW WHITE Adjustment test pattern H H H H H H H H H H H H H H H H H H H H H H H H H H H H H H H H H H H H H H H H H H H H H H H H H H H H H H H H H H H H H H H H H H H H H H H H H H H H H H H H H H H H H H H H H H H H H H H H H H H H H H H H H H H H H H H H H H H H H...

Страница 23: ...first whenever inputting video signals for the first time so that you can register the video signals before making any adjustments If the current input signal s has not been registered the UNREGISTERED SIGNAL message is displayed on screen NOTE If you have software which changes scanning mode due to the graphic board of your PC such as VGA it will be necessary to register signal entry for each sca...

Страница 24: ...NEW ENTRY and press ENTER The INPUT TERMINAL SELECT menu will be display When using the projector in stand alone application Use the CURSOR or button to select one of the three slots and press ENTER Items to select INPUT A Standard installed terminal INPUT B Optional board terminal INPUT C Optional board terminal Use the CURSOR or button to select VIDEO RGB S VIDEO or COMPO and press ENTER The NAM...

Страница 25: ...NAME INPUT screen will be displayed Items to select VIDEO Selects the signal from the VIDEO input terminal of the VIDEO input board RGB Selects the signal from the RGB input terminal of the RGB input board S VIDEO Selects the signal from the S VIDEO input terminal of the VIDEO input board COMPO Selects the signal as COMPONENT signal from the RGB input terminal of the RGB input board Go on to Step ...

Страница 26: ...0 2 S L O T 0 3 S L O T 0 4 S L O T 0 5 S L O T 0 6 S L O T 0 7 S L O T 0 8 S L O T 0 9 S L O T 1 0 S L A V E SIGNAL ENTRY Items to select VIDEO Selects the signal from the VIDEO input terminal of the VIDEO input board RGB Selects the signal from the RGB input terminal of the RGB input board S VIDEO Selects the signal from the S VIDEO input terminal of the VIDEO input board COMPO Selects the signa...

Страница 27: ...mple a b c a The characters corresponding to these INPUT buttons are as follows When using With CTL INPUT 1 A B C and 1 a b c and INPUT 2 D E F and 2 d e f and INPUT 3 G H I and 3 g h i and INPUT 4 J K L and 4 j k l and INPUT 5 M N O and 5 m n o and INPUT 6 P Q R and 6 p q r and INPUT 7 S T U and 7 s t u and INPUT 8 V W X and 8 v w x and INPUT 9 Y Z and 9 y z and INPUT 10 and 0 and If you have mad...

Страница 28: ...R Items to select ALL Copies all the settings EXCEPT H POSI PHASE Copies the settings except H position and Phase adjustments data The SOURCE INFORMATION screen will be displayed Pressing END will return to the SIGNAL ENTRY list Go on to Step 5 NOTE You can check and change various parameters on the SOURCE INFORMATION menu See page 35 D E F A U L T T E M P O R A R Y E N T R Y N U M B E R I N I T I...

Страница 29: ...do this proceed as follows 1 Use the CURSOR or button to select ENTRY MOVE and then press ENTER The ENTRY MOVE SELECT SOURCE message will be displayed at the bottom of the screen 2 Use the CURSOR or button to select a line you wish to move and then press ENTER The ENTRY MOVE SELECT DESTINATION message will be displayed at the bottom of the screen 3 Use the CURSOR or button to select a line you wis...

Страница 30: ...selected lines To do this proceed as follows 1 Use the CURSOR or button to select ENTRY DELETE and then press ENTER The DELETE SELECT START LINE message will be displayed at the bottom of the screen 2 Use the CURSOR or button to select the first of the lines you wish to delete and then press ENTER The DELETE SELECT END LINE message will be displayed at the bottom of the screen 3 Use the CURSOR or ...

Страница 31: ...s completes the DATA COPY mode The SIGNAL ENTRY list will be displayed Go on to Step 5 m When selecting CHANGE DEFAULT All of the adjustment data of the selected signal will be stored in the DEFAULT AREA The data stored in the DEFAULT AREA can be recalled by pressing the NORMAL button Selecting DEFAULT from the INITIAL DATA SELECT menu during signal entry will utilize the data stored in the DEFAUL...

Страница 32: ... signal will not be stored in the DEFAULT AREA If the SIGNAL ENTRY list will be displayed this completes the CHANGE DEFAULT mode To end the SIGNAL ENTRY list go on to Step 5 m When selecting SOURCE EDIT This feature allows you to change various parameters of the source on the selected line This can be done to the current projected signal as well as not projected source NOTE The setting INPUT TERMI...

Страница 33: ...nd press ENTER The SIGNAL ENTRY screen is displayed When used with two or more Switchers ISS 6020 ISS 6020G Use the CURSOR or button to select the master slot number 1 through 10 0 first from the master menu then select the slave slot number 1 through 10 0 from the slave menu and press ENTER The SIGNAL ENTRY screen is displayed For changing parameters of the setting feature see pages 35 to 43 S L ...

Страница 34: ...ode is in effect the RETURN USER MODE screen will be displayed If this happens use the CURSOR or button to select either YES or NO and press ENTER Items to select YES When you try to enter the ADJUST mode the next time you will need to re enter your passcode NO When you try to enter the ADJUST mode the next time you will not need to re enter your passcode RETURN USER MODE Y E S N O ...

Страница 35: ...E LOCK AKB POSI TION FONT APERTURE and SYNC TERMINATION See the following pages for an explanation of each setting Checking and Setting Various Parameters A D J U S T 1 S I G N A L E N T R Y 2 F O C U S 3 A L I G N M E N T 4 C O N V E R G E N C E 5 K E L V I N 6 R G B G A I N 7 P A S S C O D E 8 O P T I O N 9 R E F A D J U S T P 0 1 0 3 S O U R C E I N F O R M A T I O N N A M E I N P U T T E R M I...

Страница 36: ...button The above is the same procedure of the signal entry See page 27 for more details The screen will return to the SOURCE INFORMATION screen m Setting SYNC CONTROL This function is used to select the detection method of the sync signal for an RGB signal To do this proceed as follows 1 Use the CURSOR buttons to select SYNC CONTROL and then press ENTER The SYNC CONTROL menu will be displayed 2 Us...

Страница 37: ...PLAY TIME RESET Y E S N O m Setting DISPLAY TIME This function is used to reset the time of signal display 1 Use the CURSOR buttons to select DISPLAY TIME and then press ENTER The DISPLAY TIME RESET screen will be displayed 2 Use the CURSOR or button to select either YES or NO and then press ENTER To reset the timer select YES If you do not need to reset select NO The screen will return to the SOU...

Страница 38: ...gnals O F F O N S O U R C E L O C K C O N T R O L m Setting AKB This function is used to activate the auto white balance control 1 Use the CURSOR buttons to select AKB and then press ENTER The AKB CONTROL menu will be displayed 2 Use the CURSOR or button to select either OFF or ON and then press ENTER The screen will return to the SOURCE INFORMATION screen NOTE When ON is selected the AKB detectio...

Страница 39: ...OR buttons to select G Y MATRIX and press ENTER The G Y MATRIX menu will be displayed 2 Use the CURSOR or button to select an item and press ENTER The screen will return to the SOURCE INFORMATION screen Items to select HD For an HDTV signal NTSC 1 3 For a DVD signal P02 03 SOURCE INFORMATION AUTO COMP OFF OFF SYNC CONTROL COUNTER DISPLAY TIME SOURCE LOCK AKB G Y MATRIX G Y MATRIX HD NTSC1 NTSC2 NT...

Страница 40: ...is function is used to specify the appropriate font size to the on screen message To do this proceed as follows 1 Use the CURSOR buttons to select FONT and then press ENTER The FONT SIZE menu will be displayed 2 Use the CURSOR or button to select either NORMAL or SMALL and then press ENTER The screen will return to the SOURCE INFORMATION screen Items to select NORMAL Calculates the appropriate fon...

Страница 41: ...N screen NOTE The default setting is MANUAL LEVEL 1 m Setting SYNC TERMINATION This function is used to select the impedance of the sync signal 1 Use the CURSOR buttons to select SYNC TERMINA TION then press ENTER The SYNC TERMINATION menu will be displayed 2 Use the CURSOR or button to select 75 Ω or Hi Z then press ENTER The screen will return to the SOURCE INFORMATION screen NOTE The default se...

Страница 42: ...select NORMAL or SLOW then press ENTER The screen will return to the SOURCE INFORMATION screen Items to select NORMAL Standard AFC time constant ON Slows the AFC time constant NOTE The default setting is NORMAL Although jitter will be reduced image distortion may appear at the top of the screen if the AFC mode is set to SLOW P03 03 SOURCE INFORMATION POSITION WIDE FONT NORMAL APERTURE MANUAL LEVEL...

Страница 43: ...in effect the RETURN USER MODE screen is displayed If this happens use the CURSOR or button to select either YES or NO and press ENTER Items to select YES When you try to enter the ADJUST mode the next time you will need to re enter your passcode NO When you try to enter the ADJUST mode the next time you will not need to re enter your passcode RETURN USER MODE Y E S N O ...

Страница 44: ...m the signal entry beforehand See page 23 1 Electrical Focus Adjustment See page 45 2 Alignment Adjustment See page 49 3 Static Convergence Adjustment See page 55 4 Dynamic Convergence Adjustment See page 56 Check and adjust again if necessary 5 Color temperature White Balance Adjustment See page 66 6 R G B Gain Adjustment See page 67 only when used with the ISS 6020 ISS 6020G If a wrong button is...

Страница 45: ... directly by pressing the INPUT 2 button 3 Use the CURSOR or button to highlight your preferred adjustment item Press ENTER to display the selected adjustment screen You can also select the adjustment screen directly by pressing the INPUT 1 through 4 button For edge focus you can select either EDGE ALL or EDGE SEPA in the FOCUS EDGE mode of the OPTION menu See page 82 Items to select CENTER The fo...

Страница 46: ...he EDGE ALL focus Always be aware of what color the on screen CRT display is showing R G B when CENTER EDGE SEPA or COR NER is selected If that color s test pattern is turned off any adjustment to that color will display the THIS COLOR IS NOT APPLICABLE message 6 Use the CURSOR buttons to adjust the focus m When selecting CENTER Pressing the or button increases the control levels of the center foc...

Страница 47: ...e focus The gauge mark in the scale moves to the left 3 To switch to the CENTER screen use the CTL and CURSOR buttons as follows To switch to CENTER from Top press and hold CTL then press CURSOR To switch to CENTER from Bottom press and hold CTL then press CURSOR To switch to CENTER from Right press and hold CTL then press CURSOR To switch to CENTER from Left press and hold CTL then press CURSOR m...

Страница 48: ...ss ENTER This will exit the ADJUST mode Items to select YES When you try to enter the ADJUST mode the next time you will need to re enter your passcode NO When you try to enter the ADJUST mode the next time you will not need to re enter your passcode NOTE The center focus for the Blue CRT is pre adjusted so that the best white uniformity can be obtained at the gauge center 0 For this reason it has...

Страница 49: ...s the horizontal and vertical pincushion LINEAR BAL Adjusts the horizontal and vertical linearity balance KEY BALANCE Adjusts the horizontal and vertical keystone tilt balance PIN BALANCE Adjusts the horizontal and vertical pincush ion bow balance LINE DIST Adjusts S shaped distortion of vertical and horizontal lines R G B POINT Adjusts the horizontal and vertical line in detail using a intersecti...

Страница 50: ... If this happens reduce the total amount of the current adjust ment data m Adjusting LINE DISTORTION 1 Select the 10 LINE DIST item then press ENTER The LINE DIST menu is displayed 2 Use the CURSOR or buttons to select the item and press ENTER to display the selected adjustment screen You can also select the item directly by pressing the corresponding INPUT number button The selected adjustment sc...

Страница 51: ...le the convergence adjustment needs to be performed for each CRT R and B separately 1 Select 11 R G B POINT from the ALIGNMENT menu and press ENTER to display the R G B POINT menu For dynamic convergence select 9 POINT from the CONVER GENCE menu and press ENTER to display the POINT menu 2 Use the CURSOR or button to select the item and press ENTER to display the selected adjustment screen You can ...

Страница 52: ...DJUST mode Items to select YES When you try to enter the ADJUST mode again you will need to re enter your passcode NO When you try to enter the ADJUST mode again you will not need to re enter your passcode Items to select COARSE Coarse adjustment Number of adjust ment zones is 3 x 3 MEDIUM Number of adjustment zones is 7 x 7 FINE Fine adjustment Number of adjustment points is 13 x 16 3 Use the CUR...

Страница 53: ... left and right linearity Vertical BOW Adjust horizontal center line bow Horizontal BOW Adjust vertical center line bow Vertical AMPLITUDE Adjust vertical height of image Horizontal AMPLITUDE Adjust horizontal size of image Vertical KEYSTONE Adjust top and bottom keystone error Horizontal KEYSTONE Adjust left and right keystone error Alignment Adjustment Items ...

Страница 54: ...balance error Horizontal KEY BALANCE Equalize left and right keystone balance error Vertical LINEAR BALANCE Equalize top and bottom linearity balance error Horizontal LINEAR BALANCE Equalize left and right linearity balance error Vertical POINT Adjust the point peak vertically Horizontal POINT Adjust the point peak horizontally LINE DIST CENTER Correct S shaped horizontal line Horizontal LINE DIST...

Страница 55: ...trol 3 Press the R or B button to display the pattern to be aligned with the Green pattern You can turn on or off each CRT beam R and B separately 4 Hold down the CTL button then select the CRT you wish to adjust with the R and B buttons NOTE Always be aware of what color the on screen CRT display is showing R G B If that color s test pattern is turned off any adjustment to that color will display...

Страница 56: ...d See pages 57 to 65 for the explanation of the selected adjust ment NOTE You can also select adjustments directly using buttons on the full function remote control If you are in the ALIGNMENT mode see page 49 press and hold down the CTL button then press the R or B button This will bring you to the CONVER GENCE adjustment screen To select LINEAR BAL conver gence press and hold down the CTL button...

Страница 57: ...E N C E T I L T S K E W C R T R 1 0 H ABNORMAL CORRECTION DATA V Top Bottom Right Left LINE DIST 1 CENTER 2 EDGE 3 BIQUAD ADJUSTMENT m KEYSTONE PINCUSHION and LINEAR BALANCE Press and hold the CTL button then press any one of the CURSOR buttons to select the position to be adjusted CTL CTL CTL CTL Use the CURSOR buttons to correct the error C O N V E R G E N C E K E Y S T O N E C R T R 1 0 S C R E...

Страница 58: ...ss and hold the CTL then press CUSOR or button When selecting EDGE Pressing the CURSOR or button increases the level Pressing the CURSOR or button decreases the level To switch another screen press and hold the CTL then press CUSOR or button When selecting BIQUAD Pressing the CURSOR or button increases the level Pressing the CURSOR or button decreases the level To switch to the adjustment position...

Страница 59: ...nt zones is 3 x 3 MEDIUM Number of adjustment zones is 7 x 7 FINE Fine adjustment Number of adjustment points is 13 x 16 3 Use the CURSOR or buttons to move the cursor mark to the point to be adjusted Pressing the CURSOR button moves the cursor to the right Pressing the CURSOR button moves the cursor to the left Pressing the CURSOR button moves the cursor to the top Pressing the CURSOR button move...

Страница 60: ...the remote control You must adjust the convergence to all the 13 points because ACAT feature calculates all the adjustment values on the entire screen based on the adjustments values of 13 points on the screen If convergence points on the edges go out of screen reduce the horizontal and the vertical amplitude settings using the amplitude feature of the ALIGNMENT menu so that all the 13 convergence...

Страница 61: ...s to improve accuracy depending on the installation condition There may be some cases where you cannot get completely corrected convergence on the edges of the screen If this happens perform convergence adjustments other than POINT ACAT If you decreased the horizontal or and vertical amplitude and then performed the POINT ACAT adjustment return the adjustment to its previous state P O I N T 1 C O ...

Страница 62: ...equal 3 Use the CURSOR or button to adjust the cursor phase for vertical line Align the vertical center line of the point cursor with the point peak P H A S E C O N V C U R S O R 2 0 C N 2 0 C U CON CUR 7 Repeat steps 3 to 6 for the other CRTs if necessary Pressing the END button will bring you to the CONVER GENCE menu 8 To exit press END Whenever the END button is pressed the menus will sequence ...

Страница 63: ...line KEYSTONE Adjust the selected part When TOP is selected Vertical LINEARITY Adjust top and bottom linearity Vertical AMPLITUDE Adjust top and bottom height Vertical BOW Adjust horizontal center line bow When BOTTOM is selected When LEFT is selected When RIGHT is selected ...

Страница 64: ...s selected LINEAR BALANCE Adjust the selected part When RIGHT is selected When TOP is selected When BOTTOM is selected When LEFT is selected LINE DIST CENTER Correct S shaped horizontal line LINE DIST EDGE Correct S shaped horizontal line When TOP is selected LINE DIST BIQUAD Correct biquadratic distortion Marker up Marker down ...

Страница 65: ... turns at the left and right edges in the diagonal lines are equal CURSOR PHASE Align the vertical center line of the point cursor with the point peak Screen center Horizontal POINT Adjust the point peak horizontally Vertical POINT Adjust the point peak vertically ...

Страница 66: ... the white level The CURSOR button increases the black level The CURSOR button decreases the black level 4 Repeat the above steps for the other CRTs if necessary 5 To end this adjustment press the END button Whenever the END button is pressed the menus will sequence in this order ADJUST menu Source screen If the RETURN USER MODE menu appears use the CURSOR or button to select either YES or NO and ...

Страница 67: ...E Connect the projector and the Switcher with a oscillo scope then adjust the CURSOR buttons to obtain a value of 0 7Vp p of the projector input level or the Switcher output level on the oscilloscope 5 Repeat steps 3 and 4 for other input signals if necessary 6 To end this adjustment press END Whenever the END button is pressed the menus will sequence in this order ADJUST menu Source screen If the...

Страница 68: ...ng the 1 through 0 buttons 1 Each time you press the INPUT button an asterisk appears under the PASSCODE message 2 After you have finished entering the four digit passcode press ENTER NOTE If you have made an error press the NORMAL button to delete the asterisk Then re enter the correct passcode To delete all the entered digits hold down the CTL button then press the NORMAL button 3 If the entered...

Страница 69: ...me you press the INPUT button an asterisk will appear under the NEW PASSCODE message NOTE 0000 and 9999 cannot be used as a passcode 2 Once you have finished entering your four digit passcode press ENTER to store the code NOTE If you have made an error press the NORMAL button to delete the asterisk Then re enter the correct passcode To delete all the entered digits hold down the CTL button then pr...

Страница 70: ... PASSCODE COMPLETE message will be displayed NOTE If the passcode is not correct the WARNING DIFFER ENT PASSCODE message will be displayed You are required to enter the new passcode correctly 6 To complete press the END button When the END button is pressed once the RETURN USER MODE menu will be displayed Use the CURSOR or button to select either YES or NO and then press ENTER This will exit the A...

Страница 71: ... 1 through 0 buttons 1 Each time you press the INPUT button an asterisk will appear under the CURRENT PASSCODE message 2 Once you have finished entering the four digit passcode press ENTER NOTE If you have made an error press the NORMAL button to delete the asterisk Then re enter the correct passcode To delete all the entered digits hold down the CTL button then press the NORMAL button 3 If the en...

Страница 72: ...SCODE message 2 Once you have finished entering the four digit new passcode press ENTER NOTE If you have made an error press the NORMAL button to delete the asterisk Then re enter the correct passcode To delete all the entered digits hold down the CTL button then press the NORMAL button 3 If the entered passcode is correct the CHANGE PASSCODE COMPLETE message is displayed NOTE If the passcode is n...

Страница 73: ...four digit passcode press ENTER NOTE If you have made an error press the NORMAL button to delete the asterisk Then re enter the correct passcode To delete all the entered digits hold down the CTL button then press the NORMAL button 3 If the entered passcode is correct the PASSCODE DIS ABLE menu will be displayed NOTE If the passcode is not correct the WARNING DIFFER ENT PASSCODE message will be di...

Страница 74: ...f the setting features refer to the follow ing pages NOTE The INPUT TERMINAL item on the SETTING MODE menu cannot be changed P01 P03 OPTION SETTING MODE CONNECT CONDITION CEILING FRONT DEFAULT INPUT SELECT FOCUS EDGE MODE ALL S VIDEO MODE SELECT S2 AUTO STANDALONE LAST PJ ORIENTATION VIDEO MODE SELECT P02 P03 OPTION SETTING MODE WARM UP MODE INACTIVE AUTOMATIC DATA STORE PHOSPHOR SAVER OFF SIGNAL ...

Страница 75: ... menu directly by pressing the INPUT 1 button 4 Use the CURSOR or button to select the PJ ORIENTA TION item then press ENTER to display the PJ ORIENTA TION menu NOTE The SETTING MODE has three menus The PJ ORIEN TATION item is on the first menu P01 To access P02 or P03 from P01 press and hold down the CTL button then press the button to return to P01 from P02 or P03 press and hold down the CTL but...

Страница 76: ...ND button is pressed the menus will sequence in this order OPTION menu ADJUST menu Source screen If the RETURN USER MODE menu appears use the CURSOR or button to select either YES or NO and press ENTER This will exit the ADJUST mode Items to select YES When you try to enter the ADJUST mode the next time you will need to re enter your passcode NO When you try to enter the ADJUST mode the next time ...

Страница 77: ...s the button to return to P01 from P02 or P03 press and hold down the CTL button then press the button 5 Use the CURSOR or button to select your desired connec tion condition of Switcher and press ENTER The RE START prompt is displayed after setting of the connection condition is modified from the current status to your desired condition Items to select STAND ALONE The projector used in stand alon...

Страница 78: ...never the END button is pressed the menus will sequence in this order OPTION menu Adjust menu Source screen If the RETURN USER MODE menu appears use the CURSOR or button to select YES or NO and then press ENTER Items to select YES When you try to enter the ADJUST mode the next time you will need to re enter your passcode NO When you try to enter the ADJUST mode the next time you will not need to r...

Страница 79: ... or button to select the DEFAULT INPUT SELECT item then press ENTER to display the DEFAULT INPUT SELECT menu NOTE The SETTING MODE has three menus The DEFAULT INPUT SELECT item is on the first menu P01 To access P02 or P03 from P01 press and hold down the CTL button then press the button to return to P01 from P02 or P03 press and hold down the CTL button then press the button A D J U S T 1 S I G N...

Страница 80: ...ct the desired slot number 1 through 10 0 and then press ENTER When used with two or more Switchers The MASTER and SLAVE slot number menu will be displayed Use the CURSOR or button to select the master slot number first and then select the slave slot number 1 through 10 0 Press ENTER L A S T D E F A U L T DE F AUL T INP UT S E L ECT S L O T 0 1 S L O T 0 2 S L O T 0 3 S L O T 0 4 S L O T 0 5 S L O...

Страница 81: ...SER MODE menu appears use the CURSOR or button to select either YES or NO and press ENTER This will exit the ADJUST mode Items to select YES When you try to enter the ADJUST mode the next time you will need to re enter your passcode NO When you try to enter the ADJUST mode the next time you will not need to re enter your passcode RETURN USER MODE Y E S N O SETTING ...

Страница 82: ...he INPUT 1 button 4 Use the CURSOR or button to select the FOCUS EDGE MODE item on Page 1 then press ENTER to display the FOCUS EDGE MODE menu NOTE The SETTING MODE has three menus The FOCUS EDGE MODE item is on the first menu P01 To access P02 or P03 from P01 press and hold down the CTL button then press the button to return to P01 from PO2 or P03 press and hold down the CTL button then press the...

Страница 83: ...in this order OPTION menu ADJUST menu Source screen If the RETURN USER MODE menu appears use the CURSOR or button to select either YES or NO and press ENTER This will exit the ADJUST mode Items to select YES When you try to enter the ADJUST mode the next time you will need to re enter your passcode NO When you try to enter the ADJUST mode the next time you will not need to re enter your passcode A...

Страница 84: ...splayed in the SOURCE INFORMATION screen To set proceed as follows 1 Press the ADJUST button to display the ADJUST menu The projector may ask you to enter your passcode See page 68 for the explanation of the PASSCODE 2 Use the CURSOR or button to highlight the 8 OPTION line Press ENTER to display the OPTION menu You can also select the OPTION menu directly by pressing the INPUT 8 button 3 Use the ...

Страница 85: ...ect either YES or NO and press ENTER This will exit the ADJUST mode Items to select YES When you try to enter the ADJUST mode the next time you will need to re enter your passcode NO When you try to enter the ADJUST mode the next time you will not need to re enter your passcode NOTE The input signal must be compatible with the S2 S1 MODE standard Refer to the user manual included with the connecte...

Страница 86: ...RSOR or button to highlight the 8 OPTION line Press ENTER to display the OPTION menu You can also select the OPTION menu directly by pressing the INPUT 8 button 3 Use the CURSOR or button to highlight the 1 SETTING MODE line Press ENTER to display the SETTING MODE menu You can also select the SETTING MODE menu directly by pressing the INPUT 1 button 4 Use the CURSOR or button to select the VIDEO M...

Страница 87: ...es to the PAL mode SECAM Switches to the SECAM mode Select MANUAL when connecting to poor quality signal or non standard signals such as video games NOTE The projector may not function correctly with a mono chrome signals in the AUTO mode 6 To complete press the END button Whenever the END button is pressed the menus will sequence in this order OPTION menu ADJUST menu Source screen When your passc...

Страница 88: ...irectly by pressing the INPUT 1 button 4 Use the CURSOR or button to select the AUTO POWER ON MODE item on Page 2 then press ENTER to display the AUTO POWER ON MODE menu NOTE The SETTING MODE has three menus The AUTO POWER ON MODE item is on the second menu P02 To access P02 from P01 press and hold down the CTL button then press the button to return to P01 from P02 press and hold down the CTL butt...

Страница 89: ...tched outlet 6 To complete press the END button Whenever the END button is pressed the menus will sequence in this order OPTION menu ADJUST menu Source screen If the RETURN USER MODE menu appears use the CURSOR or button to select either YES or NO and then press ENTER Items to select YES When you try to enter the ADJUST mode the next time you will need to re enter your passcode NO When you try to ...

Страница 90: ... the INPUT 1 button 4 Use the CURSOR or button to select the WARM UP MODE item on Page 2 then press ENTER to display the WARM UP MODE menu NOTE The SETTING MODE has three menus The WARM UP MODE item is on the second menu P02 To access P02 from P01 press and hold down the CTL button then press the button to return to P01 from P02 press and hold down the CTL button then press the button A D J U S T ...

Страница 91: ... END button 6 To complete press the END button Whenever the END button is pressed the menus will sequence in this order OPTION menu ADJUST menu Source screen If the RETURN USER MODE menu appears use the CURSOR or button to select either YES or NO and then press ENTER Items to select YES When you try to enter the ADJUST mode the next time you will need to re enter your passcode NO When you try to e...

Страница 92: ...lso select the SETTING MODE menu directly by pressing the INPUT 1 button 4 Use the CURSOR or button to select the AUTOMATIC DATA STORE item on Page 2 then press ENTER to display the AUTOMATIC DATA STORE menu NOTE The SETTING MODE has three menus The AUTOMATIC DATA STORE item is on the second menu P02 To access P02 from P01 press and hold down the CTL button then press the button to return to P01 f...

Страница 93: ...projector is turned off Every 10 minutes NOTE After DISABLE is selected in the AUTOMATIC DATA STORE menu the settings will not be stored in the memory unless you select YES in the STORE menu 6 If the RETURN USER MODE menu appears use the CURSOR or button to select either YES or NO and press ENTER This will exit the ADJUST mode Items to select YES When you try to enter the ADJUST mode the next time...

Страница 94: ...e SETTING MODE menu directly by pressing the INPUT 1 button 4 Use the CURSOR or button to select the PHOSPHOR SAVER item on Page 2 then press ENTER to display the PHOSPHOR SAVER menu NOTE The SETTING MODE has three menus The PHOSPHOR SAVER item is on the second menu P02 To access P02 from P01 press and hold down the CTL button then press the button to return to P01 from P02 press and hold down the...

Страница 95: ...reen If the RETURN USER MODE menu appears use the CURSOR or button to select either YES or NO and then press ENTER Items to select YES When you try to enter the ADJUST mode the next time you will need to re enter your passcode NO When you try to enter the ADJUST mode the next time you will not need to re enter your passcode 6 Use the CURSOR or button to select your desired interval time from the I...

Страница 96: ... 1 button 4 Use the CURSOR or button to select the SIGNAL SWITCHING item on Page 2 then press ENTER to display the SIGNAL SWITCHING menu NOTE The SETTING MODE has three menus The SIGNAL SWITCHING menu is on the second menu P02 To access P02 from P01 press and hold down the CTL button then press the button to return to P01 from P02 press and hold down the CTL button then press the button A D J U S ...

Страница 97: ...omplete this press END Whenever the END button is pressed the menus will sequence in this order OPTION menu ADJUST menu Source screen If the RETURN USER MODE menu appears use the CURSOR or button to select either YES or NO and then press ENTER Items to select YES When you try to enter the ADJUST mode the next time you will need to re enter your passcode NO When you try to enter the ADJUST mode the...

Страница 98: ...E menu You can also select the SETTING MODE menu directly by pressing the INPUT 1 button 4 Use the CURSOR or button to select the DIRECT ENTRY ACCESS item on Page 3 then press ENTER to display the DIRECT ENTRY ACCESS menu NOTE The SETTING MODE has three menus The DIRECT ENTRY ACCESS item is on the third menu P03 To access P03 from P01 press and hold down the CTL button then press the button twice ...

Страница 99: ...mplete this press END Whenever the END button is pressed the menus will sequence in this order OPTION menu ADJUST menu Source screen If the RETURN USER MODE menu appears use the CURSOR or button to select either YES or NO and press ENTER This will exit the ADJUST mode Items to select YES When you try to enter the ADJUST mode the next time you will need to re enter your passcode NO When you try to ...

Страница 100: ... press the button twice to return to P01 from P03 press and hold down the CTL button then press the button twice 5 Use the CURSOR or button to select either OFF or ON and press ENTER Items to select OFF Defocuses the blue CRT ON Does not defocus the blue CRT 6 To end this mode press the END button Whenever the END button is pressed the menu will sequence in this order OPTION menu ADJUST menu Sourc...

Страница 101: ...P03 To access P03 from P01 press and hold down the CTL button then press the button twice to return to P01 from P03 press and hold down the CTL button then press the button twice 5 Use the CURSOR or button to select the baud rate from 4800 to 38400 bps and press ENTER 6 To end this mode press the END button Whenever the END button is pressed the menu will sequence in this order OPTION menu ADJUST ...

Страница 102: ...ut board In regardless of this setting pressing INPUT 10 button searches a COMPONENT signal This feature allows you to set the searching method of RGB COMPONENT signal To set this feature proceed as follows 1 Press the ADJUST button to display the ADJUST menu The projector may ask you to enter your passcode See page 68 for the explanation of PASSCODE 2 Use the CURSOR or button to highlight the 8 O...

Страница 103: ... 0 M A S T E R SIGNAL FORMAT RGB COMPONENT S L O T 0 1 S L O T 0 2 S L O T 0 3 S L O T 0 4 S L O T 0 5 S L O T 0 6 S L O T 0 7 S L O T 0 8 S L O T 0 9 S L O T 1 0 R R R R R R R R R R M A S T E R RETURN USER MODE Y E S N O When MANUAL is selected searching will be set for each slot Use the CURSOR or button to select the input slot number of the Switcher and press ENTER The SIGNAL FORMAT menu will b...

Страница 104: ...o highlight the 8 OPTION line Press ENTER to display the OPTION menu You can also select the OPTION menu directly by pressing the INPUT 8 button 3 Use the CURSOR or button to highlight the 2 MENU MODE line Press ENTER to display the MENU MODE menu You can also select the MENU MODE menu directly by pressing the INPUT 2 button 4 Use the CURSOR or button to highlight the MESSAGE MODE item Press ENTER...

Страница 105: ...ever the DISPLAY button is pressed If no button operation is made for 20 minutes or more the on screen message will automatically turn off 6 To end this mode press the END button When the END button is pressed the menus will sequence in this order OPTION menu ADJUST menu Source screen If the RETURN USER MODE menu appears use the CURSOR or button to select either YES or NO and press ENTER This will...

Страница 106: ...MODE line Press ENTER to display the MENU MODE menu You can also select the MENU MODE menu directly by pressing the INPUT 2 button 4 Use the CURSOR or button to highlight the MESSAGE COLOR item Press ENTER to display the MESSAGE COLOR menu A D J U S T 1 S I G N A L E N T R Y 2 F O C U S 3 A L I G N M E N T 4 C O N V E R G E N C E 5 K E L V I N 6 R G B G A I N 7 P A S S C O D E 8 O P T I O N 9 R E ...

Страница 107: ...mode press the END button Whenever the END button is pressed the menus will sequence in this order OPTION menu ADJUST menu Source screen If the RETURN USER MODE menu appears use the CURSOR or button to select either YES or NO and press ENTER This will exit the ADJUST mode Items to select YES When you try to enter the ADJUST mode the next time you will need to re enter your passcode NO When you try...

Страница 108: ...sing the INPUT 2 button 4 Use the CURSOR or button to highlight the DATE TIME DISPLAY item Press ENTER to display the DATE TIME DISPLAY menu 5 Use the CURSOR or button to select any one of the three items DATE DAY and TIME Then press ENTER A D J U S T 1 S I G N A L E N T R Y 2 F O C U S 3 A L I G N M E N T 4 C O N V E R G E N C E 5 K E L V I N 6 R G B G A I N 7 P A S S C O D E 8 O P T I O N 9 R E ...

Страница 109: ... AM PM Is the time in hours minutes seconds am pm format HH MM SS 24 HOUR Is the time in hours minutes seconds 24 hour format OFF Does not display the time NOTE You can select the time input format for timer date preset with this feature When OFF is selected use the AM PM format 6 To end this mode press END Whenever the END button is pressed the menus will sequence in this order OPTION menu ADJUST...

Страница 110: ...an also select the MENU MODE menu directly by pressing the INPUT 2 button 4 Use the CURSOR or button to highlight the DATE TIME PRESET item Press ENTER to display the DATE TIME PRESET menu A D J U S T 1 S I G N A L E N T R Y 2 F O C U S 3 A L I G N M E N T 4 C O N V E R G E N C E 5 K E L V I N 6 R G B G A I N 7 P A S S C O D E 8 O P T I O N 9 R E F A D J U S T O P T I O N 1 S E T T I N G M O D E 2...

Страница 111: ...SOR or button to select either YES or NO and press ENTER This will exit the ADJUST mode Items to select YES When you try to enter the ADJUST mode the next time you will need to re enter your passcode NO When you try to enter the ADJUST mode the next time you will not need to re enter your passcode NOTE The projector has a built in clock The clock will keep working for about three days after the ma...

Страница 112: ...address ON Displays PJ address 6 To end this mode press END Whenever the END button is pressed the menu will sequence in this order OPTION menu ADJUST menu Source screen If the RETURN USER MODE menu appears use the CURSOR or button to select either YES or NO and then press ENTER This will exit the ADJUST mode Items to select YES When you try to enter the ADJUST mode again you will need to re enter...

Страница 113: ...IGNAL message OFF Does not display the NEW SIGNAL message 6 To end this mode press END Whenever the END button is pressed the menu will sequence in this order OPTION menu ADJUST menu Source screen If the RETURN USER MODE menu appears use the CURSOR or button to select either YES or NO and then press ENTER This will exit the ADJUST mode Items to select YES When you try to enter the ADJUST mode agai...

Страница 114: ...he EDIT and press ENTER This will bring you to the EDIT mode and a program line is highlighted Items to select START Executes the program EDIT Corrects or creates the program data A D J U S T 1 S I G N A L E N T R Y 2 F O C U S 3 A L I G N M E N T 4 C O N V E R G E N C E 5 K E L V I N 6 R G B G A I N 7 P A S S C O D E 8 O P T I O N 9 R E F A D J U S T O P T I O N S E Q U E N C E R P 0 1 N O 0 1 0 ...

Страница 115: ...e desired time P OFF Programs to turn off the power at the desired time INSERT Inserts the selected line and moves down the following lines DELETE Deletes the selected line and moves up the following lines m Selecting INPUT When using in stand alone application 1 Use the CURSOR or button to select INPUT and press ENTER The INPUT TERMINAL SELECT terminal menu is displayed 2 Use the CURSOR or button...

Страница 116: ...ds If you have made an error in the input of numbers press the END button to return to the MASTER menu then start from step 2 The WEEK SELECT screen will appear 4 Use the CURSOR or button to select any day of the week then select either YES or NO with ENTER When DAILY selected the entire week is changed to YES When END is selected the current setting is saved To return to Step 3 press the END butt...

Страница 117: ... week then select either YES or NO with ENTER When DAILY selected the entire week is changed to YES When END is selected the current setting is saved To return to Step 4 press the END button In that case the changed setting is invalid NOTE Typing 99 99 99 in the time input menu will execute the program immediately See the example in the following WAIT section I N P U T W A I T G O T O L O O P P O ...

Страница 118: ...lect VIDEO then type 99 99 99 in the TIME input screen then select DAILY in the WEEK SELECT menu for INPUT Second line Select type 00 20 00 in the TIME input screen for WAIT Third line Type 99 99 99 then select DAILY for P OFF When this program starts the input signal will change to VIDEO immediately Then the current condition will be retained for 20 minutes Finally the power will be turned off Th...

Страница 119: ... 1 Use the CURSOR or button to select LOOP and press ENTER The LOOP COUNT input screen will be displayed 2 Enter the number of the destination line LOOP and the number of the loop times COUNT in this order using the INPUT button and press ENTER If you have made an error press END to return to the Program menu then start again The SEQUENCER screen will be restored to its last setting I N P U T W A ...

Страница 120: ...ed if set in the first line In this case the program will start its execution from the second line m Selecting P OFF 1 Use the CURSOR or button to select P OFF and press ENTER The POWER OFF input screen will be displayed 2 Enter the POWER OFF TIME you wish to turn on the projector using INPUT buttons and press ENTER Type the time in hours 24 hours minutes and seconds If you made an error press END...

Страница 121: ...T I O N S E Q U E N C E R P 0 1 N O 0 1 0 2 0 3 0 4 0 5 0 6 0 7 0 8 0 9 1 0 I N P U T M 1 0 M 0 2 M 0 1 W A I T M 0 1 W A I T L O O P M 0 2 P O F F P O N S 0 1 S 0 2 S 0 2 S 0 1 0 3 C O U N T 0 5 S 0 2 T I M E 1 2 0 0 0 0 1 4 0 0 0 0 0 0 1 0 0 0 0 0 2 0 0 0 1 5 5 0 0 0 1 8 0 0 0 0 0 9 0 0 0 0 S T A R T E D I T S M T W T F S X O O O O O X X O O O O O X X O O O O O X X O O O O O X X O O O O O X X O ...

Страница 122: ...ODE menu appears use the CURSOR or button to select either YES or NO and then press ENTER This will exit the ADJUST mode Items to select YES When you try to enter the ADJUST mode the next time you will need to re enter your passcode NO When you try to enter the ADJUST mode the next time you will not need to re enter your passcode RETURN USER MODE Y E S N O O P T I O N S E Q U E N C E R P 0 1 N O 0...

Страница 123: ...NTER to display the ADDRESS screen You can also select the ADDRESS menu directly by pressing the INPUT 4 button or the ADDRESS button on the full function remote control 4 Enter the address number using the INPUT button and press ENTER If you have made a mistake press END to return to the OP TION menu then start again NOTE Enter the address number 01 when only one projector is used A D J U S T 1 S...

Страница 124: ...RETURN USER MODE menu appears use the CURSOR or button to select either YES or NO and press ENTER This will exit the ADJUST mode Items to select YES When you try to enter the ADJUST mode the next time you will need to re enter your passcode NO When you try to enter the ADJUST mode the next time you will not need to re enter your passcode RETURN USER MODE Y E S N O ...

Страница 125: ...and press ENTER The new remote control address is displayed on the screen When the new remote control address is configured at 00 the display will not be changed However its address has been changed by pressing ENTER The number you can specify ranges from 00 to 64 To stop the address changing press END See the projector address number on the screen NOTE The buttons other than the above mentioned b...

Страница 126: ...L 4 To exit this menu press END Whenever the END button is pressed the menus will sequence in this order OPTION menu ADJUST menu Source screen If the RETURN USER MODE menu appears use the CURSOR or button to select either YES or NO and press ENTER This will exit the ADJUST mode Items to select YES When you try to enter the ADJUST mode the next time you will need to re enter your passcode NO When y...

Страница 127: ...time of CRT USER PJ RUNNING TIME The amount of operating time of the projector User resetable How to reset the user projector or CRT running time 1 Use the CURSOR buttons to select the item and then press ENTER The USER PJ RUNNING TIME RESET or USER CRT RUNNING TIME RESET menu is displayed 2 Use the CURSOR or button to select either YES or NO and then press ENTER Items to select YES The time will ...

Страница 128: ... This will exit the ADJUST mode Items to select YES When you try to enter the ADJUST mode the next time you will need to re enter your passcode NO When you try to enter the ADJUST mode the next time you will not need to re enter your passcode 4 To exit the HOUR METER display press END Whenever the END button is pressed the menus will sequence in this order ADJUST menu Source screen If the RETURN U...

Страница 129: ...ctory Press and hold the CTL button then press to display the REF ADJUST menu The REF ADJUST menu can also be displayed by selecting the 9 REF ADJUST item in the ADJUST menu REF ADJUST 1 ASTIG 2 BRIGHT UNIFORM 3 WHITE UNIFORM 4 RASTER CENTERING 5 FOCUS BAL 6 REF WHITE BAL For service personnel only cannot be selected ASTIG menu Adjustment screen Adjustment screen NOTE Items 5 and 6 cannot be selec...

Страница 130: ...ER Adjusts the four corners on the creen 3 Use the CURSOR or button to select the CENTER EDGE or CORNER item Press the ENTER button to display the ASTIG adjustment screen The DOT COARSE test pattern is automatically displayed Pressing The CTL and FOCUS buttons rotates three items as follows CENTER EDGE CORNER 4 Select the CRT you wish to adjust with R G or B button 5 Press the R G or B button to p...

Страница 131: ...n diagonally 8 To end this mode press the END button Whenever the END button is pressed the menus will sequence in this order REF ADJUST menu Source screen If the RETURN USER MODE menu appears use the CURSOR or button to select either YES or NO and then press ENTER This will exit the REF ADJUST mode Items to select YES When you try to enter the ADJUST mode the next time you will need to re enter y...

Страница 132: ... button to increase or decrease the brightness on the right and the left side Press CURSOR or button to increase or decrease the brightness on the top and the bottom side 4 To end this mode press the END button Whenever the END button is pressed the menus will sequence in this order REF ADJUST menu Source screen If the RETURN USER MODE menu appears use the CURSOR or button to select either YES or ...

Страница 133: ...RSOR or button to increase the amount of blue on the right side and the amount of red on the left side Press CURSOR or button to increase the amount of red on the right side and the amount of blue on the left side 4 To end this mode press the END button Whenever the END button is pressed the menus will sequence in this order REF ADJUST menu Source screen If the RETURN USER MODE menu appears use th...

Страница 134: ...OR or moves the raster up Pressing CURSOR or moves the raster down 4 To end this mode press the END button Whenever the END button is pressed the menus will sequence in this order REF ADJUST menu Source screen If the RETURN USER MODE menu appears use the CURSOR or button to select either YES or NO and then press ENTER This will exit the REF ADJUST mode Items to select YES When you try to enter the...

Страница 135: ...135 Appendix CONTENTS Timing Charts Pre set Signals 136 Input Signal Referecne Chart 137 Input Signal Timing 138 Message List 139 ...

Страница 136: ... following signals have been set by factory P 0 1 1 0 1 I N P U T S E L E C T S T A N D A L O N E N O 0 1 0 2 0 3 0 4 0 5 0 6 0 7 0 8 0 9 1 0 S O U R C E V I D E O V I D E O V I D E O V I D E O R G B N A M E N T S C 3 5 8 N T S C 4 4 3 P A L S E C A M V E S A 1 0 2 4 I N P U T A A A A A ...

Страница 137: ...B VIDEO C D E A B VIDEO C D E A B C D E A B VIDEO C D E A B VIDEO HORIZONTAL VERTICAL HORIZONTAL VERTICAL HORIZONTAL VERTICAL Separate Sync Composite Sync Composite Sync Video Sync on Green Sync Polarity Positive Negative Sync Polarity Positive Negative Sync Polarity Negative ...

Страница 138: ...3 26 1 13 19 26 29 15 14 21 16 13 71 26 1 15 79 11 56 12 68 16 00 12 510 15 754 15 880 E 0 3 0 99 0 3 0 16 1 13 0 12 2 12 0 09 0 3 0 06 0 46 0 044 1 12 0 722 0 369 0 062 Polarity 1 1 1 1 1 1 IBM VGA 350 IBM VGA 400 IDTV Macintosh II IBM VGA 480 Macintosh Quadra VESA 8002600 72 Hz VESA 10242768 60 Hz IBM CGA EGA and VGA are registered trademarks of International Business Machines Corporation Apple ...

Страница 139: ...n the portion of the gauge that displays the percentage H V 6 5 6 5 H V RANGE OVER 6 5 Conditions This message might be displayed at the time of the CONVERGENCE FOCUS EDGE SEPARATE and WHITE BAL adjustments Should this display appear further increases or decreases in the amount of correction will not reflect a change of the data on the screen Countermeasures Please review the amount of correction ...

Страница 140: ...unication error Signal is being deleting from INPUT LIST ENTRY COPY completed There is no space for signals No 51 and later in Input List when NEW is selected from STORE menu ENTRY MOVE completed Signal selection from INPUT LIST while in the external control mode Depress the R G B button or execute PICTURE FUNCTION adjustment items during the PICTURE MUTE setting in the external control mode Execu...

Страница 141: ...UT LIST An error occurred while the SE QUENCER user program was running and the program was forced to stop POWER OFF or an INPUT command was not set in the SEQUENCER user program AUTO SEQUENCER finished There was a manual completion when the AUTO SEQUENCER was running The gain data is being stored The projector will turn off in three minutes when ON OFF or SLEEP TIMER is set to ON The selected tub...

Страница 142: ...NEC Corporation Printed in Japan 78409591 ...

Отзывы: