


Upgrading your Server 7-45
Installation
Use the following procedure to install a DIMM.
1.
See the section
Preparing for Upgrade
described earlier to prepare.
2.
Remove the left-hand side access panel as described earlier in this chapter.
3.
Remove the top air duct.
4.
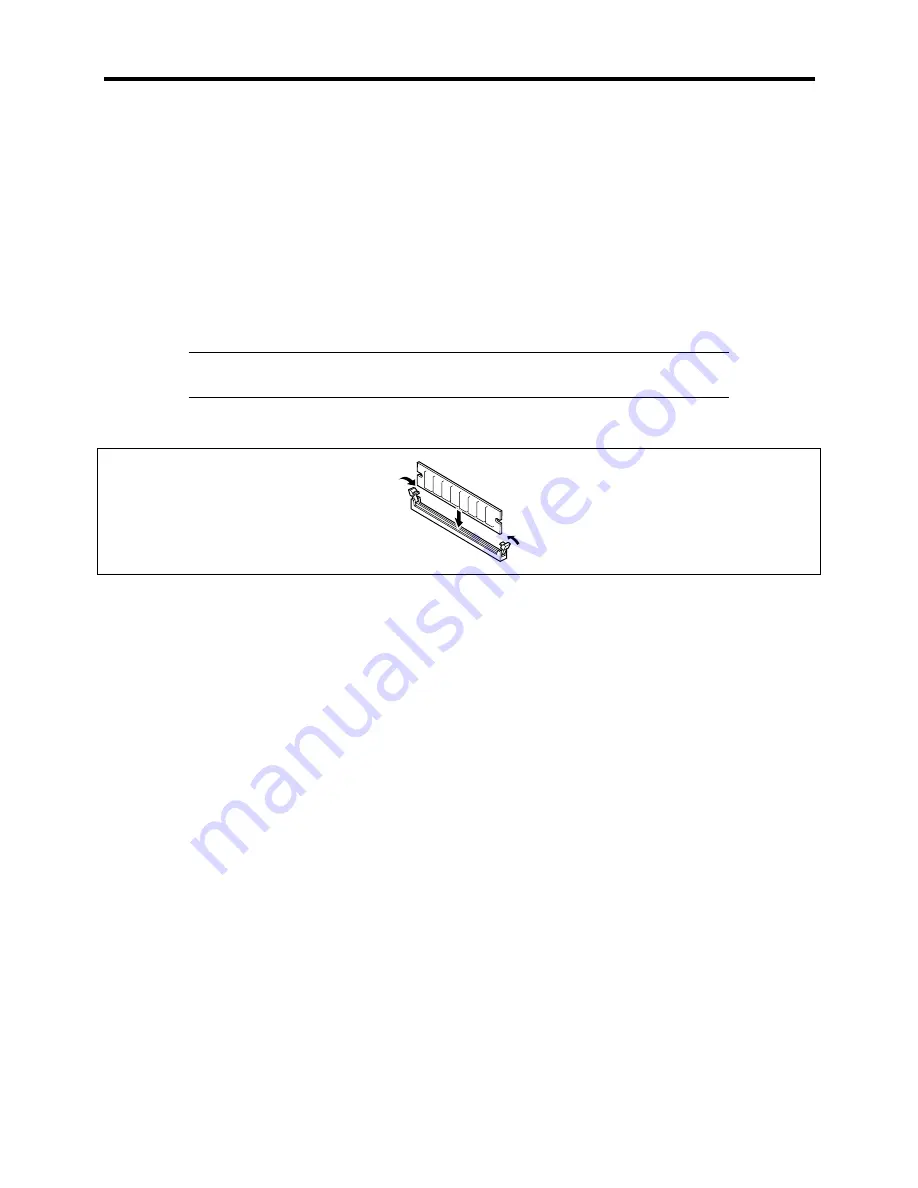
Open the levers at both ends of the socket.
5.
Push the DIMM straight into the socket.
NOTE:
Make sure of the orientation of the DIMM.
Each DIMM has a slit on the terminal side for preventing wrong insertion.
The levers automatically close when the DIMM is inserted into the socket.
6.
Install the components removed in steps 2 and 3.
7.
Power on the server and verify that POST displays no error messages.
If POST displays an error message, take note of the message and see the POST error
messages listed in Chapter 6.
8.
Start the SETUP and select [Advanced]
→
[Memory Configuration] to verify that the
installed DIMM shows the status "Normal". (See Chapter 3 or details.)
9.
Select "Yes" for [Reset Configuration Data] on the [Advanced] menu.
This setting is required to change the hardware configuration data. See Chapter 3 for
details.
10.
If your operating system is Windows 2000, set the paging file size to the recommended
value or a greater value as shown below. See Chapter 4 for details.
!
For Windows 2000:
Total memory size × 1.5
Содержание EXPRESS5800/120MF
Страница 1: ... EXPRESS5800 120Mf U s e r s G u i d e ...
Страница 2: ......
Страница 4: ......
Страница 12: ...x ...
Страница 24: ...1 6 System Overview Rear View 11 9 10 12 13 14 15 16 2 17 15 18 17 16 1 8 7 6 1 2 3 4 5 2 5 1 ...
Страница 58: ...1 40 System Overview This page is intentionally left blank ...
Страница 59: ...Chapter 2 Setting Up Your Server This chapter describes how to set up your server ...
Страница 202: ...4 62 Installing the Operating System and Utilities This page is intentionally left blank ...
Страница 214: ...5 12 Maintenance This page is intentionally left blank ...
Страница 229: ...Troubleshooting 6 15 Memory modules DIMM Group 3 DIMM Group 2 DIMM Group 1 ...
Страница 282: ...7 28 Upgrading your Server Removal Follow the installation instructions in reverse order to remove the backup device ...
Страница 304: ...7 50 Upgrading your Server This page is intentionally left blank ...
Страница 305: ...Chapter 8 Internal Cabling Diagrams Internal cable connections of the server are shown below ...
Страница 318: ...B 4 IRQ and I O Port Address This page is intentionally left blank ...
Страница 326: ...C 8 Installing Windows 2000 This page is intentionally left blank ...
Страница 340: ...10 Glossary This page is intentionally left blank ...
Страница 345: ...xx ...
Страница 346: ... ...


