iv
Returning Defective Hardware for Service
Use the following procedure to report/return defective hardware.
Call the
NCR Customer Care Center
at 1-800-262-7782 and have the following information
available when you place the call.
•
Class/Model number of the defective equipment
•
Serial Number of the defective equipment
•
Equipment location in the store
•
Description of the problem, including any system error codes, error condition, or
guidance to the area of failure.
The NCR Agent will provide you with a work order number, which serves as your
Return Material Authorization (RMA). Please provide the RMA on the outside of the
shipping box.
Note:
A work order must be opened for each device that is shipped for repair.
Содержание XR3 (7613)
Страница 1: ...User Guide NCR RealPOS XR3 7613 Release 1 0 BCC5 0000 5154 Issue B...
Страница 13: ...xi...
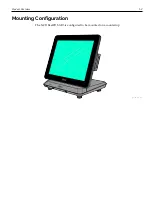
Страница 16: ...Product Overview 1 3 Mounting Configuration The NCR RealPOS XR3 is configured to be mounted on a countertop...
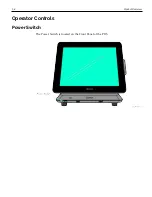
Страница 17: ...1 4 Product Overview Operator Controls Power Switch The Power Switch is located on the Front Panel of the POS...
Страница 20: ...Product Overview 1 7 Label Locations...
Страница 59: ...Disk Image Backup and Recovery Tool 4 46 2 Enter the Password The factory default password is Recovery1234...
Страница 62: ...4 49 Disk Image Backup and Recovery Tool 2 Click on the USB Button...
Страница 69: ...Disk Image Backup and Recovery Tool 4 56 A progress bar is displayed as the image is applied...
Страница 70: ...4 57 Disk Image Backup and Recovery Tool A message is displayed when the load is complete...
Страница 71: ...Disk Image Backup and Recovery Tool 4 58 5 Reboot the POS...
Страница 82: ...5 69 Power Management 2 Select Network Adapters Realtek PCIe GBE Family Controller 2...
Страница 98: ...7 85 BIOS Updating Procedure 5 Select Make Bootable...
Страница 124: ...2x20 Customer Display Interface 9 111 245 246 247 248 249 250 251 252 253 254 255...
Страница 132: ...2x20 Customer Display Interface 9 119 245 246 247 248 249 250 251 252 253 254 255...
Страница 140: ...2x20 Customer Display Interface 9 127 245 246 247 248 249 250 251 252 253 254 255...
Страница 144: ...10 131 Wireless Adapter Switching 6 Select Create a new package OK...
Страница 146: ...10 133 Wireless Adapter Switching 12 Click Yes 13 Enter a filename and choose a location to save the package file...
Страница 151: ...B 138 Touch Screen Calibration Do NOT touch the bezel with your other fingers...

