


ii
Warning:
DO NOT connect or disconnect any serial peripherals while the terminal
is connected to AC power. This can result in system or printer damage.
Grounding Instructions
In the event of a malfunction or breakdown, grounding provides a path of least
resistance for electric current to reduce the risk of electric shock. This product is
equipped with an electric cord having an equipment-grounding conductor and a
grounding plug. The plug must be plugged into a matching outlet that is properly
installed and grounded in accordance with all local codes and ordinances. Do not
modify the plug provided – if it will not fit the outlet, have the proper outlet installed by
a qualified electrician. Improper connection of the equipment-grounding conductor can
result in a risk of electric shock.
The conductor with insulation having an outer surface that is green with or without
yellow stripes is the equipment-grounding conductor.
If repair or replacement of the electric cord or plug is necessary, do not connect the
equipment-grounding conductor to a live terminal. Check with a qualified electrician or
service personnel if the grounding instructions are not completely understood, or if you
are in doubt as to whether the product is properly grounded.
Use only 3-wire extension cords that have 3-prong grounding plugs and 3-pole
receptacles that accept the product’s plug.
Repair or replace damaged or worn cords
immediately.
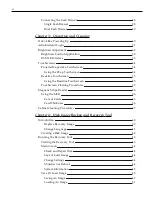
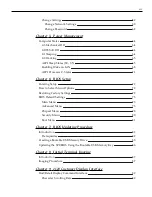
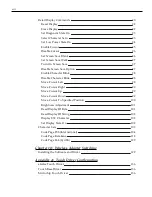
Содержание XR3 (7613)
Страница 1: ...User Guide NCR RealPOS XR3 7613 Release 1 0 BCC5 0000 5154 Issue B...
Страница 13: ...xi...
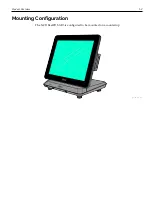
Страница 16: ...Product Overview 1 3 Mounting Configuration The NCR RealPOS XR3 is configured to be mounted on a countertop...
Страница 17: ...1 4 Product Overview Operator Controls Power Switch The Power Switch is located on the Front Panel of the POS...
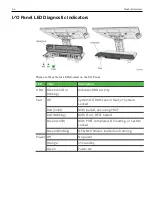
Страница 20: ...Product Overview 1 7 Label Locations...
Страница 59: ...Disk Image Backup and Recovery Tool 4 46 2 Enter the Password The factory default password is Recovery1234...
Страница 62: ...4 49 Disk Image Backup and Recovery Tool 2 Click on the USB Button...
Страница 69: ...Disk Image Backup and Recovery Tool 4 56 A progress bar is displayed as the image is applied...
Страница 70: ...4 57 Disk Image Backup and Recovery Tool A message is displayed when the load is complete...
Страница 71: ...Disk Image Backup and Recovery Tool 4 58 5 Reboot the POS...
Страница 82: ...5 69 Power Management 2 Select Network Adapters Realtek PCIe GBE Family Controller 2...
Страница 98: ...7 85 BIOS Updating Procedure 5 Select Make Bootable...
Страница 124: ...2x20 Customer Display Interface 9 111 245 246 247 248 249 250 251 252 253 254 255...
Страница 132: ...2x20 Customer Display Interface 9 119 245 246 247 248 249 250 251 252 253 254 255...
Страница 140: ...2x20 Customer Display Interface 9 127 245 246 247 248 249 250 251 252 253 254 255...
Страница 144: ...10 131 Wireless Adapter Switching 6 Select Create a new package OK...
Страница 146: ...10 133 Wireless Adapter Switching 12 Click Yes 13 Enter a filename and choose a location to save the package file...
Страница 151: ...B 138 Touch Screen Calibration Do NOT touch the bezel with your other fingers...


