background image

xi

Содержание XR3 (7613)

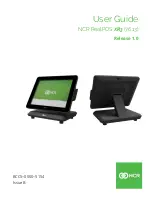
Страница 1: ...User Guide NCR RealPOS XR3 7613 Release 1 0 BCC5 0000 5154 Issue B...

Страница 2: ...he terms and conditions of an agreement you have with NCR NCR s copyright notice must be included It is the policy of NCR Corporation NCR to improve products as new technology components software and...

Страница 3: ...th the same or equivalent type as recommended by the manufacturer Discard used batteries according to the manufacturer s instructions Attention Il y a danger d explosion s il y a remplacement incorrec...

Страница 4: ...ll not fit the outlet have the proper outlet installed by a qualified electrician Improper connection of the equipment grounding conductor can result in a risk of electric shock The conductor with ins...

Страница 5: ...If you do not have access to a computer you may leave a voice message at 1 800 528 8658 USA or International 1 770 623 7400 When leaving a message please provide a phone number and or an email address...

Страница 6: ...he defective equipment Serial Number of the defective equipment Equipment location in the store Description of the problem including any system error codes error condition or guidance to the area of f...

Страница 7: ...3 2x20 Customer Display 7613 F450 7613 K450 13 10 in Integrated Non Touch LCD 7613 F452 13 Cable Management Bar 7613 F500 14 Wireless Card and Antenna 7613 F153 15 Wireless Adapter Switching 15 Magnet...

Страница 8: ...the Resistive Touchscreen 35 Touchscreen Cleaning Procedures 35 Magnetic Stripe Reader 36 Using the MSR 36 Care of Cards 36 Card Thickness 36 Cabinet Cleaning Procedures 37 Chapter 4 Disk Image Backup...

Страница 9: ...o Select Menu Options 72 Restoring Factory Settings 72 BIOS Default Settings 73 Main Menu 73 Advanced Menu 73 Chipset Menu 78 Security Menu 80 Boot Menu 81 Chapter 7 BIOS Updating Procedure Introducti...

Страница 10: ...Move Cursor Left 98 Move Cursor Right 99 Move Cursor Up 99 Move Cursor Down 99 Move Cursor To Specified Position 100 Brightness Adjustment 101 Read Display ID Byte 101 Read Display ID String 102 Displ...

Страница 11: ...ix Appendix B Touchscreen Calibration Proper Touchscreen Methods 137 Calibrating the Touchscreen 139 Resistive Touchscreen Calibration 139...

Страница 12: ...x Revision Record Issue Date Remarks A Feb 2017 First Issue B Jan 2018 Added Troubleshooting Terminal Unresponsive After Connecting AC Power...

Страница 13: ...xi...

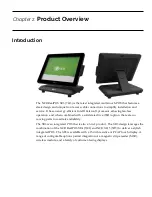
Страница 14: ...and when combined with a solid state drive SSD option there are no moving parts to maximize reliability The XR3 is an integrated POS that is also a 3 in 1 product The XR3 design leverages the combinat...

Страница 15: ...Product ID Description 7613 1215 8801 RealPOS XR3 15 PCAP Display w Intel Celeron Dual Core 7613 1225 8801 RealPOS XR3 15 Resistive Display w Intel Celeron Dual Core Note Storage devices memory power...

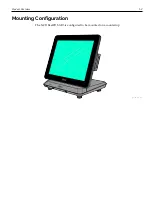
Страница 16: ...Product Overview 1 3 Mounting Configuration The NCR RealPOS XR3 is configured to be mounted on a countertop...

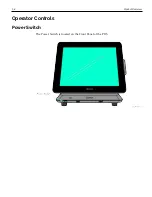
Страница 17: ...1 4 Product Overview Operator Controls Power Switch The Power Switch is located on the Front Panel of the POS...

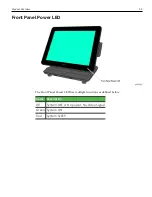
Страница 18: ...roduct Overview 1 5 Front Panel Power LED The Front Panel Power LED has multiple functions as defined below Color Description Off System OFF or No power No Video Signal Green System ON Red System SLEE...

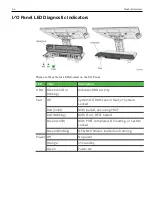
Страница 19: ...Green Solid or Blinking Indicates HDD activity Stat Off System Off BIOS cannot load or System Locked Red Solid BIOS loaded executing POST Red Blinking BIOS Error POST halted Green Solid BIOS POST com...

Страница 20: ...Product Overview 1 7 Label Locations...

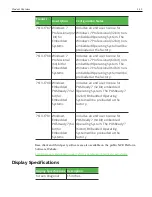
Страница 21: ...12V 1 Powered USB 24V printer 2 USB 3 0 ports Note For security purposes individual USB ports can be disabled in the BIOS by Chipset South Bridge USB Configuration USB Ports Per Port Disable Control E...

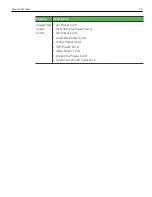
Страница 22: ...1 9 Feature Description Supported Power Cords US Power Cord International Power Cord UK Power Cord Australia Power Cord China Power Cord SEV Power Cord India Power Cord Argentina Power Cord Power Cord...

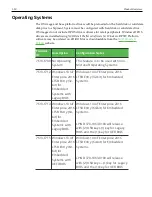
Страница 23: ...ure is to be used with non Microsoft Operating Systems 7613 F712 Windows 10 IoT Enterprise 2016 LTSB Entry 32 bit for Embedded Systems with Legacy BIOS Windows 10 IoT Enterprise 2016 LTSB Entry 32 bit...

Страница 24: ...l be preloaded at the factory 7613 F790 Windows Embedded POSReady 7 32 bit for Embedded Systems Includes an end user license for POSReady 7 32 bit embedded Operating System The POSReady 7 32 bit Embed...

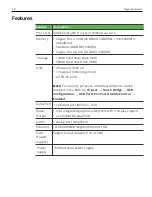
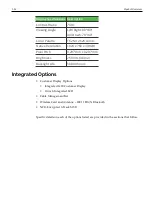
Страница 25: ...68 x 3 RGB Pixel Pitch 0 297 mm x 0 297 mm Brightness 250 nits cd m2 Backlight Life 50 000 hours Integrated Options Customer Display Options Integrated 2x20 Customer Display 10 inch Integrated LCD Cab...

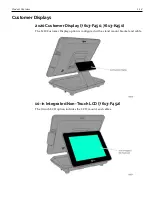
Страница 26: ...isplays 2x20 Customer Display 7613 F450 7613 K450 The 2x20 Customer Display option is configured with a stand mount bracket and cable 10 in Integrated Non Touch LCD 7613 F452 The 10 inch LCD option in...

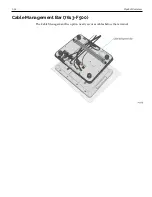
Страница 27: ...1 14 Product Overview Cable Management Bar 7613 F500 The Cable Management Bar option neatly secures cables below the terminal...

Страница 28: ...delivers up to 300 Mbps speed with dual stream 2x2 Bluetooth 4 0 Low Energy is also supported in this module The wireless option is located at the base of the unit Wireless Adapter Switching Wireless...

Страница 29: ...upported OPOS Serial NCR API or Keyboard Wedge Note If you need assistance with Keyboard Wedge configuration please send an email request from the following location http www5 ncr com support support_...

Страница 30: ...stem to uniquely identify a card issuing institution in an international interchange or closed environment 7813 is specific to financial cards credit and debit Track 1 data is 7 bit encoded alphanumer...

Страница 31: ...orrect part on the next service visit or at a convenient time before the component fails Predictive End of Life is a proactive service strategy designed to move service activity from a reactive break...

Страница 32: ...rd as a power disconnect device Do not permit any object to rest on the power cord Do not locate the NCR RealPOS XR3 where the power cord can be walked on Use a grounding strap or touch a grounded met...

Страница 33: ...nsidering the terminal workplace Avoid direct glaring and reflective glaring light Locate the terminal in a controlled luminance surrounding When installed next to windows orient the terminal so it do...

Страница 34: ...es The NCR RealPOS XR3 terminal comes fully assembled and ready to use All that is required to install the terminal is connect the Peripheral Cables LAN Cable Power Adapter Cable and AC Power Cord Bef...

Страница 35: ...2 22 Hardware Installation 3 Lay the terminal face down on a flat surface Caution Always use a soft material cloth foam to protect the display screen when placing the terminal face down...

Страница 36: ...Hardware Installation 2 23 4 Open the IO Panel Cover Press on the ribs on both sides and then pivot the cover to open...

Страница 37: ...e labeled in the illustration below a Route the cable from the back of the terminal towards the IO Panel Note If a Cable Management Bar is present route the cable under the Bar before connecting the c...

Страница 38: ...other power bricks may cause damage to the unit 8 Close the IO Panel Cover and then carefully place the terminal upright on its feet Note Make sure that all cables are correctly routed and are not pin...

Страница 39: ...rror could occur The terminal may appear dead or unable to power on Follow the previous steps to plug in the terminal wait 60 seconds and re attempt powering on the terminal Caution Do not connect or...

Страница 40: ...ecting the Transaction Printer 1 Connect the Powered USB Printer Interface Cable to the USB Connector and Power Connector on the printer 2 Connect the other end of the Printer Cable to the 24 V Powere...

Страница 41: ...llation Connecting the Cash Drawer The NCR RealPOS XR3 supports both single and dual Cash Drawer connections The Cash Drawer can be connected to the Cash Drawer connector or to the transaction printer...

Страница 42: ...rawer Cable Connect this cable to the terminal or transaction printer cash drawer connector There are two versions of the Dual Cash Drawer Cable 1432 C516 0009 24V 1432 C517 0009 12V Caution The two c...

Страница 43: ...reboots to continue setup Complete the System Setup This varies from OS to OS but the following is typical 2 The initial setup procedures are performed Starting Windows Preparing the computer for fir...

Страница 44: ...3 31 Operation and Cleaning Administrator Login In order to install certain software on the terminal you may need Administrator rights Username NCR Password NCR Password is case sensitive...

Страница 45: ...ing the brightness setting See the SetBrightness Method in the NCR Retail System Monitor User Guide B005 0000 1768 Brightness Control Application 1 Run the Brightness Control tool Start All Programs N...

Страница 46: ...Programs NCR Retail Systems Manager 2 Expand the Platform menu Platform Display 3 Adjust the control to the desired brightness level 0 100 4 The value set is saved in a configuration file When the sy...

Страница 47: ...igher robustness and stability than common capacitive touchscreens because the active touch surface is located on the back side of the touchscreen instead of the front side Therefore the active surfac...

Страница 48: ...n the current flow Because the controller derives both the X and Y touch coordinates from the stable glass layer the accuracy and operation of the touchscreen is unaffected by any damage that may have...

Страница 49: ...e the card through the slot in the MSR in a quick and steady movement The magnetic stripe must be facing up and with the stripe in the slot Care of Cards Cards should never come in contact with liquid...

Страница 50: ...or any strong dis solvent Do not use thinner or benzene abrasive cleaners or compressed air Warning Do not use any other types of cleaners such as vinegar solvents degreasers or ammonia based cleaner...

Страница 51: ...oft created for use with Windows Vista and later OS versions The format can also be used to capture and restore XP based OS images More information on the ImageX tool and WIM format can be found at ht...

Страница 52: ...isk Image Backup and Recovery Tool Replace Recovery Image This feature is used to update the Recovery Tool and the environment that it runs in 1 On the Change Settings Screen click on Replace Recovery...

Страница 53: ...Disk Image Backup and Recovery Tool 4 40 2 Click on the source of the Recovery Image 3 Complete the image replacement in the same manner as with the POS Site User image restore procedures...

Страница 54: ...4 41 Disk Image Backup and Recovery Tool Change Language 1 On the Change Settings Screen click on Change Language...

Страница 55: ...ity GenDrivers_display At this site download the following ImagingSuite_3 8 0 5 zip or later The Imaging Suite package consists of a three primary parts A Server application for local area network ima...

Страница 56: ...Panel as indicated in the image 1 Begin with terminal OFF The Power Switch is located on the Front Panel of the POS 2 Using a pen stylus or similar object press and hold the recessed Recovery Tool But...

Страница 57: ...in the Windows file system and prevent Windows from starting Checkdisk analyzes the failures and fixes them in most cases This function runs in a Windows Command Box Save or Load Image This button op...

Страница 58: ...em Information This is where useful information of the POS is displayed such as Serial Number and Image Names Save Or Load Image This function is used to either Save or Load an image from a device 1 O...

Страница 59: ...Disk Image Backup and Recovery Tool 4 46 2 Enter the Password The factory default password is Recovery1234...

Страница 60: ...ited to 8GB on the local drive The USB and network options can be used to store backup larger images The total size is comprised of the base factory image the user and site backups and the roughly 300...

Страница 61: ...available USB or network should be used to store backups Output Options There are three output options Hard Disk Drive Solid State Device USB Device Network Note Windows 7 images require a minimum of...

Страница 62: ...4 49 Disk Image Backup and Recovery Tool 2 Click on the USB Button...

Страница 63: ...ready exists then you have the choice of performing either a Site or User backup Site Image Use this option immediately after all application components have been loaded and setup for initial operatio...

Страница 64: ...emove power during an Image Load Complete the Operating System setup and then shut down Windows properly Removing power prematurely will corrupt the image display various messages about Windows failed...

Страница 65: ...Disk Image Backup and Recovery Tool 4 52 1 Click on the arrow that points from the desired load device to the terminal Example Click on the USBLoad Button 2 Click on the USB Button...

Страница 66: ...4 53 Disk Image Backup and Recovery Tool If you are loading from a network a dialog screen opens to Select a Network Drive...

Страница 67: ...ecovery Tool 4 54 3 Select the Image Type User Image Most recent routine backup Site Image Image of the terminal after application components were loaded Factory Image This is the NCR Base Image as sh...

Страница 68: ...4 55 Disk Image Backup and Recovery Tool 4 Click Yes to to apply the image Caution All the information in the current productive working image on the drive is lost with this operation...

Страница 69: ...Disk Image Backup and Recovery Tool 4 56 A progress bar is displayed as the image is applied...

Страница 70: ...4 57 Disk Image Backup and Recovery Tool A message is displayed when the load is complete...

Страница 71: ...Disk Image Backup and Recovery Tool 4 58 5 Reboot the POS...

Страница 72: ...and Recovery Tool Change Settings On the Main Screen click on Change Settings There are four functions available on the Change Settings screen Change Network Settings Change Password Replace Recovery...

Страница 73: ...Disk Image Backup and Recovery Tool 4 60 Change Network Settings 1 On the Change Settings Screen click on Change Network Settings...

Страница 74: ...4 61 Disk Image Backup and Recovery Tool 2 Enter the Password 3 Enter the network configuration settings and then click Enter...

Страница 75: ...Disk Image Backup and Recovery Tool 4 62 Change Password 1 On the Change Settings Screen click on Change Password 2 Enter the new Password Click Enter...

Страница 76: ...3 Disk Image Backup and Recovery Tool If you have forgotten lost the password you can click on Lost Password A unique code is generated that you can provide to NCR Support to get a new temporary passw...

Страница 77: ...re context is retained Except for the real time clock power consumption is zero G2 S5 Soft Off A computer state where the computer consumes a minimal amount of power No user mode or system mode code i...

Страница 78: ...feature at nearly zero latency S2 Not supported S3 Suspend to Ram The S3 sleeping state is a low wake latency sleeping state This state is similar to the S1 sleeping state except that the CPU and sys...

Страница 79: ...pport the available power states Power State S0 Working S0 Idle Backlight Off HDD Off S3 Suspend to RAM S4 Hibernate S5 Soft Off Supported Y N Y Y Y Y Y Description Fully Functional Video Backlight Of...

Страница 80: ...ch N A Y Y N N USB Keyboard N A Y Y N N USB Mouse N A Y Y N N LAN magic packet N A Y Y Y Y RTC Alarm N A Y Y Y Y Serial Port RI N A Y N N N Note Power consumption based on the following configuration...

Страница 81: ...ake on LAN In order for Wake on LAN to function the Network driver must be enabled factory default The procedure for enabling the driver depends on which operating system you are using Windows 7 1 Sel...

Страница 82: ...5 69 Power Management 2 Select Network Adapters Realtek PCIe GBE Family Controller 2...

Страница 83: ...Power Management 5 70 3 Under the Advanced tab select Wake on Magic Packet and verify it is enabled Select Wake on Patter Match and verify it is disabled...

Страница 84: ...sleeping state the processor does not execute any instructions Each processor sleeping state has a latency associated with entering and exiting that corresponds to the power savings In general the lo...

Страница 85: ...r the highlighted item press F1 To save the changes move the cursor to the Exit Menu select either Save Changes Exit or Save Changes and press Enter Restoring Factory Settings To reset all values to t...

Страница 86: ...ce Support Enabled SHA 1 PCR Bank Enabled SHA256 PCR Bank Disabled Pending operation None Platform Hierarchy Enabled Storage Hierarchy Enabled Endorsement Hierarchy Enabled TPM2 0 UEFI Spec Version TC...

Страница 87: ...BIOS Setup 6 74 Bluetooth Radio Enabled Logo Display Logo HDD S M A R T Status Reporting SATA Port0 120GB SATA Fla 120 0GB SMART Status Supported OK SMART Port1 Not Present SMART Status N A...

Страница 88: ...tion Super IO Chip IT8786 Serial Port 1 A Configuration Serial Port Enabled Device Settings IO 3F8h IRQ 4 I O Base Address 0x3F8 IRQ IRQ4 H W Monitor System Health Status Memory Module Temperature 28...

Страница 89: ...Selection ACHI SATA Interface Speed Gen3 SATA Test Mode Disabled Aggressive LPM Support Enabled Software Feature Mask Configuration HDD Unlock Enabled LED Locate Enabled SATA PORT0 120GB SATA Fla 120...

Страница 90: ...lter UEFI and Legacy Option ROM Execution Network Legacy Storage Legacy Video Legacy Other PCI Devices UEFI Info Report Configuration Summary Screen Disabled USB Configuration Legacy USB Support Enabl...

Страница 91: ...bled DVMT Pre Allocated 32M DVMT Total Gfx Mem 256MB Aperture Size 128MB GTT Size 4MB IGD Thermal Disabled Spread Spectrum Clock Enabled WOPCMSZ 1MB ISP Enable Disable Disabled PUNIT Power Configurati...

Страница 92: ...Active LFP eDP Port A Max TOLUD 3GB South Bridge USB Configuration USB Port 0 Enabled USB Port 1 Enabled USB Port 2 Enabled USB Port 3 Enabled USB Port 4 Enabled Restore AC Power Loss Last State Seria...

Страница 93: ...BIOS Setup 6 80 Security Menu Administrator Password Cleared User Password Cleared Secure Boot Secure Boot Control Enabled Secure Boot Mode Standard...

Страница 94: ...Boot Option Priorities New Boot Option Policy Default Boot mode select UEFI FIXED BOOT ORDER Priorities Boot Option 1 Network Boot Option 2 Hard Disk Boot Option 3 USB Key Boot Option 4 USB Hard Disk...

Страница 95: ...age Loader User s Guide B005 0000 2326 for information about this procedure Prerequisites The following are required to perform a SPI BIOS update using the bootable USB memory key USB Keyboard BIOS So...

Страница 96: ...will be formatted and all data on USB drive will be lost Back up any important data located on drive before proceeding Note For more information refer to the NCR Imaging Suite User Guide 1 Insert a U...

Страница 97: ...ally launches the Imaging Client when the WinPE boots Advanced users if required can browse to an alternate bootable WinPE boot wim Optional The USB drive can be optionally made to automatically apply...

Страница 98: ...7 85 BIOS Updating Procedure 5 Select Make Bootable...

Страница 99: ...yed menu select Option 1 to update the complete SPI and preserve DMI valid or invalid Press ENTER 7 At the prompt press ENTER to enter the class model serial number and other information requested by...

Страница 100: ...operation Note For more information refer to the NCR Imaging Suite User Guide Imaging Procedure 1 Connect the auto imaging USB flash drive to the target terminal that you wish to image 2 Connect a USB...

Страница 101: ...8 88 Initial Terminal Imaging 6 Reboot the system by pressing and holding the Power Switch for 5 seconds to power off then pressing once more to power on...

Страница 102: ...no command byte is received immediately the firmware waits forever if need be and uses the next received byte s to complete the command Note Note Each command consists of at least two bytes The first...

Страница 103: ...e Cursor Default 1B 09 Set Screen Save Blank 1B 0A Set Screen Save Walk Default 1B 0B Turn On Screen Save 1B 0C Disable Screen Save Feature 1B 0D Enable Character Blink 1B 0E Disable Character Blink D...

Страница 104: ...Set 10 External ROM required 1 1B 2A Select Character Set 11 External ROM required 1 1B 2B Select Character Set 12 External ROM required 1 1B 2C Select Character Set 13 External ROM required 1 1B 2D...

Страница 105: ...ion in the Installation chapter The Microcontroller test consists of a check sum test on the ROM and a write read test on the RAM A check sum test is also performed on the External Character PROM that...

Страница 106: ...red before sending the Set Display State On Note The LCD only has one character set Select Character Set n Format 1B20 1B32 Description VFD only This set of commands chooses one of the three supported...

Страница 107: ...and continues to accept commands This command causes the firmware to blank or turn off the Retail Display Display data can be processed while the display is in the Low Power State but it does not app...

Страница 108: ...aracter and the cursor The cursor is defined as character 0X5F of whatever character set is currently chosen For the three supported character sets the cursor is the bottom row of pixels turned on For...

Страница 109: ...hrough a command from the host software When the feature is not disabled two specific options exist The Set Screen Save Blank operation causes the display to go blank when the timer expires When the f...

Страница 110: ...ave Blank mode is the default mode after power up Turn On Screen Save Format 1B 0B Description This command causes one of the screen save functions Set Screen Save Blank or Set Screen Save Walk to act...

Страница 111: ...racter to start or stop blinking is to set up the character blink operator move the cursor to the correct character and resend the individual character code Disable Character Blink Format 1B 0E Descri...

Страница 112: ...ext character sent to the display overwrites the character in the left end of the upper line Move Cursor Up Format 1B 11 Description Moves the cursor up one line When the cursor is on the upper line t...

Страница 113: ...tion 27 is the lower rightmost position Any value outside this range is discarded the command is ignored and the cursor is moved The cursor location always indicates the position of the next character...

Страница 114: ...ult brightness setting is 5 100 Nn Brightness 01 20 02 40 03 60 04 80 05 100 Note This command is not supported by the LCD The only action taken is to take the display out of Screen Save Read Display...

Страница 115: ...cription This command is a request for the ESC character to be displayed at the current cursor position Set Display State On Format 1B 05 Description This state is used for normal run time conditions...

Страница 116: ...installed Code 858 International VFD and LCD Katakana Code 866 Cyrillic The VFD supports 16 additional character sets of 256 characters each These additional character sets are inside a PROM that plug...

Страница 117: ...04 2x20 Customer Display Interface Code Page 858 International 000 001 002 003 004 005 006 007 008 009 010 011 012 013 014 015 016 017 018 019 020 021 022 023 024 025 026 027 028 029 030 031 032 033 0...

Страница 118: ...2x20 Customer Display Interface 9 105 035 036 037 038 039 040 041 042 043 044 045 046 047 048 049 050 051 052 053 054 055 056 057 058 059 060 061 062 063 064 065 066 067 068 069...

Страница 119: ...9 106 2x20 Customer Display Interface 070 071 072 073 074 075 076 077 078 079 080 081 082 083 084 085 086 087 088 089 090 091 092 093 094 095 096 097 098 099 100 101 102 103 104...

Страница 120: ...2x20 Customer Display Interface 9 107 105 106 107 108 109 110 111 112 113 114 115 116 117 118 119 120 121 122 123 124 125 126 127 128 129 130 131 132 133 134 135 136 137 138 139...

Страница 121: ...9 108 2x20 Customer Display Interface 140 141 142 143 144 145 146 147 148 149 150 151 152 153 154 155 156 157 158 159 160 161 162 163 164 165 166 167 168 169 170 171 172 173 174...

Страница 122: ...2x20 Customer Display Interface 9 109 175 176 177 178 179 180 181 182 183 184 185 186 187 188 189 190 191 192 193 194 195 196 197 198 199 200 201 202 203 204 205 206 207 208 209...

Страница 123: ...9 110 2x20 Customer Display Interface 210 211 212 213 214 215 216 217 218 219 220 221 222 223 224 225 226 227 228 229 230 231 232 233 234 235 236 237 238 239 240 241 242 243 244...

Страница 124: ...2x20 Customer Display Interface 9 111 245 246 247 248 249 250 251 252 253 254 255...

Страница 125: ...9 112 2x20 Customer Display Interface Code Page Katakana 000 001 002 003 004 005 006 007 008 009 010 011 012 013 014 015 016 017 018 019 020 021 022 023 024 025 026 027 028 029 030 031 032 033 034...

Страница 126: ...2x20 Customer Display Interface 9 113 035 036 037 038 039 040 041 042 043 044 045 046 047 048 049 050 051 052 053 054 055 056 057 058 059 060 061 062 063 064 065 066 067 068 069...

Страница 127: ...9 114 2x20 Customer Display Interface 070 071 072 073 074 075 076 077 078 079 080 081 082 083 084 085 086 087 088 089 090 091 092 093 094 095 096 097 098 099 100 101 102 103 104...

Страница 128: ...2x20 Customer Display Interface 9 115 105 106 107 108 109 110 111 112 113 114 115 116 117 118 119 120 121 122 123 124 125 126 127 128 129 130 131 132 133 134 135 136 137 138 139...

Страница 129: ...9 116 2x20 Customer Display Interface 140 141 142 143 144 145 146 147 148 149 150 151 152 153 154 155 156 157 158 159 160 161 162 163 164 165 166 167 168 169 170 171 172 173 174...

Страница 130: ...2x20 Customer Display Interface 9 117 175 176 177 178 179 180 181 182 183 184 185 186 187 188 189 190 191 192 193 194 195 196 197 198 199 200 201 202 203 204 205 206 207 208 209...

Страница 131: ...9 118 2x20 Customer Display Interface 210 211 212 213 214 215 216 217 218 219 220 221 222 223 224 225 226 227 228 229 230 231 232 233 234 235 236 237 238 239 240 241 242 243 244...

Страница 132: ...2x20 Customer Display Interface 9 119 245 246 247 248 249 250 251 252 253 254 255...

Страница 133: ...9 120 2x20 Customer Display Interface Code Page 866 Cyrillic 000 001 002 003 004 005 006 007 008 009 010 011 012 013 014 015 016 017 018 019 020 021 022 023 024 025 026 027 028 029 030 031 032 033 034...

Страница 134: ...2x20 Customer Display Interface 9 121 035 036 037 038 039 040 041 042 043 044 045 046 047 048 049 050 051 052 053 054 055 056 057 058 059 060 061 062 063 064 065 066 067 068 069...

Страница 135: ...9 122 2x20 Customer Display Interface 070 071 072 073 074 075 076 077 078 079 080 081 082 083 084 085 086 087 088 089 090 091 092 093 094 095 096 097 098 099 100 101 102 103 104...

Страница 136: ...2x20 Customer Display Interface 9 123 105 106 107 108 109 110 111 112 113 114 115 116 117 118 119 120 121 122 123 124 125 126 127 128 129 130 131 132 133 134 135 136 137 138 139...

Страница 137: ...9 124 2x20 Customer Display Interface 140 141 142 143 144 145 146 147 148 149 150 151 152 153 154 155 156 157 158 159 160 161 162 163 164 165 166 167 168 169 170 171 172 173 174...

Страница 138: ...2x20 Customer Display Interface 9 125 175 176 177 178 179 180 181 182 183 184 185 186 187 188 189 190 191 192 193 194 195 196 197 198 199 200 201 202 203 204 205 206 207 208 209...

Страница 139: ...9 126 2x20 Customer Display Interface 210 211 212 213 214 215 216 217 218 219 220 221 222 223 224 225 226 227 228 229 230 231 232 233 234 235 236 237 238 239 240 241 242 243 244...

Страница 140: ...2x20 Customer Display Interface 9 127 245 246 247 248 249 250 251 252 253 254 255...

Страница 141: ...ed The driver can be installed from the Install drivers wireless directory If the driver is not present on your system you can obtain it from NCR https www ncr com 1 At this site select the Support ta...

Страница 142: ...er Switching Installing the Software and Driver 1 Run the Intel exe self extracting executable Windows 7 32 bit Wireless_17 x x_s32 exe or Windows 7 64 bit Wireless_17 x x_s64 exe 2 Agree to the EULA...

Страница 143: ...logy Click Install Installation takes several minutes progress bar shown on screen 4 After the installation is complete click Start Wireless Administrator Tool 5 Enter the Administrator Tool Password...

Страница 144: ...10 131 Wireless Adapter Switching 6 Select Create a new package OK...

Страница 145: ...ireless Adapter Switching 10 132 7 Select the Application Settings tab 8 Select Include Application Settings in this package 9 Select Adapter Switching 10 Check Enable Adapter Switching 11 Click Close...

Страница 146: ...10 133 Wireless Adapter Switching 12 Click Yes 13 Enter a filename and choose a location to save the package file...

Страница 147: ...ing 10 134 14 Click Finish after the save operation completes 15 Click Apply this package to this computer Note You can open and apply the saved package file on other computers that have the Administr...

Страница 148: ...10 135 Wireless Adapter Switching When connecting and disconnecting the wired LAN cable you should now see system tray icons indicating Proset disabling and enabling the wireless adapter...

Страница 149: ...support_drivers_ patches asp Class External Terminals 7701XR5 Windows Windows10 display Touch Base Driver For a 5968 PCAP touch display it is recommended to use Microsoft Inbox Touch driver however if...

Страница 150: ...directly Perform the calibration in the position sitting or standing that you normally expect to use the touchscreen Touch the calibration target firmly and precisely with your fingertip During calibr...

Страница 151: ...B 138 Touch Screen Calibration Do NOT touch the bezel with your other fingers...

Страница 152: ...e calibration program a Open Windows Explorer b Navigate to the calibration program C Install Touch Drivers Resistive Touch Calibartion 2 Touch the center of the cross hair target When the target is t...

Отзывы: