


M A C O S X A U D I O S O F T W A R E
24
Choose the MOTU MicroBook from this
menu, as discussed in the following
sections.
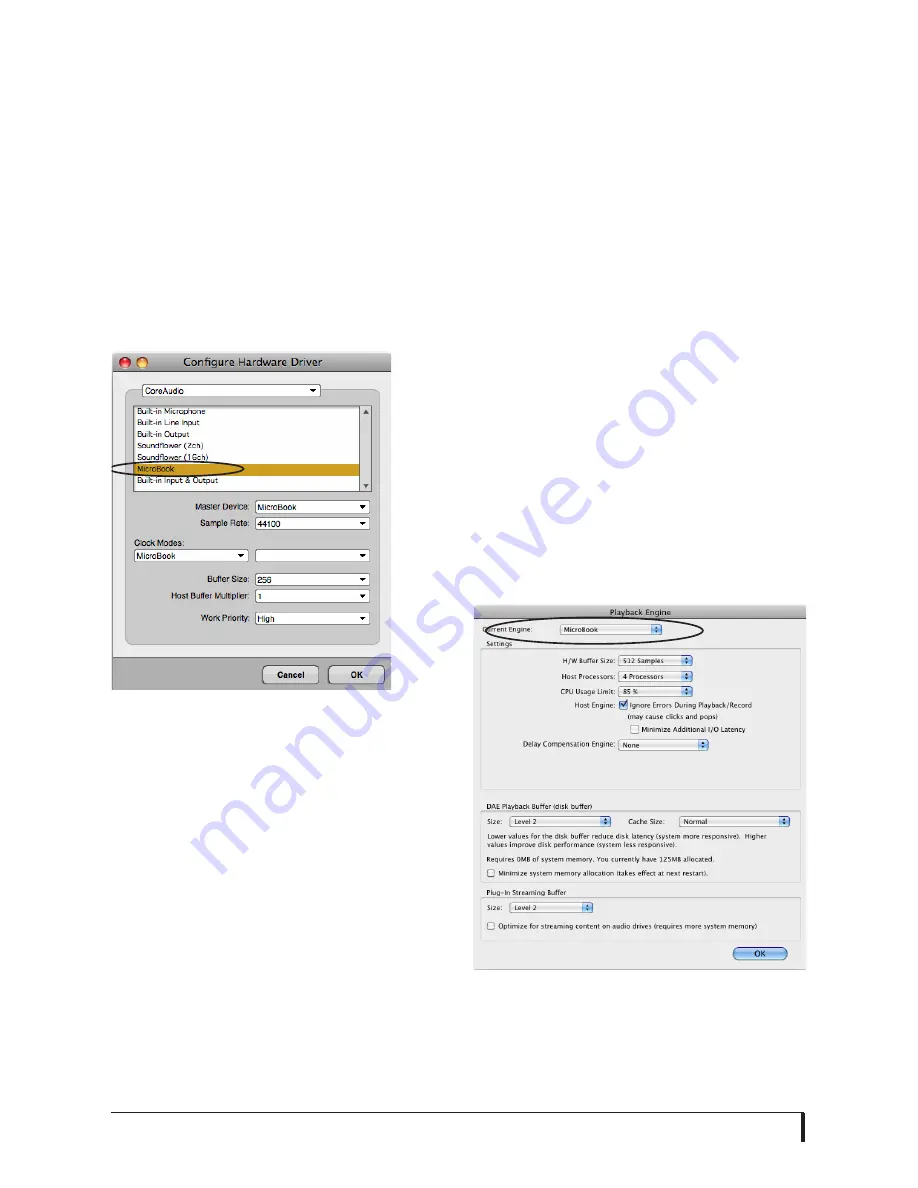
Digital Performer and AudioDesk
Choose the MicroBook as your audio
input output device by choosing
Configure Audio System>Configure
Hardware Driver
from the Setup menu.
This window shows MicroBook settings
such as sample rate and clock source.
Figure 5-2: E n a b l i n g t h e M i c r o B o o k i n
Digital Performer and AudioDesk.
Exchanging projects with Digital
performer
To open AudioDesk Version 3 (or Version
1 or 2) files in Digital Performer, just use
DP’s
File menu> Open
command. (No
conversion is required beforehand in
AudioDesk.) To export a Digital
Performer project to AudioDesk, use
Save A Copy As
in Digital Performer’s File
menu and choose the
AudioDesk 3.0
file
format. Then open the resulting
AudioDesk 3.0 document in AudioDesk.
Exchanging projects with AudioDesk
Digital Performer can exchange projects
with AudioDesk. To open an AudioDesk
project in Digital Performer, open it in
same way you would a DP project. To
export a project to AudioDesk, use DP’s
File menu> Save A Copy As
command
and choose the AudioDesk 3.0 file
format.
Pro Tools
In Avid Pro Tools, go to the Setup menu
and choose
Playback Engine
as shown in
Figure 5-3. Choose the MicroBook from
the Current Engine menu. For
information about the
H/W Buffer Size
setting, see “Adjusting the audio I/O
buffer” on page 29.
☛
Pro Tools 9 or later is required for
operation with the MicroBook.
Figure 5-3: Enabling the MicroBook in Pro
Tools
Содержание MicroBook II
Страница 1: ......
Страница 14: ...A B O U T T H E M I C R O B O O K 12...
Страница 18: ...I N S T A L L I N G T H E M I C R O B O O K S O F T W A R E 16 Figure 3 1 AudioDesk for Mac OS X...
Страница 40: ...W I N D O W S A U D I O S O F T W A R E 38...


