1-8
Tabletop
Operation Manual for the EMT 10T, 10/4, and 10/4T
Melco Embroidery Systems
Installing the tabletop (EMT 10/4 Only)
You only need to install the tabletop on the EMT 10/4 if you are going to embroider flat goods or
use the sash frame. To install the tabletop, refer to the instructions below.
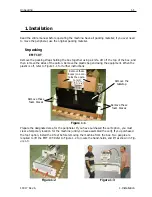
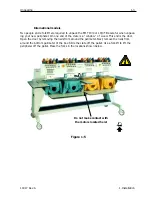
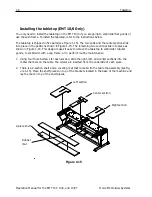
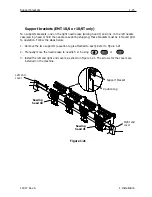
The tabletop is shipped in five parts (see Figure 1-15). The two ends and the center section slide
into place in the positions shown in Figure 1-15. The remaining two sections slide into place as
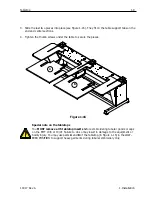
shown in Figure 1-16. This design makes it easy to remove the tabletop to embroider tubular
goods, to embroider with a cap frame, or to perform routine maintenance.
1. Using four thumb screws for each section, slide the right, left, and center sections into the
metal channels on the table. The screws are inserted from the underside of each piece.
2. There is a 2-section shelf and a covering mat that comes with the table top assembly (see Fig-
ure 1-15). Place the shelf pieces on top of the brackets located in the base of the machine and
lay the mat on top of the shelf pieces.
Figure 1-15
2-piece shelf
Rubber
mat
Left section
Center section
Right section
Содержание EMT 10/4
Страница 24: ...1 16 Support brackets Operation Manual for the EMT 10T 10 4 and 10 4T Melco Embroidery Systems ...
Страница 52: ...2 28 Quick Start Operation Manual for the EMT 10T 10 4 and 10 4T Melco Embroidery Systems ...
Страница 108: ...6 10 Error Messages Operation Manual for the EMT 10T 10 4 and 10 4T Melco Embroidery Systems ...
Страница 126: ...INDEX Operation Manual for the EMT 10T 10 4 and 10 4T ...
Страница 127: ...Quick Ref erence Guide for the EMT 10T 10 4 and 10 4T 11817 Revision A ...
Страница 130: ...EMT MENU AND COMMAND QUICK REFERENCE ...

