SkyRaider DS10 User Manual
July 14, 2018
SkyRaider DS10 User Manual
Page 35
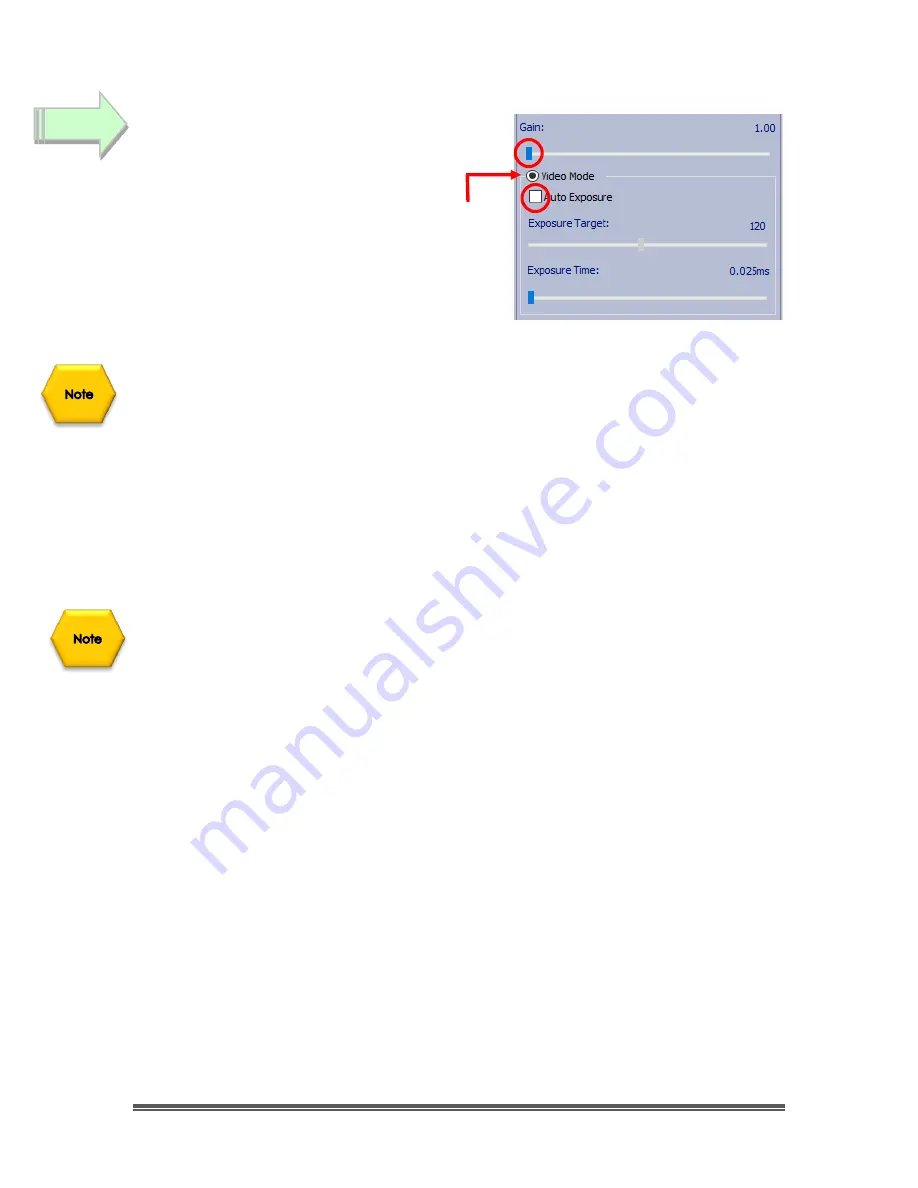
With MallincamSky running,
Left-Click
on the
Capture and Resolution Tab
to expand the
exposure window.
➢
Click
in the
Video Mode Selector
to
choose
Video Mode
.
➢
Move the
Gain
Slider all the way to the
Left.
➢
Make sure that the
Auto Exposure
CheckBox
is
unchecked.
The SkyRaider DS10 has two exposure modes:
•
Video Mode
•
Trigger Mode
Since we are imaging planetary objects, our exposure should not exceed
5
seconds
. Therefore, we will be using
Video Mode
exclusively for setting our
exposure times.
Video Mode
will continuously take and display images at the
duration you set in the Exposure time.
If the
Green Exposure Rectangle
(it is visible
only
when you have selected the
Auto Exposure
checkbox) annoys you, you can
Left-Click Hold and Drag
corners
of the rectangle to resize it to either cover the whole image window, or even to
be a zero-size box at one of the corners of your image window. This way you can
always have the
Capture and Resolution
Tab open without the annoying green
rectangle in the middle of your image.
So, l
et’s get started:
➢
Set your exposure to a small value, say
10ms
as a starting point (we are
using a small time, but the actual exposure amount depends upon the
f/ratio, size of telescope, filters, seeing conditions, ...). You can adjust the
exposure using one of the three methods below:
o
You can either use the
mouse button
and
Left-Click-Hold and
Drag
the
Slider Marker
(This method is best for making large movements).
o
You can also
Click
on the
Slider Marker
, then use the
Left
and
Right
arrows keys on your keyboard to precisely move the
Exposure
Marker
(this method provides the most accurate tiny adjustments
to the exposure times).
Step 6


