background image


Versión 05-12 


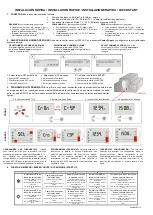
INSTALACIÓN RÁPIDA / INSTALLATION RAPIDE / INSTALLAZIONE RAPIDA / QUICK START 


1.  CONECTAR

 todos los componentes del sistema. 


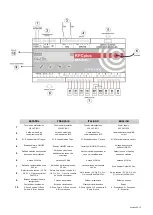
Compuertas de zona. Salidas 1 a 8. (Rojo +, negro -). 


Sonda de retorno de aire (S1): Salida NTC 1  (o dejar la resistencia equivalente) 


Conexionar la máquina: Relés Y, V, W, G. Solicitar esquema a MADEL. 


2.  SELECCIONAR EL NÚMERO DE ZONAS

: Alimentar la central de control 230 VAC en el conector 

Power Supply

, y configurar en la centralita según 

esquema adjunto. 


1. Pulsar la tecla SET durante 5 s 

2. Seleccionar el Nº de zonas 

3. Confirmar con la tecla ENTER 

1. Appuyer SET pendant 5 s 

2. Sélectionner Nº de zones 

3. Confirmer avec la touche Enter 

1. Premere il pulsante SET per 5 s 

2. Selezionare il numero di zone 

3. Confermare la scelta con ENTER 

1. Press SET button for 5 s 

2. Select the number of zones 

3. Confirm it with the ENTER button 


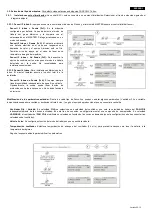
3.  PROGRAMAR LOS TERMOSTATOS

. La primera vez que se insertan las pilas se accede directamente al modo 

de programación. En el caso de no acceder automáticamente a la configuración o de quererse modificar, se debe 
entrar en modo SETUP (con el termostato encendido) mediante la las combinaciones de teclas que muestran las 
figuras. 


4.  PUESTA EN MARCHA / MISE EN ROUTE / ACCENSIONE / START UP


Seleccionar 

15ºC

 en 

todos los termostatos 


Sélectionner 

15ºC

 en tous les 

thermostats 


Selezionare 

15°C

 su ciascun 

termostato 


Switch all the thermostats to 

15 ºC.


Comprobar que todas 

las rejillas abren 


Vérifier que tous les clapets 

ouvrent 


Controllare che tutte le serrande si 

aprano 


Verify that all the dampers open


Esperar que arranque 

la máquina en frío 


Attendez que la machine se 

mette en marche en mode froid 


Aspettare accensione macchina 

in modalità freddo 


Wait until the AHU strart up in 

cooling mode 

Seleccionar 

35ºC

 en 

todos los termostatos 


Sélectionner 

35ºC

 en tous les 

thermostats 


Selezionare 

35°C

 su ciascun 

termostato 


Switch all the thermostats to   

35 ºC


Comprobar que todas las rejillas 

cierran y para la máquina 


Vérifier que tous les clapets ferment et le 

système s'arrête 


Controllare che tutte le serrande si chiudano e 

si spenga la macchina 


Verify that all the dampers close and the AHU 

stops 


Seleccionar 

35ºC

 en 

todos los termostatos 


Sélectionner 

35ºC

 en tous les 

thermostats 


Selezionare 

35°C

 su ciascun 

termostato 

Switch all the thermostats to 

35 ºC

.


Comprobar que todas 

las rejillas abren 


Vérifier que tous les clapets 

ouvrent 


Controllare che tutte le serrande si 

aprano 


Verify that all the dampers open


Esperar que arranque 

la máquina en calor 


Attendez que la machine se 

mette en marche en mode 

chaud 


Aspettare accensione macchina 

in modalità caldo 


Wait until the AHU strart up in 

heating mode


Seleccionar 

15ºC

 en 

todos los termostatos 


Sélectionner 

15ºC

 en tous les 

thermostats 


Selezionare 

15°C

 su ciascun 

termostato 


Switch all the thermostats to 15 

ºC.


Comprobar que todas las rejillas 

cierran y para la máquina 


Vérifier que tous les clapets ferment et le 

système s'arrête 


Controllare che tutte le serrande si chiudano e 

si spenga la macchina 


Verify that all the dampers close and the AHU 

stops


BRANCHER

 tous les éléments du système: 


Clapets zone. Sorties 1 a 8. (Rouge +, noir -). 


Sonde de reprise de l'air (S1) : Sortie NTC 1  (o 
laissez la résistance équivalent) 


Brancher la machine: Relais Y, V, W, G. 
Demandez le schéma à MADEL 

COLLEGARE

 tutti i componenti del sistema 


  Serrande zona. Uscite da 1 a 8 (rosso +, nero -). 


  Sonda aria di ripresa (S1): uscita NTC 1 (o lasciare 

la resistenza). 


  Unità trattamento aria: relè Y, V, W, G. Chiedere 

schema a MADEL. 

WIRE 

all the components of the system 


  Zone dampers. Outputs 1 to 8 (red+,    black -) 


  Air return sensor (S1): output NTC 1 (or keep the 

resistance). 


  Air Handling Unit: relay Y, V, W, G. Ask for wiring 

diagram to MADEL 

SÉLÉCTIONNER LE NUMERO DE ZONES :


Alimenter la platine de contrôle à 230 VAC 
en la borne 

Power Supply

, et configurer 

selon le schéma suivant.


SELEZIONARE IL NUMERO DI ZONE :


Alimentare la centralina 230 VAC nel 
connettore 

Power supply

 e configurare come 

da schema seguente.


SELECT NUMBER OF ZONES:


Power the 

control panel to 230 VAC in the 

Power supply


terminal and follow the figure below to 
configure:


PROGRAMMER  LES  THERMOSTATS

.  Lorsque 

vous  insérez  les  piles  pour  la  première  fois,  vous 

accédez directement au menu de configuration. Si v 
ous 

n'entrez 

pas 

automatiquement 

dans 

la 

configuration  ou  si  vous  souhaitez  la  modifier,  entrez 
en  mode SETUP (avec le thermostat  allumé)  avec la 

combinaison de touches indiquée dans le schéma.


PROGRAMMARE I TERMOSTATI.

 La prima volta che si 

inseriscono  le  batterie  si  accede  direttamente  alla 

modalità  programmazione.  Nel  caso  ciò  non  accada, 
oppure  se  si  desidera  modificare  le  precedenti 

impostazioni,  si  può  accedere  a  tale  modalità  (a 
termostato  ACCESO)  mediante  la  combinazione  dei  tasti 

riportata in figura.


THERMOSTAT  CONFIGURATION.

  The  first  time 

batteries  are  inserted,  the  configuration  menu  is 

directly  accessed.  Where  configuration  is  not 
automatically  accessed  or  where  it  is  to  be  modified, 

enter  SETUP  mode  (with  the  thermostat  on)  by 
pressing  the  combination  of  buttons  shown  in  the 

figure. 


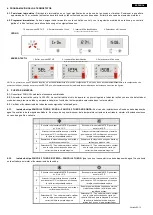
1. Entrar en modo SET-UP 

2. Seleccionar modo 

Cron


3. Insertar Nº de identificación 

4. Seleccionar el Nº de zona 

K

A

R

E

S

S


C

R

ON

O


Содержание Zoning KFCplus

Страница 1: ...s 433 92 et 434 33 MHZ pour réduire au maximum ce type de problèmes ALCUNE ANNOTAZIONI RIGUARDO LA TRASMISSIONE RADIO La centralina deve essere posta preferibilmente in luogo elevato anche in controsoffitto purché accessibile e lontano da masse metalliche ed elementi conduttori In caso contrario si riduce il raggio di trasmissione fra i termostati e la centralina La trasmissione radio non utilizza...

Страница 2: ...rar que arranque la máquina en calor Attendez que la machine se mette en marche en mode chaud Aspettare accensione macchina in modalità caldo Wait until the AHU strart up in heating mode Seleccionar 15ºC en todos los termostatos Sélectionner 15ºC en tous les thermostats Selezionare 15 C su ciascun termostato Switch all the thermostats to 15 ºC Comprobar que todas las rejillas cierran y para la máq...

Страница 3: ...nsione di zone o di riscaldamento Output to zone or heating expansion modules 6 Antena 433 MHz Antenne 433 MHz Antena 433 Mhz Antenna 433 Mhz 7 Salidas a compuertas de zona 24 Vdc Sortie des registres motorisés 24 Vdc Uscite serrande motorizzate 24 Vdc Zone damper Output 24 Vdc 8 Relés libres de tensión G1 G2 G3 W V Y para control del FAN COIL Relais hors tension tensión G1 G2 G3 W V Y pour le con...

Страница 4: ...exión suministrada con el citado módulo a la salida Input Output Expansion Modules de la placa base 2 4 Fan coil Existen tres tipos de interconexión con el fan coil en función de del tipo de instalación Solicitar a MADEL el esquema de conexión Instalación TIPO 1 Instalaciones múltiples o individuales a 2 tubos frío calor a 2 tubos frío calor batería eléctrica Instalaciones múltiples o individuales...

Страница 5: ...aster también asume el control total de la instalación Fancoil 4 tubos no Sonda Fc4 El equipo siempre tiene disponibilidad independiente de agua frío o caliente Opcionalmente la sonda puede tener función de protección contra los arranques en frío cuándo funciona en invierno Modificación de los parámetros estándar Dentro de cada tipo de Fancoil se pueden cambiar algunos parámetros Ventilador Fijo o...

Страница 6: ... en 15ºC verificar uno por uno que la rejilla correspondiente se abra Arrancar los termostatos de zona y también posicionar en 35ºC verificar uno por uno que la rejilla correspondiente se abra 3 Esperar que la máquina se ponga en marcha y verificar que produce frío Esperar que la máquina se ponga en marcha y verificar que produce calor 4 Seleccionar 35 ºC en cada termostato verificar que la rejill...

Страница 7: ...conectar la válvula de 4 vías 7 Cuando la rejilla tiene que abrir cierra y viceversa Motores mal conectados Verificar la conexión del motor Polaridad negro rojo 8 Una de las rejillas no funciona Conexión regulador de zona Verificar la conexión del motor Polaridad negro rojo Verificar que el regulador no esté obstruido 9 Todas las rejillas funcionan correctamente pero el equipo de climatización no ...

Страница 8: ...l existe 3 types de branchement entre la centrale et le ventilo convecteur VC en fonction du type d installation Installation TYPE 1 Installation TYPE 2 Installation TYPE 3 Installations multiples ou individuelles à 2 tubes froid chaud Installations multiples ou individuelles à 2 tubes froid chaud batterie eléctrique Installations multiples ou individuelles à 4 tubes batterie froid batterie chaud ...

Страница 9: ...ubes no Sonde Fc4 Il existe toujours disponibilité indépendante d eau chaude ou Dans le cas d installer la sonde elle sert pour protéger le système des démarrages en chaud à une température trop basse Modification des paramètres standard En fonction du type de Ventilo convecteur et d installation il est possible de modifier certains paramètres ventilateur fixe variable temporisation démarrage vent...

Страница 10: ...ndante s ouvre bien Faites démarrer les thermostats de zone puis positionnez sur 35ºC vérifiez un par un que le clapet correspondante s ouvre bien 3 Attendez que le VC se mette en marche et vérifiez que le système produit du froid Attendez que le VC se mette en marche et vérifiez que le système produit de la chaleur 4 Sélectionnez 35ºC sur chaque thermostat vérifiez que le clapet correspondante se...

Страница 11: ...ule une des deux choses est produite Mauvaise connexion vanne 4 voies La vanne à 4 voies est mal connectée ou mal configurée La vanne à 4 voies n est pas connectée 7 Lorsque le clapet doit s ouvrir elle se ferme et vice versa Moteur mal connecté Vérifiez la connexion du moteur Polarité noir rouge 8 L une des clapets ne fonctionne pas Connexion clapet de zone Vérifiez la connexion du moteur Polarit...

Страница 12: ...na intervenga questo deve essere sempre posizionato sui limiti estremi di funzionamento più freddo in estate più caldo in inverno Sono i termostati di zona che regolano la temperatura Il cambio di ciclo freddo caldo si programma sia sul termostato master sia sul termostato macchina Macchine meccaniche Si sostituisce il termostato macchina e il sistema zoning assume il controllo dell installazione ...

Страница 13: ...si desidera la possibilità di regolare la ventilazione meccanica controllata VMC dal MASTER Modifica parametri standard Per ogni tipo di unità trattamento aria si possono modificare alcuni parametri a seconda di quale tipo di UTA si utilizzi Temporizzazione spegnimento ventilatore regola il tempo di ritardo di chiusura ultima serranda per adeguarsi al ritardo di spegnimento del ventilatore Tempori...

Страница 14: ...15 C verificare volta per volta che la serranda corrispondente si apra Accendere i termostati di zona e mentre si settano su 35 C verificare volta per volta che la serranda corrispondente si apra Verificare che la caldaia e il relè V della centralina siano attivati 3 Aspettare che l UTA si avvii e verificare che produca aria fredda Aspettare che l UTA si avvii e verificare che produca aria calda S...

Страница 15: ... o mal configurata vedi 2 2 1 2 Manca la connessione alla valvola a 4 vie 7 La serranda si chiude anziché aprirsi e viceversa Errata connessione motori Verificare la connessione dei motori nero rosso 8 Una delle serrande non funziona Connessione serranda Verificare la connessione del motore nero rosso Verificare che la serranda non sia bloccata 9 Tutte le serrande funzionano correttamente ma l UTA...

Страница 16: ...th the module to the Input Output Expansion Modules on the control board 2 4 Fan coil There are 3 types of wiring between the central control and the Fancoil depending on the type of installation Installation TYPE 1 Installation TYPE 2 Installation TYPE 3 Multiple or individual installations with 2 pipes Cool Heat with 2 pipes cool Heat Electric heater Multiple or individual installations Multiple...

Страница 17: ...mode at lower temperatures Standard parameter modification Certain parameters Fan Delay fixed or variable fan etc can be changed in each machine type depending on the protection equipment connected to the control panel Fixed or variable FAN When working in fixed mode the fan always works despite the number of active zones at the selected speed wired between the control panel and the fancoil In var...

Страница 18: ... FC to start up and check that heat is produced 4 Select 35ºC on each thermostat check that the corresponding grille closes and that the machine stops when the last one is closed Select 15ºC on each thermostat check that the corresponding grille closes and that the machine stops when the last one is closed 5 3 2 2 PIPES BATTERIE OR 4 PIPES SENSOR installation As in the previous example should be d...

Страница 19: ... 2 The 4 way valve is not connected 7 When the damper should open close and vice versa Motors badly connected Check the motor connection Polarity black red 8 One of the grilles does not work Zone regulator connection Check the motor connection Polarity black red Check that the regulator is not obstructed 9 All of the dampers work properly but the air conditioning equipment does not work Air condit...

Страница 20: ...r tous les composants habituels additionnels comme la sonde l antenne etc GARANTIA MADEL ATD garantisce i suoi prodotti per difetti di produzione per 2 due anni a partire dalla data di consegna della merce al DISTRIBUTORE La garanzia comporta UNICAMENTE il rimpiazzo del prodotto difettoso e NON comprende mano d opera spese di viaggio eventuali altri danni a cose o persone etc La garanzia NON copre...

Отзывы: