


44
Chapter 5: Work with Layers
Add and name a layer
You’ll now add a layer, name the layer, and then add a graphic symbol to the layer.
1.
In the Timeline, click the Car layer.
2.
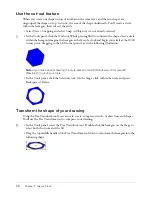
Click the Insert Layer button below the Timeline.
The new layer appears above the Car layer and becomes the active layer.
3.
Double-click the layer name, type
Background
as the new name for the layer, and press Enter
(Windows) or Return (Macintosh).
As a best practice, always name each layer, and give the layer a meaningful name that indicates
the type of content on the layer.
4.
In the Library panel (Window > Library), select the background graphic symbol and drag it to
the Stage.
Because the Background layer is above all layers except the Mask layer, objects on that layer
appear over objects on lower layers.
Change the order of layers
Obviously, you don’t want the background to cover the other objects on the Stage. Normally, the
background layer is the bottom layer on the Timeline. You’ll move the Background layer you
just created.
1.
In the Timeline, drag the Background layer from the top position to the bottom position.
All objects on the Stage now appear on top of the background.
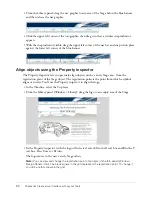
2.
With the Background layer still selected, in the Property inspector, enter
0
in the X text box
and
72
in the Y text box. Press Enter or Return to precisely position the Background layer on
the Stage.
Organize layers in a folder
You can create layer folders to organize layers and reduce Timeline clutter. The Timeline contains
two layers that contain navigation objects: one for navigational buttons and another for
navigational art. You’ll create a layer folder, named Navigation, for both layers.
1.
In the Timeline, select the Buttons layer.
2.
Click the Insert Layer Folder button, which is below the layer names.
Note:
If the Property inspector shows properties for the frame rather than for the movie clip, click
the Background movie clip on the Stage.
3.
Double-click the layer folder name and rename the folder
Navigation
.
4.
Drag the Navbar layer and the Buttons layer to the Navigation folder.
The layers appear indented to indicate that they’re within the folder.
You can click the expander arrow to expand and collapse the folder and included layers.
Содержание FLASH MX 2004-LEARNING FLASH
Страница 1: ...Learning Flash...
Страница 8: ...8 Contents...
Страница 34: ...34 Chapter 3 Write Scripts with ActionScript...
Страница 54: ...54 Chapter 6 Create a User Interface with Layout Tools...
Страница 62: ...62 Chapter 7 Draw in Flash...
Страница 68: ...68 Chapter 8 Create Symbols and Instances...
Страница 76: ...76 Chapter 9 Add Animation and Navigation to Buttons...
Страница 104: ...104 Chapter 13 Add Interactivity with ActionScript...
Страница 112: ...112 Chapter 14 Create a Form with Conditional Logic and Send Data...
Страница 122: ...122 Chapter 15 Work with Objects and Classes Using ActionScript 2 0...


