


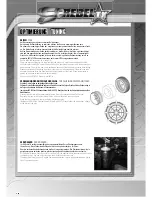


LACKIERUNG UND BEKLEBUNG
PAINT AND DECALS
Einige Fahrzeuge werden, je nach Ausstattung, mit einer unlackierten Karosserie ausgeliefert.
Diese werden von innen abgeklebt und lackiert (bitte Hinweis „Darstellung der Scheiben“ beachten).
Die angezeichneten Karosserielöcher können vor oder nach der Lackierung mit einem LRP Karosse-
rielochbohrer (Art.Nr. 65701) geöffnet werden.
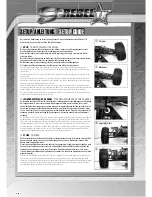
Nachdem die Karosserie an den vorgezeichneten Linien mit einer Lexanschere ausgeschnitten
wurde, bereiten man Sie zur Lackierung vor.
Die Karosserie wird mit Seife ausgewaschen um Fett- und sonstige Rückstände zu entfernen.
Nachdem diese vollständig getrocknet ist, bringt man die Abklebefolie der Scheiben von innen
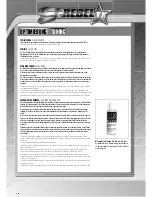
auf (bitte Hinweis zur Darstellung der Scheiben beachten). Anschließend wird die Karosserie mit
spezieller Polycarbonatfarbe (Empfehlung LRP Lexan Spray Magic Colour 2), ebenfalls von innen, in
mehreren Schichten, dünn lackiert (Bitte Hinweise auf der Spraydose beachten). Den Lack bitte min-
destens zwölf Stunden trocknen und abziehen lassen. Nach der Lackierung die Schutzfolie entfernen
und die Aufkleber anbringen.
Achtung
: Bitte nur in gut gelüfteten Räumen oder im Freien lackieren!
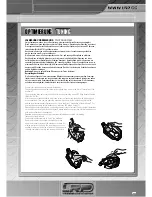
Darstellung der Scheiben
Die Scheiben können auf zwei verschiedene Möglichkeiten erkennbar gemacht werden. Entweder
lackiert man die Karosserie von innen komplett und bringt die entsprechenden Aufkleber von außen
auf, oder man nutzt die Scheibenaufkleber vor der Lackierung auf der Innenseite. Die Scheibenaus-
schnitte werden abgeklebt, überlackiert und nach trocknen der Farbe wieder abgezogen.
Several vehicles will be delivered with clear bodies.
They will be masked and painted on the inside (please have a look to the hint of “Illustration of the
windows”).
The pre-marked body holes could be done before or after painting with a LRP Body Reamer Wrench
(Order No. 65701).
After you have cut the bodyshell with a lexan scissors, please wash the body with dish soap and
dry it completely. Then you can apply the windows-mask from inside, as the bodyshell will be
painted from the inside aswell (please have a look to the hint of “Illustration of the windows”). For
painting please use only polycarbonate paint (reference LRP Magic Colour 2).
Please apply several skinny layers of the colour and let it dry for at least 12 hours (follow information
on the spray can). After painting the bodyshell, please remove the protective film first and then start
with the decalisation of the bodyshell.
Caution
: painting must be done only in well-ventilated areas or outside of a building!
Illustration of the windows
You have two different ways to “paint” the windows.
One way is to paint the complete bodyshell and then
apply the window stickers at the outside of the body (re-
moving protective film first). The other way you use the
window stickers on the inside of the body. Then you paint
the body completely, let it dry and remove the stickers.
OPTIMIERUNG
OPTIMIERUNG TUNING
TUNING
P. 57
P. 57
Содержание S8 REBEL TX
Страница 25: ...NOTIZEN NOTIZEN NOTES NOTES P 25 P 25 ...
Страница 39: ...NOTIZEN NOTIZEN NOTES NOTES P 39 P 39 ...
Страница 40: ...P 40 P 40 ...
Страница 41: ...P 41 P 41 ...
Страница 42: ...P 42 P 42 ...
Страница 43: ...P 43 P 43 ...
Страница 44: ...P 44 P 44 ...
Страница 45: ...P 45 P 45 ...
Страница 46: ...P 46 P 46 ...
Страница 47: ...P 47 P 47 ...
Страница 48: ...P 48 P 48 ...
Страница 49: ...P 49 P 49 ...
Страница 50: ...P 50 P 50 ...
Страница 51: ...NOTIZEN NOTIZEN NOTES NOTES P 51 P 51 ...
Страница 59: ...NOTIZEN NOTIZEN NOTES NOTES P 59 P 59 ...
Страница 64: ...NOTIZEN NOTIZEN NOTES NOTES P 64 P 64 ...
Страница 70: ...NOTIZEN NOTIZEN NOTES NOTES P 70 P 70 ...
Страница 71: ...NOTIZEN NOTIZEN NOTES NOTES P 71 P 71 ...