


59
Connecting to Your DVR Over the Internet on PC or Mac
Step 3 of 3: Connect to the DVR Over the Internet
Follow the steps below to connect to the DVR over the Internet using a PC or Mac.
NOTE: Make sure to upgrade your DVR to the latest firmware version.
You must have the latest
DVR firmware and client software to connect to the DVR over the Internet.
PC
1
Insert the software CD that comes included with the system. Open the CD and click
DVR
Software>Lorex Client Software - PC
. Follow the on-screen instructions to install.
•
OR
, download the
Client Software for PC
from
www.lorextechnology.com
.
2
Once installation is finished, double-click the
Lorex Stratus Client 1 icon (
)
from the
desktop. The DVR login screen appears.
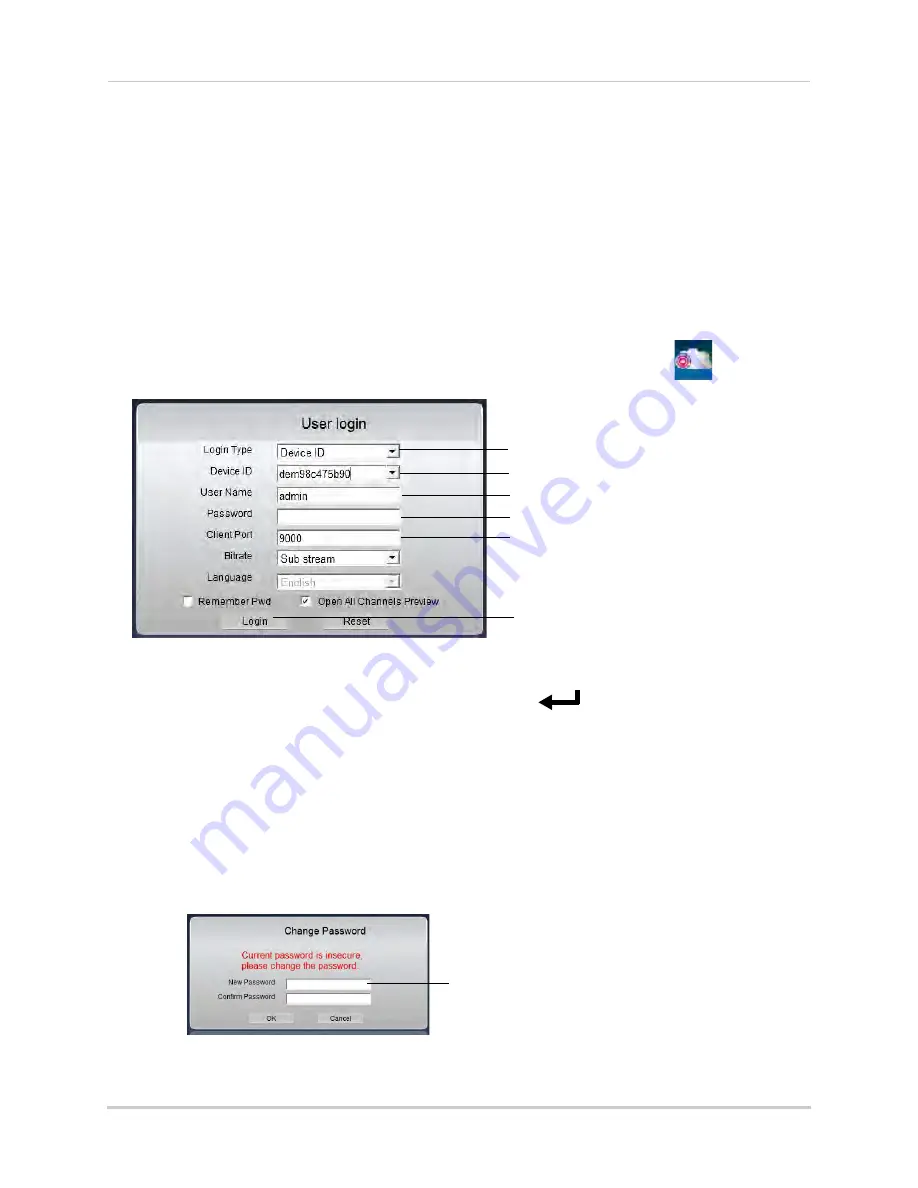
3
Under
Login Type
, select
Device ID
.
4
Under
Device ID
, enter the
DVR’s Device ID
. Press
PTZ/
on the front panel to find the
Device ID.
5
Under
User Name
, enter the DVR’s
user name
(default:
admin
).
6
Under
Password
, enter the DVR’s
password
(default:
000000
).
7
Under
Client Port
, enter the DVR’s
Client Port
(default:
9000
).
8
Click
Login
.
• If this is the first time connecting to your system, you will be prompted to change the password.
Enter the new password and click
OK
.
• Enter the new password in the login screen and click
Login
to connect to the DVR.
The Client Software connects to your DVR and streams live video from your cameras.
Select Device ID
Enter Device ID
Enter User Name (default:
admin
)
Enter Password (default:
000000
)
Enter Client Port (default:
9000
)
Click Login
Enter the new password
and click OK
Содержание LH150
Страница 16: ...xiv...